For crafters, quilters, and sewing enthusiasts, fabric scraps are both a blessing and a challenge. They hold the potential for creative projects yet can quickly turn into a chaotic pile of colors and textures.
If you’ve ever found yourself rummaging through heaps of fabric scraps in search of that perfect piece, it’s time to bring order to your sewing sanctuary. But how to organize fabric scraps? In this guide, we’ll unravel the art of organizing fabric scraps efficiently and effectively.
Say goodbye to the frustration of not finding the right fabric scrap when you need it, and embrace the joy of a neatly organized stash.
Whether you’re a seasoned seamstress or a crafting novice, our tips and tricks will help you transform your collection of fabric remnants into a source of inspiration.
Join us as we embark on a journey of tidiness, creativity, and resourcefulness in the world of fabric scraps.
How to Organize Fabric Scraps?
Organizing fabric scraps can transform chaos into creative inspiration. Here’s a step-by-step guide on how to effectively organize your fabric remnants:
Gather Your Fabric Scraps
Collect all your fabric scraps from various places, such as bins, bags, and drawers. Ensure you have everything in one place for assessment.
Sort by Size and Type
Begin by sorting your fabric scraps by size (small, medium, large) and type (cotton, silk, denim, etc.). This initial sorting helps you get a better overview of what you have.
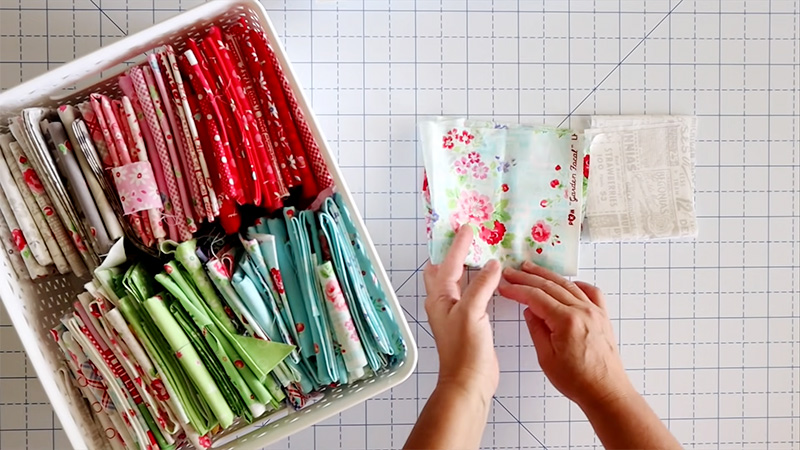
Color-Coding
Further categorize your scraps by color. Use clear bins or containers to store each color group separately. This makes it easier to find the right color for your projects.
Label Containers
Label your containers with color and fabric type, so you can quickly identify the contents. Labeling ensures easy access and minimizes the need to dig through bins.
Use Clear Storage
Opt for clear containers or storage bags to see the contents without opening them. This visual accessibility saves time and effort when searching for specific scraps.
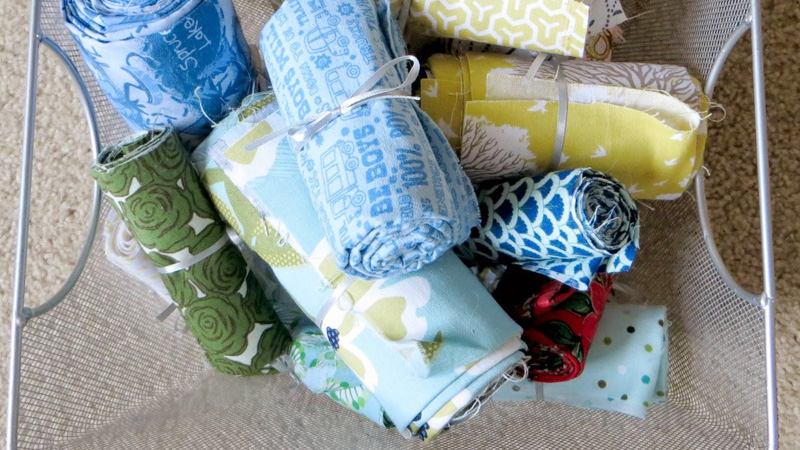
Fold and Store Neatly
Fold your fabric scraps neatly to maximize space and prevent wrinkles. Use techniques like the KonMari method for efficient folding. Place them in containers or shelves with easy access.
Scrap Management System
Establish a system for managing small scraps, such as creating a “scrap bag” for tiny remnants. These can be repurposed for quilting, patchwork, or stuffing. Store frequently used or favorite fabric scraps at eye level or within arm’s reach for convenience.
Catalog or Inventory
Consider creating a digital catalog or inventory of your fabric scraps, especially if you have a large collection. This can be a spreadsheet or an app to keep track of what you have.
Donate or Repurpose
Periodically assess your fabric scraps and consider donating excess or using them in creative ways like making scrunchies, quilt blocks, or fabric-covered buttons.
Maintenance
Regularly revisit your organized fabric scraps to ensure they remain tidy and well-sorted. Make adjustments as needed.
By following these steps, you’ll transform your fabric scrap collection into an organized and inspiring resource, ready to fuel your next creative sewing or crafting project.
How to Sort Fabric Scraps?
Sorting fabric scraps is a crucial step in the organization process. Here’s how to efficiently sort your fabric scraps:
Gather Your Fabric Scraps
Collect all your fabric scraps from various storage areas and place them in a designated work area.
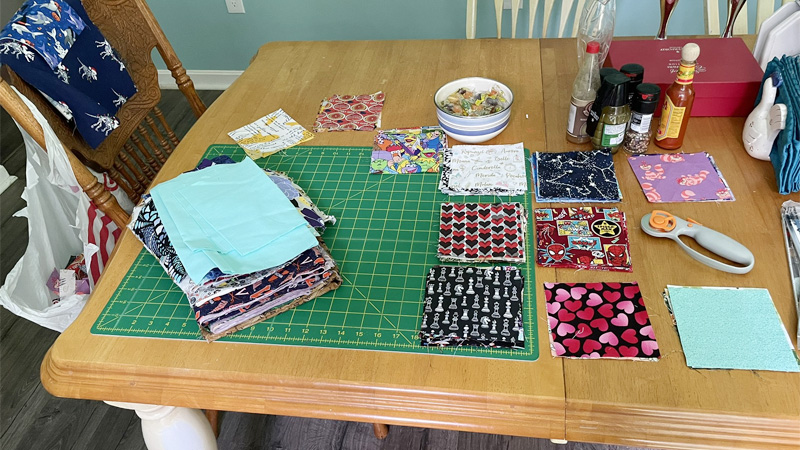
Initial Sorting by Size
Start by sorting your fabric scraps by size. You can categorize them into three main groups: small, medium, and large. This helps you get a sense of the quantity and variety you have.
Sort by Fabric Type
Once you’ve sorted by size, further categorize your fabric scraps by fabric type. Common categories might include cotton, silk, denim, flannel, or any other materials you have. This helps you find specific fabrics easily.
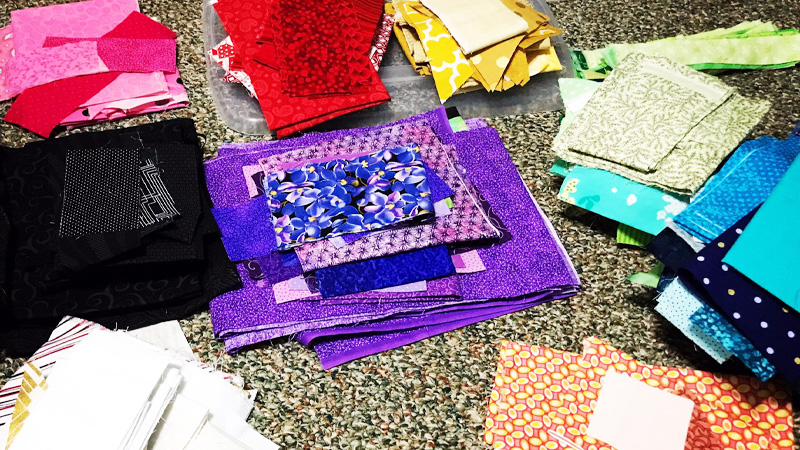
Sort by Color
For a more detailed organization, sort each fabric type into color groups. Use bins, bags, or containers for each color category. This makes it effortless to locate the right color for your projects.
Evaluate Scraps for Usability
While sorting, assess the condition of each fabric scrap. If a piece is too small or damaged, consider whether it can still be used for small projects like patchwork, quilting, or crafts. Set aside scraps that may not have immediate use but could be repurposed.
Label Containers
Label your storage containers or bins with both the fabric type and color. This labeling system ensures you can quickly identify the contents without having to open each container.
Create a “Scraps in Progress” Container
As you work on various projects, you may accumulate scraps that you plan to use soon. Keep a designated container or bag for these “scraps in progress” to prevent clutter in your workspace.
Stay Consistent
Develop a system for sorting and storing your fabric scraps that makes sense to you. Consistency in your sorting process will make it easier to maintain over time.
Regular Maintenance
Periodically revisit your organized fabric scraps to ensure they remain tidy and well-sorted. Make adjustments as needed to accommodate new additions or changes in your crafting needs.
Donate or Repurpose
If you find that you have more fabric scraps than you can realistically use, consider donating excess materials or finding creative ways to repurpose them, reducing waste.
Efficiently sorting fabric scraps not only helps you stay organized but also makes it much easier to locate the perfect piece for your next sewing or crafting project.
Accessories to Organize Fabric Scraps
When organizing fabric scraps, having the right accessories can significantly streamline the process and keep your workspace tidy. Consider these accessories to help you efficiently manage your fabric remnants:
Clear Storage Containers
Clear plastic bins or storage containers allow you to see the contents at a glance, making it easy to locate specific fabric scraps.
Drawer Dividers
Use drawer dividers or organizers to create separate compartments within drawers, keeping fabric scraps neatly separated by size, type, or color.
Label Maker or Labels
Label your storage containers and drawers to quickly identify the contents. A label maker or adhesive labels can help maintain an organized system.
Ziplock Bags
Small fabric scraps can be sorted into Ziplock bags by color, type, or size. They are clear and resealable, making them great for visibility and accessibility.
Clear Hanging Shoe Organizers
Hang a clear shoe organizer on the back of a door to store smaller fabric scraps. The pockets are transparent, making it easy to spot and access your scraps.
Fabric Swatch Cards
Create fabric swatch cards for each type of fabric in your collection. Attach a small piece of fabric to an index card and label it with fabric details for quick reference.
Thread Holders
Use thread spool holders to store small rolls of ribbon, lace, or trim. This keeps these items organized and prevents tangling.
Stackable Baskets
Stackable wire or plastic baskets can be placed on shelves to hold larger fabric scraps or projects in progress.
Mason Jars
Use clear mason jars to store buttons, beads, or small embellishments that you might use with your fabric scraps.
Binder or Folder for Swatch Samples
Create a binder or folder where you keep swatch samples of your fabric scraps. This serves as a visual reference for your collection.
Scrap Bag
Designate a large reusable bag for scraps that are too small for your usual projects. These can later be used for quilting, stuffing, or smaller crafts.
Having these accessories on hand can help you maintain an organized and efficient system for your fabric scraps, making your sewing and crafting endeavors more enjoyable and productive.
How to Make a DIY Fabric Scrap Organizer?
Creating a DIY fabric scrap organizer is a practical and cost-effective way to keep your sewing area tidy. Here’s a simple guide to making one:
Measure and Cut the Board
Determine the size you want for your fabric scrap organizer. Cut your cardboard or foam board into two equal pieces for the front and back panels. These will serve as the covers of your organizer.
Cover the Board with Fabric
Lay your chosen fabric face down on a clean surface. Place one of the board pieces on top, ensuring it’s centered on the fabric.
Glue the Fabric
Apply a thin, even layer of glue or adhesive spray to one side of the board. Press the board onto the fabric, making sure it’s centered. Smooth out any wrinkles or air bubbles.
Trim Excess Fabric
Leave an extra inch or so of fabric around the edges. Trim the corners diagonally to reduce bulk. This will make it easier to fold and glue the fabric to the back of the board.
Fold and Glue Fabric Edges
Apply glue to one edge of the board, then fold the excess fabric over it. Press firmly to secure. Repeat this process for all four edges, neatly folding the corners to create clean edges.
Create Divider Panels
Measure and cut additional pieces of cardboard or foam board to create divider panels for your organizer. These dividers will separate your fabric scraps by color, type, or size.
Cover Divider Panels with Fabric
Repeat the process of covering these divider panels with fabric, ensuring that you leave extra fabric around the edges to fold and glue neatly.
Attach Dividers to the Organizer
Arrange the divider panels inside one of the covers (either the front or back panel) to create sections for your fabric scraps. Use glue or binder clips to secure them in place.
Assemble the Organizer
Apply glue to the edges of the front or back cover (whichever one doesn’t have the dividers) and attach the other cover to create the complete organizer.
Let it Dry
Allow your DIY fabric scrap organizer to dry thoroughly. This may take a few hours or overnight, depending on the type of glue or adhesive used.
Organize Your Fabric Scraps
Once your organizer is dry, start sorting your fabric scraps into the sections you’ve created with the dividers.
Your DIY fabric scrap organizer is now ready to help you keep your fabric remnants neatly organized and easily accessible for all your sewing and crafting projects.
FAQs
Yes, you can use alternative materials like chipboard, thin plywood, or even sturdy recycled cardboard from boxes. The key is to use something rigid to maintain the organizer’s structure.
Absolutely! Using contrasting fabrics can add a stylish touch to your organizer. Just ensure that both fabrics are securely glued in place.
The size of your divider panels depends on the dimensions of your organizer and how you want to organize your fabric scraps. Measure the inside of your organizer and cut divider panels accordingly.
Yes, you can use double-sided adhesive tape or fabric spray adhesive as alternatives to traditional glue. Ensure that the adhesive you choose provides a secure bond.
Absolutely! You can sew or glue pockets to the inside covers to hold small tools or notions. You can also add labels or fabric swatches to the outside to help identify the contents of your organizer more easily.
Conclusion
The world of fabric scraps, once a source of clutter and frustration, can now become a well-organized haven of creativity and inspiration. By implementing the strategies and ideas shared in this guide, you’re on your way to a more efficient and enjoyable crafting experience.
Remember, organizing fabric scraps isn’t just about tidiness; it’s about unlocking the full potential of your materials.
When your fabric scraps are neatly sorted and accessible, you’ll find yourself more inclined to take on new projects, experiment with designs, and breathe life into your creative ideas.
As you embark on this journey of organization and creativity, take pleasure in the process. Sorting, storing, and repurposing fabric scraps can be a rewarding and satisfying part of your crafting endeavors.
So, let your newfound organization skills be the key to unlocking a world of imaginative possibilities with your fabric scraps. Happy crafting!
Leave a Reply