Adding a zipper to a hand-knit sweater is a craft that combines function with fashion, transforming your cozy creation into a versatile and stylish garment.
Whether you’re aiming to make your cardigan easier to slip on and off or seeking a unique design element, the process requires attention to detail and precision.
This intricate endeavor involves marrying the soft, delicate knit fabric with the rigid structure of a zipper, ensuring a seamless and professional finish.
In this guide, we’ll walk you through the step-by-step process of how to put a zipper in a hand-knit sweater, empowering you to enhance the functionality and aesthetic appeal of your cherished handcrafted garment.
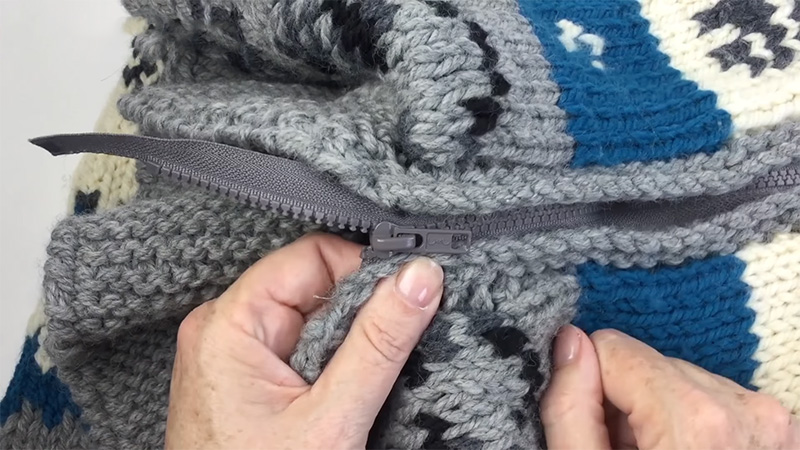
How to Put a Zipper in a Hand Knit Sweater? 9 Steps
Adding a zipper to a hand-knit sweater is a practical and attractive way to make your cozy creation more functional and stylish.
While it may seem like a daunting task, with some patience and sewing skills, you can achieve a professional-looking result.
Here’s a step-by-step guide on how to put a zipper in a hand-knit sweater:
Materials you’ll need
- Hand-knit sweater
- Zipper (matching the length of your sweater opening)
- Matching thread
- Sewing machine or sewing needle
- Fabric scissors
- Straight pins
- Iron and ironing board
- Measuring tape
- Seam ripper (optional)
Step 1: Prepare the Sweater and Zipper
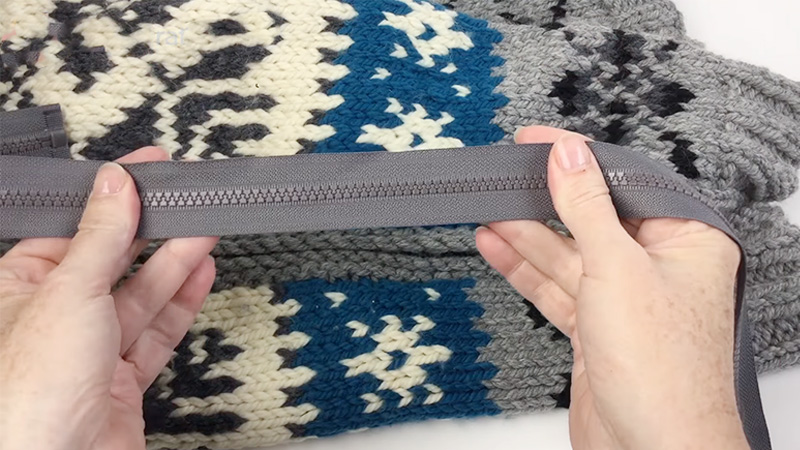
Find a clean and spacious surface to work on. Lay your hand-knit sweater flat with the right side facing up.
Ensure that it’s blocked and stretched into its final shape, as blocking after adding a zipper can be challenging.
Choose a zipper that matches the length of the sweater opening. The top of the zipper should align with the neckline, and the bottom should match the hem.
If your zipper is slightly longer, it’s better to have excess at the top rather than the bottom to avoid an awkward bulge at the hem.
Step 2: Prepare the Sweater Edges
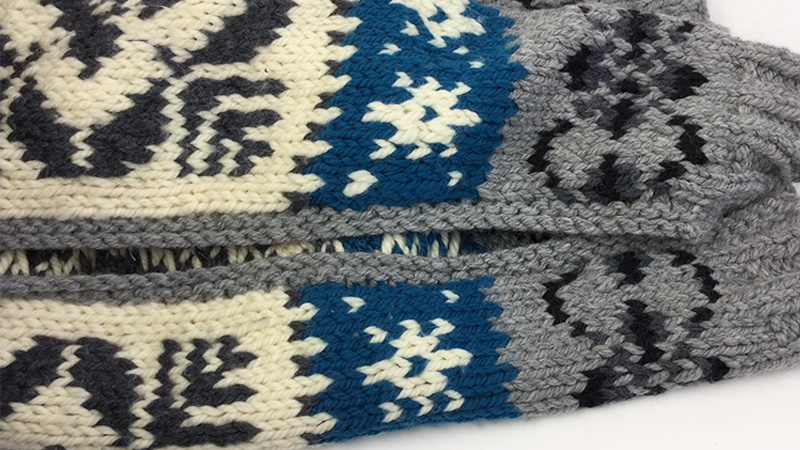
If your sweater has a folded hem or edging along the front opening, carefully unfold it, and if necessary, use a seam ripper to undo any stitches.
You want to have a clean, flat edge to work with when attaching the zipper.
Step 3: Position the Zipper
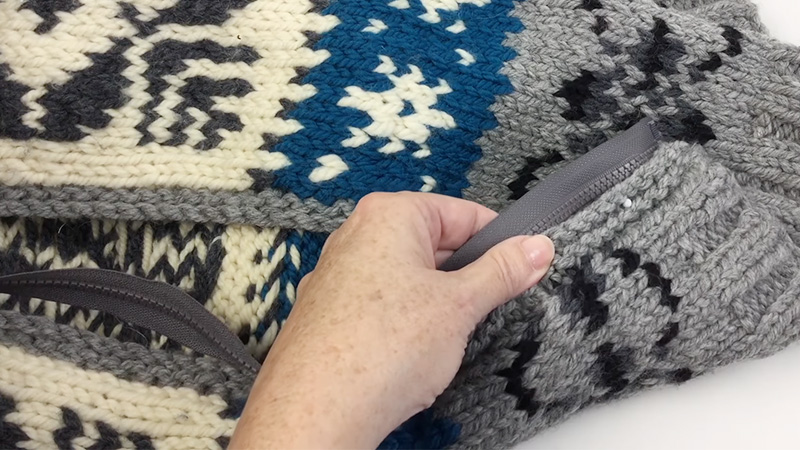
Lay the zipper flat with the right side facing up. Fold down the top tape of the zipper by about 1/2 inch (1.27 cm) to create a clean edge.
This will prevent the zipper from fraying and give it a finished look when it’s attached to the sweater.
Step 4: Pin the Zipper
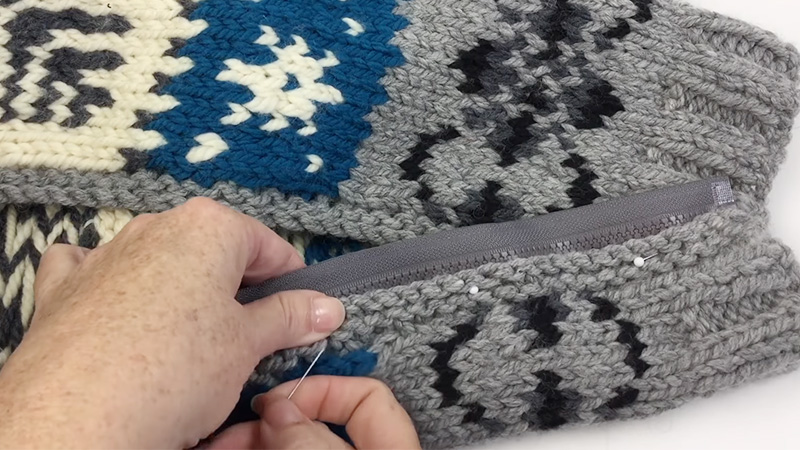
Position the zipper along the center front of your sweater, aligning the marked top and bottom points with the neckline and hem.
Use straight pins to secure the zipper in place, ensuring that it’s centered and lies flat without any wrinkles or folds.
Step 5: Baste the Zipper
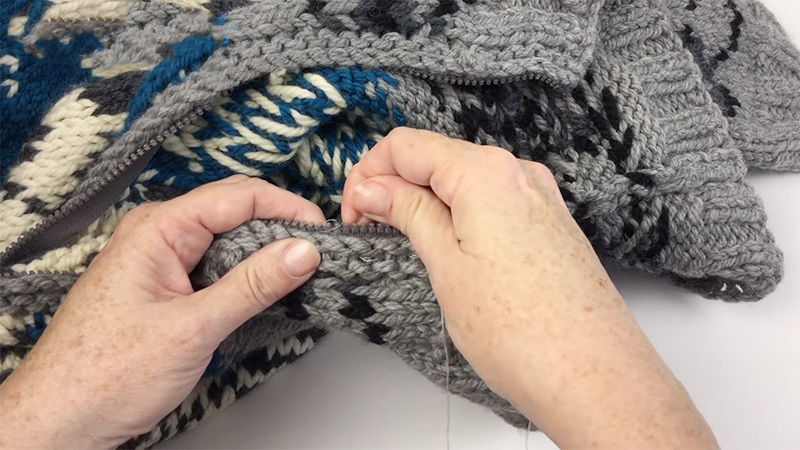
Load your sewing machine with matching thread and set it to a long basting stitch. Alternatively, if you prefer hand sewing, use a backstitch for added strength.
Sew a temporary basting stitch along both sides of the zipper tape. This step holds the zipper in place temporarily and makes it easier to sew the zipper permanently while ensuring it’s correctly positioned.
Step 6: Sew the Zipper Permanently
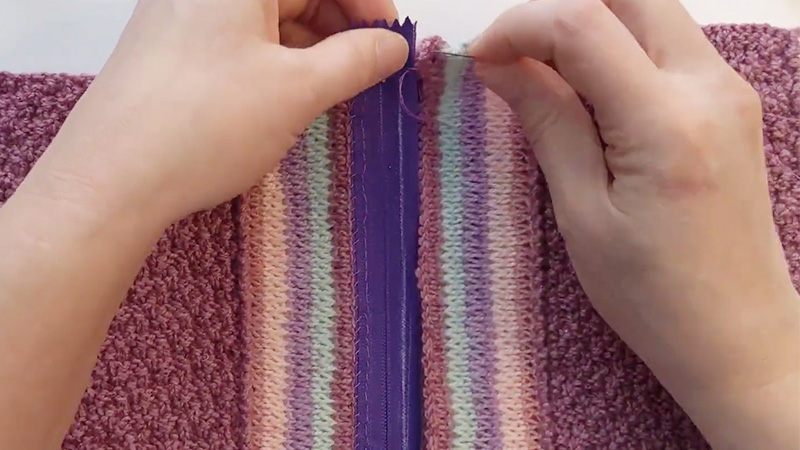
Carefully sew the zipper to the sweater using a regular stitch, removing the basting stitches as you go.
Maintain an even distance from the edge of the zipper tape to the sweater’s front to ensure a neat and consistent appearance.
Step 7: Reinforce the Top and Bottom
At the top and bottom of the zipper, sew back and forth a few times to secure the ends of the zipper tape firmly.
This reinforces these critical points, ensuring that the zipper stays in place during use.
Step 8: Press the Sweater
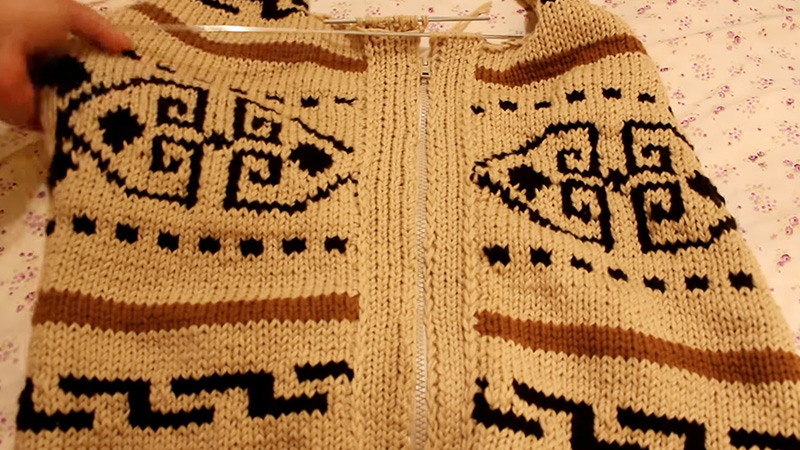
Use an iron set on a low setting to gently press the seam allowances flat on both sides of the zipper. This step helps create a polished appearance and ensures the sweater lies flat.
Step 9: Finishing Touches
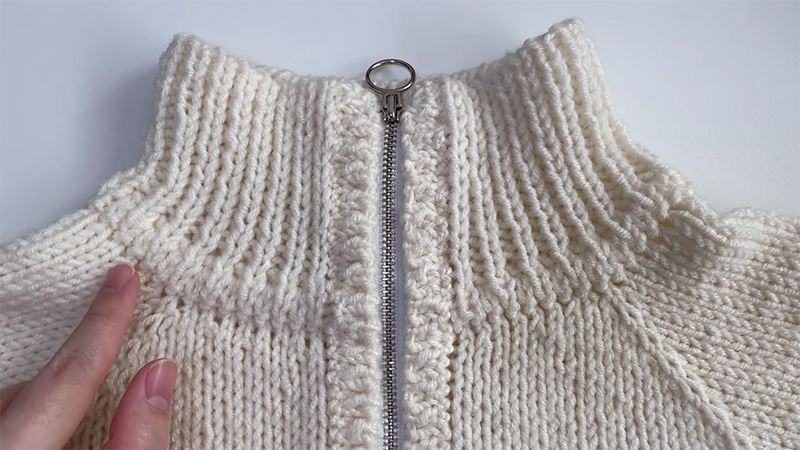
Carefully trim any excess zipper tape that extends beyond the neckline and hem of the sweater, ensuring a clean and tidy finish.
If your sweater originally had a folded hem or edging, fold it back over the zipper and stitch it down by hand or using a sewing machine.
This covers the zipper tape and creates a clean finish for your hand-knit sweater.
What Kind of Zipper Should You Use for Your Hand-Knit Sweater?
Selecting the right type of zipper for your hand-knit sweater is essential to ensure a proper fit, functionality, and overall aesthetic appeal.
Here are some considerations to help you choose the appropriate zipper:
Zipper Length
The zipper’s length should match the opening of your hand-knit sweater. Measure the sweater’s front opening from the neckline to the hem to determine the required length.
If you can’t find an exact match, it’s generally better to choose a slightly longer zipper and trim the excess at the top.
Zipper Type
There are two common types of zippers suitable for hand-knit sweaters:
Separating Zipper
This type of zipper completely separates into two pieces when unzipped. It’s ideal for cardigans and open-front sweaters where you want the entire sweater to open up.
Ensure that you get a separating zipper with the appropriate length and color.
Non-Separating Zipper
These zippers don’t separate entirely and are commonly used for pullover sweaters where you only need a partial opening, such as a quarter or half zipper at the neckline. They are typically shorter than separating zippers.
Zipper Material
Zippers come in various materials, including metal, plastic, and nylon. The choice of material depends on your sweater’s style and your personal preference:
Metal Zippers
These are durable and have a sturdy appearance. They work well for heavier sweaters or those with a more rustic or vintage look.
Plastic Zippers
Lightweight and affordable, plastic zippers are suitable for many sweater types. They come in a variety of colors and are easy to sew onto knit fabrics.
Nylon Zippers
These zippers are strong and versatile. They are often used in sportswear and can be a good choice for everyday sweaters.
Color
Select a zipper color that complements your sweater’s color scheme. Ideally, the zipper should blend in with the knit fabric to create a cohesive look. You can find zippers in various colors to match your project.
Zipper Gauge
Zipper gauge refers to the size of the zipper teeth and the corresponding zipper slider. For hand-knit sweaters, a medium or fine-gauge zipper is usually appropriate.
These zippers have smaller teeth and sliders, which are less likely to catch on the sweater’s knit fabric.
Zipper Brand and Quality
Choose a reputable brand for your zipper, as the quality of the zipper can affect its durability and performance. YKK is a well-known zipper brand known for its reliability.
Zipper Pull
Consider the style of the zipper pull. Some zippers come with decorative pulls, while others have more functional, minimalist pulls. Choose one that suits your sweater’s overall design.
How Do You Prevent Your Zipper From Puckering or Bulging?
Preventing your zipper from puckering or bulging when adding it to your hand-knit sweater is crucial for achieving a professional and polished look.
Here are some tips to help you avoid these common issues:
Stabilize the Edges
Before attaching the zipper, reinforce the edges of your sweater where the zipper will be sewn. You can use a narrow strip of fusible interfacing or lightweight fabric tape along the edges.
This extra layer helps distribute the stress from the zipper evenly and prevents the knit fabric from stretching or puckering.
Block Your Sweater
Ensure that your hand-knit sweater is blocked and stretched to its final dimensions before adding the zipper.
Blocking helps the knit fabric relax into its intended shape and size, reducing the likelihood of puckering or bulging when the zipper is sewn in.
Use the Correct Stitch Length
When sewing the zipper to your sweater, use the appropriate stitch length on your sewing machine.
A shorter stitch length can help secure the zipper tape more evenly to the knit fabric and prevent puckering. Typically, a stitch length of 2-2.5mm is suitable for this purpose.
Stitch Slowly and Carefully
Take your time when sewing the zipper to your sweater. Sew slowly and guide the fabric through the machine carefully to ensure even stitching.
Rushing can lead to uneven tension, which may cause puckering.
Use a Walking Foot
If you have access to a walking foot attachment for your sewing machine, consider using it.
A walking foot can help feed both layers of fabric (the sweater and the zipper tape) through the machine evenly, reducing the risk of puckering.
Press and Steam
After sewing the zipper in place, gently press the seams on both sides of the zipper with an iron set to a low heat setting.
Pressing can help flatten any minor puckering that may have occurred during sewing. Be careful not to stretch the fabric while pressing.
You can also use a garment steamer to gently steam the sweater’s front to relax any puckered areas. Steam can be particularly effective on knit fabrics.
Trim Excess Seam Allowance
If you notice slight puckering after sewing, carefully trim any excess seam allowance near the zipper.
Be cautious not to cut into the sweater itself. Trimming excess fabric can help reduce bulk and alleviate minor puckering.
Choose the Right Zipper
As mentioned in a previous response, selecting the appropriate type of zipper for your hand-knit sweater is essential.
Ensure the zipper’s length, type, and gauge match your project to minimize the risk of bulging or puckering.
Practice and Test
If you’re new to adding zippers to knitwear, practice on scrap fabric or an old sweater to refine your technique and get a feel for your sewing machine’s settings.
This can help you gain confidence and avoid common pitfalls when working on your project.
FAQs
Yes, you can add a zipper to most hand-knit sweater patterns, but it’s essential to consider the design and structure of the sweater.
No, you can attach a zipper to your hand-knit sweater by hand using a needle and thread. However, a sewing machine can make the process faster and more precise.
For delicate knit fabrics, opt for a nylon or plastic zipper with a fine gauge and a smooth pull. These zippers are less likely to catch on the knit stitches.
Mark the zipper’s placement on your sweater using pins or fabric chalk before sewing. Double-check the alignment by measuring and pinning it in place, ensuring it’s centered and straight before sewing.
Yes, you can add a zipper to a blocked and finished sweater. Just ensure that the sweater is stretched and shaped to its final dimensions before attaching the zipper to prevent distortion.
To Wrap Up
Incorporating a zipper into a hand-knit sweater is a skill that combines craftsmanship and functionality.
Through careful planning, precise measurements, and skillful stitching, one can seamlessly integrate a zipper, enhancing both the aesthetic appeal and wearability of the garment.
This process demands patience, attention to detail, and a steady hand, ensuring that the final result aligns with the knitter’s vision.
Moreover, choosing a zipper that complements the sweater’s color and texture is paramount for a harmonious finish.
By following these steps, a knitter can elevate their creation, achieving a polished, professional look that brings both warmth and style to those who wear it.
Leave a Reply