Embarking on the journey of altering your jeans can lead to a custom fit that feels uniquely yours. One pivotal step in this process is removing the waistband.
This alteration opens up a realm of possibilities, from achieving a more comfortable fit to repurposing the denim for creative projects. However, it requires precision and care.
In this guide, we’ll walk you through the steps, providing detailed instructions and valuable tips to ensure the waistband removal process is both successful and rewarding.
With the right tools and techniques, you’ll have the confidence to transform your jeans into a piece that truly reflects your style and comfort preferences.

How to Remove Waistband From Jeans?
Removing a waistband from jeans can be a useful skill, whether you’re altering your clothing for a better fit or repurposing the fabric for a different project.
Here’s a step-by-step guide on how to do it:
Materials Needed:
- Seam ripper or small scissors
- Pins
- Iron and ironing board
Steps:
Gather Your Supplies
Before starting, gather all the necessary supplies. Ensure you have a high-quality seam ripper or small, sharp scissors.
The seam ripper should have a fine point for precise stitching removal. Optionally, you can have pins to hold fabric in place, and an iron and ironing board for fabric pressing later in the process.
Prepare Your Work Area
Set up a clean, well-lit workspace where you have ample room to spread out your jeans. A spacious work area will make it easier to maneuver the fabric and maintain your focus throughout the project.
Turn the Jeans Inside Out
Begin by flipping your jeans inside out. This step exposes the inner side of the waistband where the stitching connects it to the body of the jeans. It also helps protect the visible side of the jeans from any accidental snips or tears.
Locate the Waistband Seam
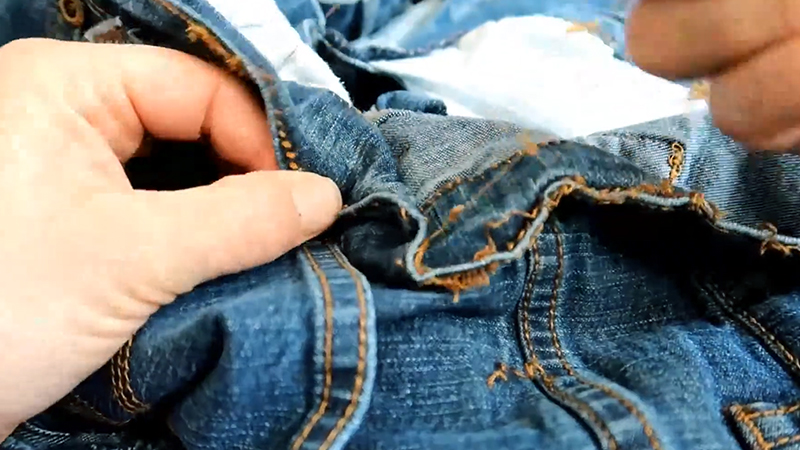
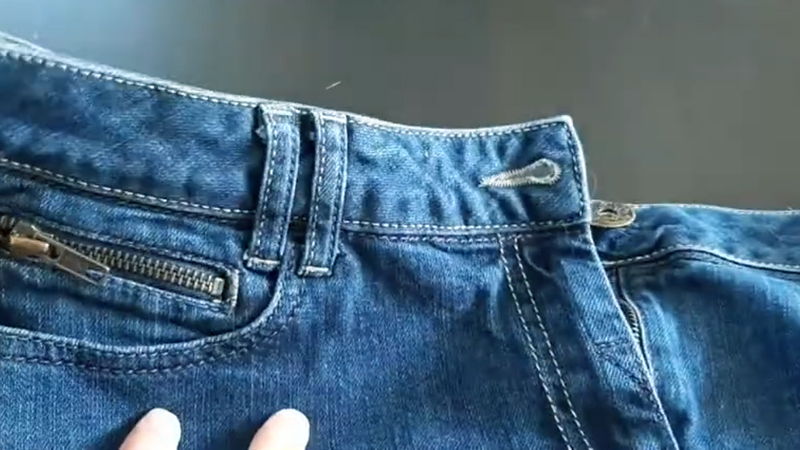
Take a moment to identify the waistband seam, which is typically a double row of stitching along the inner top edge of the jeans. It’s important to pinpoint this seam as it’s the area where you’ll be working.
Use a Seam Ripper
Choose your preferred tool for removing the stitches. A seam ripper is specifically designed for this task, with one pointed end for getting under stitches and a small blade for cutting them.
Alternatively, you can use small, sharp scissors. Insert the seam ripper or scissors under the stitches of the waistband seam.
Carefully Cut
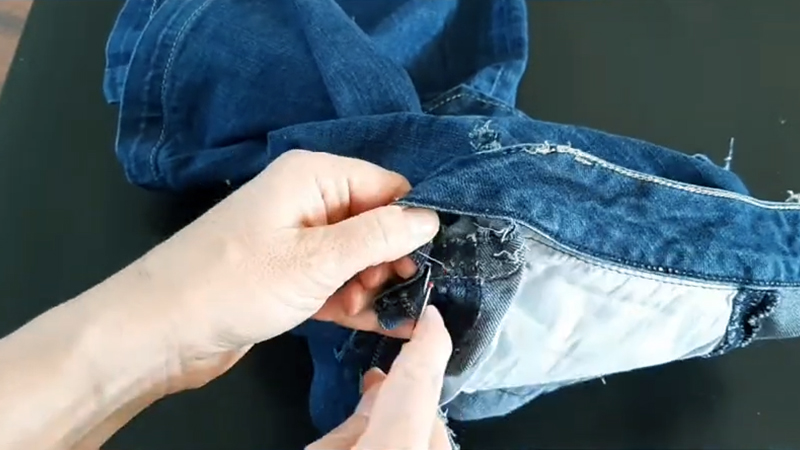
Begin at one end of the waistband seam and, using gentle and controlled movements, cut or rip the stitches along its entire length.
Take your time to ensure precision, and avoid cutting into the main fabric of the jeans.
As you remove stitches, keep the seam ripper or scissors flat against the fabric to prevent accidental snags.
Remove Excess Threads
After all the stitches are removed, you may find residual thread or loose ends. Using your fingers or a pair of tweezers, carefully pull out these threads to create a clean finish. This step is essential for achieving a polished look.
Press if Necessary
If the fabric around the waistband seam is wrinkled or creased due to the removal process, consider using an iron. Set the iron to a low heat setting, and press the area gently.
Always place a pressing cloth or a scrap piece of fabric between the iron and your jeans to prevent damage.
Inspect for Loose Threads
Conduct a thorough inspection of the area around the removed waistband to ensure there are no remaining loose threads or weak spots. Trim any excess threads with scissors to prevent future fraying.
Adjust the Waistband
If you plan to alter the waistband size, this is the time to make the necessary adjustments. You can take in or let out the waistband by sewing it to the desired size. Ensure that the adjustments are even and secure.
Reassemble
When you’ve made adjustments to the waistband and wish to reattach it to the jeans, use a sewing machine or hand-sewing techniques. Ensure the waistband is evenly and securely attached to the jeans.
Clean Up
After completing the removal or any necessary adjustments, neatly fold your jeans and put away your tools.
Maintaining an organized workspace and properly caring for your sewing tools will make future projects more efficient and enjoyable.
How Do You Create a New Look for Your Jeans After Removing the Waistband?

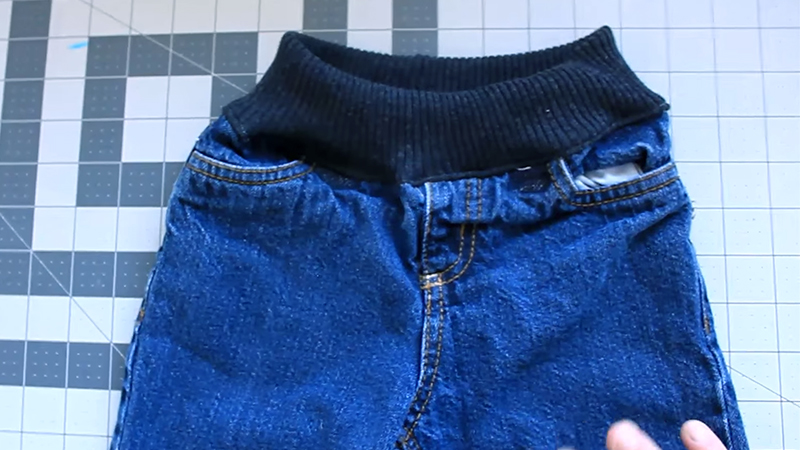
After removing the waistband from your jeans, you have a great opportunity to give them a fresh and unique look.
Here are some creative ideas to transform your jeans:
Paper Bag Waist
Fold down the fabric at the top to create a high-waisted look. Experiment with different folding styles for varying effects.
You can leave it loose for a casual vibe or use a belt to cinch the waist for a polished finish. This style elongates the legs and offers a flattering silhouette.
Add a Belt
Choose a statement belt to draw attention to the waist area. You can opt for a wide, embellished belt for a bold statement or a thin, leather belt for a more understated look.
Position it at your natural waist or experiment with different placements to accentuate your figure.
Create a Ruffle
Sew or gather fabric around the waist area to create a playful and feminine ruffled effect. This adds a touch of whimsy to your jeans, giving them a romantic, vintage-inspired flair.
Attach Suspender Straps
Attach suspenders to the front and back of your jeans for a quirky and retro-inspired style.
Play with different strap widths and materials for a customized look. Pair this with a fitted shirt or crop top to complete the ensemble.
Incorporate Lace
Sewing lace or fabric inserts along the waistband area creates a delicate, bohemian touch. Choose lace with intricate patterns or fabric with contrasting textures for a visually captivating effect. This addition introduces a touch of elegance to your jeans.
Embroidery or Appliqué
Elevate your jeans with intricate embroidery or fabric appliqués. Whether it’s floral motifs, geometric designs, or personalized monograms, this artistic touch adds a unique and meaningful element to your denim. Consider using complementary thread colors for a harmonious look.
Add a Peplum
Attach a peplum or ruffle around the waist for a playful, dynamic appearance. This creates movement and volume, giving your jeans a distinctively feminine and fashion-forward edge. Pair with a fitted top to balance the silhouette.
Insert Grommets
Enhance the waistband area with grommets or eyelets, allowing for a corset-inspired design.
Thread a ribbon or cord through them to create an adjustable and eye-catching closure. This edgy detail adds a touch of rebellion to your jeans.
Experiment with Fabric Panels
Introduce fabric panels in contrasting colors or patterns to create visual interest. Position them strategically around the waistband area to add depth and dimension to your jeans.
This technique can be both bold and eye-catching, making your jeans a statement piece.
Create a Layered Look
Add a layer of lace, tulle, or sheer fabric underneath the waistband to create a textured, ethereal effect.
This layered approach brings a touch of romance and whimsy to your jeans, making them ideal for special occasions or artistic ensembles.
Apply Fabric Paint or Dye
Express your creativity by applying fabric paint or dye to your jeans. Experiment with different techniques such as tie-dye, splatter painting, or stenciling. This allows you to personalize your jeans with unique patterns, colors, and designs.
Insert a Zipper or Buttons
Add an industrial touch to your jeans by incorporating decorative zippers or button plackets. Experiment with placement, direction, and materials to achieve a modern, urban-inspired look. This detail can serve as a focal point, adding an element of intrigue to your jeans.
Create a Wraparound Effect
Utilize fabric to wrap around the waistband area, creating a distinctive closure. This wrap-style design offers a unique, asymmetrical look. Secure the fabric with ties or buttons for a functional and eye-catching detail.
Effective Tips for Post-waistband-Removal Care

After removing the waistband from your jeans, it’s important to take a few steps to care for them properly to ensure they remain in good condition.
Here are some effective tips for post-waistband-removal care:
Inspect for Loose Threads
Thoroughly examine the entire waist area of the jeans for any lingering loose threads or weakened spots.
Use scissors to carefully trim any excess threads to prevent fraying and maintain a neat appearance.
Press and Iron
If the fabric appears wrinkled or creased due to the removal process, use an iron on a low setting to smooth it out.
Always place a pressing cloth or a scrap piece of fabric between the iron and the denim to protect the material while ensuring a smooth finish.
Make Further Adjustments
If you plan to make additional alterations, such as resizing the waistband, tapering the legs, or adding embellishments, this is the ideal time to carry out these adjustments. Ensure they are even, well-executed, and aligned with your desired design.
Clean the Jeans
Depending on the condition of your jeans and whether they were previously worn, you may want to wash or dry clean them to refresh the fabric.
Follow the care instructions on the label to maintain the denim’s quality. Keep in mind that excessive washing can cause denim to fade, so use this option judiciously.
Store Properly
When you’re not wearing the jeans, store them properly to prevent damage and maintain their condition.
Follow appropriate storage care tips, which include folding them neatly, avoiding overcrowding, and protecting them from direct sunlight and moisture.
Rotate Your Jeans
If you have multiple pairs of jeans, rotate them regularly to prevent excessive wear on any one pair. This ensures your jeans age more evenly and prolongs their lifespan.
Label and Organize
If you have several pairs of jeans with various alterations or unique features, consider labeling them or organizing them by style, color, or size to make it easy to find the pair you want.
Regularly Air Them Out
Even in storage, it’s a good practice to air out your jeans occasionally. This helps prevent musty odors and keeps the fabric fresh. Simply hang them or lay them flat in a well-ventilated area for a few hours.
Storing Care for Jeans After Alteration

After successfully altering your jeans, it’s crucial to store them properly to maintain their quality and fit.
Here are some essential tips for storing your jeans after alteration:
Clean Before Storing
Ensure your jeans are clean before placing them in storage. This helps prevent any dirt, oils, or stains from setting in over time.
Fold, Don’t Hang
Folding your jeans is the best way to store them. Hanging can lead to stretching and distortion, especially if the jeans have been altered to fit your body shape.
Separate Denim from Other Fabrics
If you’re storing your jeans with other clothing items, keep them separate from fabrics that may transfer color or cause friction. This prevents any potential damage or color bleeding.
Use Fabric Bags
Consider storing your jeans in fabric bags or containers. These allow the fabric to breathe while protecting against dust and potential pests. Avoid using plastic bags, as they can trap moisture.
Label or Sort by Style
When you have multiple pairs of jeans, consider labeling or sorting them by style or color. This makes it easier to locate a specific pair without rummaging through all your stored clothes.
Rotate Your Wardrobe
Periodically rotate your clothing to ensure all items receive equal wear. This prevents any one pair of jeans from becoming overused and extends the lifespan of your entire wardrobe.
Avoid Sunlight and High Humidity
Store your jeans away from direct sunlight and areas prone to high humidity. Prolonged exposure to sunlight can cause fading, while humidity can lead to mold and mildew.
Check for Moisture and Pests
Regularly inspect your storage area for signs of moisture or pests. Catching these issues early can prevent damage to your denim and other clothing items.
Consider Wrapping in Acid-Free Tissue Paper
For extra protection, consider wrapping your jeans in acid-free tissue paper before placing them in storage. This can help prevent any potential discoloration or damage to the fabric.
Avoid Tight Compressions
Don’t pack your storage containers too tightly. Jeans need some room to breathe and maintain their shape. Overly compressed storage can lead to wrinkles and deformation.
FAQs
What tools do I need to remove the waistband from my jeans?
A seam ripper or sharp scissors are essential. A fine-pointed seam ripper is recommended for precision.
Can I remove the waistband without damaging the jeans?
With care and attention, it’s possible to remove the waistband without damaging the jeans. Use gentle, controlled movements.
Is it necessary to turn the jeans inside out before starting?
Yes, turning the jeans inside out exposes the inner side of the waistband where the stitching is located.
Can I reattach the waistband after removing it for alterations?
Yes, if needed, the waistband can be reattached using sewing techniques. Ensure it’s evenly and securely attached.
What should I do if there are loose threads after removing the waistband?
Use your fingers or tweezers to carefully remove any remaining loose threads. This ensures a clean finish.
Wrap Up
In mastering the art of removing a waistband from jeans, you’ve unlocked a world of customization and creativity.
This process empowers you to tailor your denim to perfection, whether for comfort, style, or upcycling endeavors. Through careful steps and attention to detail, you’ve navigated the alteration with finesse.
As you conclude this journey, remember that every stitch removed signifies a step towards a garment uniquely tailored to you. The possibilities for further transformation are endless.
Whether you’re crafting a new look or repurposing the waistband, your newfound skills open a realm of sartorial potential. Embrace this newfound expertise and let your creativity flourish.
Leave a Reply