Sewing is a timeless craft that empowers us to create functional and beautiful garments. One essential skill every sewing enthusiast should master is attaching hook and eye closures.
Whether you’re sewing a delicate evening gown, a sturdy coat, or a simple blouse, knowing how to sew a hook and eye securely can make all the difference in the fit and functionality of your creations.
So, how to sew a hook and eye? In this comprehensive guide, we’ll take you step-by-step through the process of sewing a hook and eye closure. You’ll learn the necessary materials, tools, and techniques to achieve professional-looking results.
Whether you’re a complete beginner or someone looking to refine your sewing skills, this tutorial will equip you with the knowledge and confidence to add this indispensable closure to your sewing repertoire.
Get ready to enhance the functionality and style of your garments.

How to Sew a Hook and Eye?
Sewing a hook and eye is a simple but essential skill in garment construction. Here are the basic steps to sew a hook and eye:
Materials You’ll Need
Hook and eye sets come in various sizes and colors, so choose one that matches your fabric and the size of the closure needed.
Choose a thread that matches your fabric color for a seamless look. Use a hand-sewing needle appropriate for your fabric.
Smaller needles work well with delicate fabrics, while heavier fabrics require sturdier needles.
Sharp scissors are essential for clean cutting. Pins will help hold your hook and eye in place while sewing.
Prepare Your Fabric
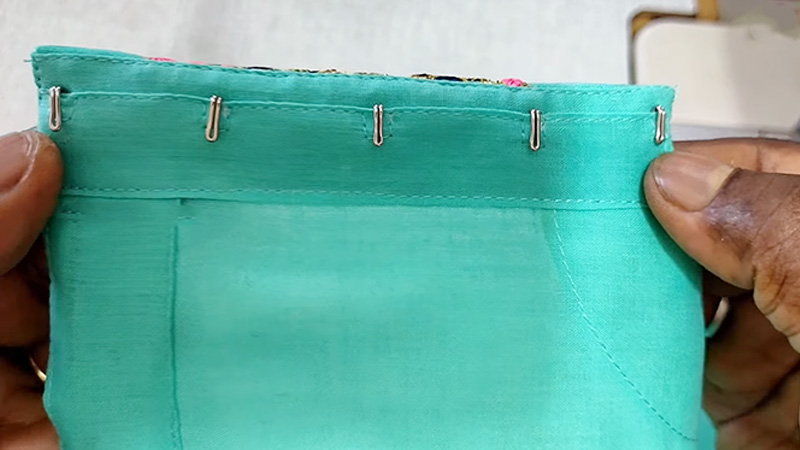
Ensure that your fabric pieces are properly aligned where you want to attach the hook and eye. It’s usually at the edge where your garment opens or closes.
Decide which side you want to attach first – the hook or the eye. Place one piece of the hook or eye where you want it to be on your fabric. Use pins to secure it in place, making sure it’s aligned and centered.
Thread Your Needle
Thread your needle with a length of thread, and tie a knot at the end. You can double the thread for added strength.
Insert your needle from the backside of the fabric, coming up through one of the holes on the hook or eye. Pull the thread through until the knot catches on the fabric.
Stitch Securely
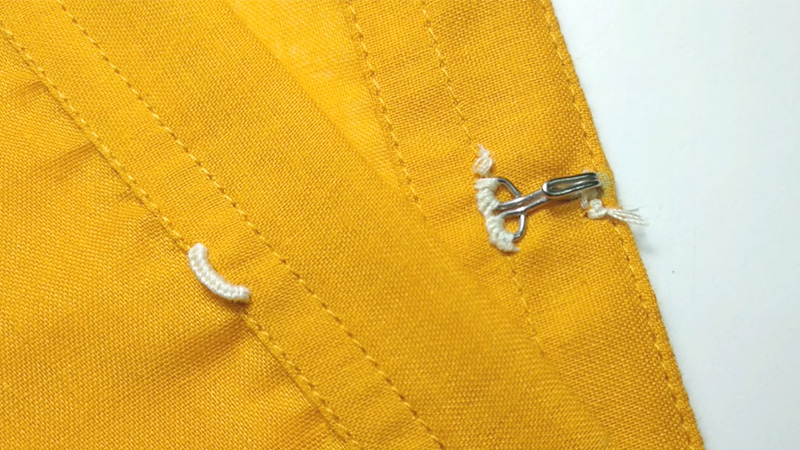
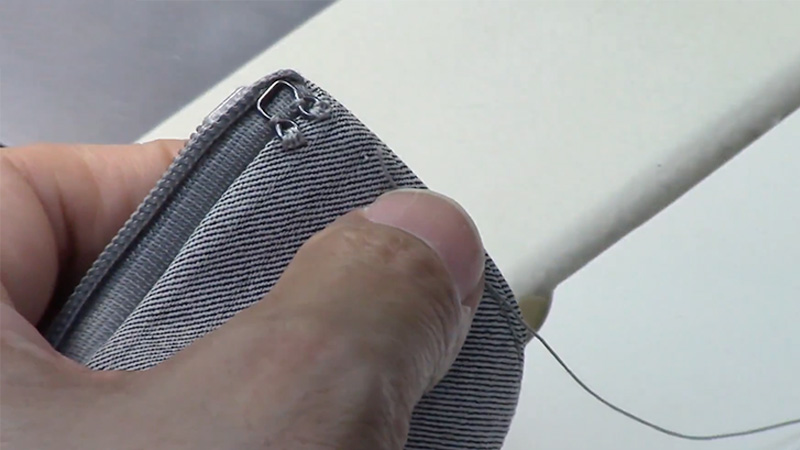
Begin stitching around the edges of the hook or eye, making small and neat stitches. Ensure that the stitches are close together to provide a stronghold. Sew around the entire perimeter of the hook or eye.
Knot the Thread
Once you’ve sewn around the hook or eye, insert your needle into the backside of the fabric and make a small knot to secure the thread.
Cut off any excess thread. Now, repeat the process on the opposite side of your fabric with the corresponding hook or eyepiece.
Test the Closure
Once both the hook and eye are securely attached, close and open your fabric to make sure the closure works smoothly.
Examine your work to ensure that the hook and eye are aligned and securely attached. Make any necessary adjustments if they are not sitting properly.
Press Your Fabric
Finally, press your fabric to remove any wrinkles and set the stitches. Be cautious when pressing delicate fabrics to avoid damage. Congratulations! You’ve successfully sewn a hook and eye closure.
This skill will prove invaluable as you continue your sewing journey, adding both functionality and style to your garments.
Practice makes perfect, so don’t be discouraged if it’s not perfect the first time; with time and experience, your closures will become more precise and polished.
How Do You Sew on a Hook and Bar?

Sewing on a hook and bar closure is a common technique used in sewing garments to secure waistbands, pants, skirts, and other closures. Here are the steps to sew on a hook and bar:
Materials You’ll Need
Hook and bar sets come in various sizes and styles. Choose one that suits your fabric and the size of the closure needed. Use thread that matches your fabric color for a seamless look.
Select a hand-sewing needle appropriate for your fabric type. Sharp scissors are essential for clean cutting. Pins will help hold your hook and bar in place while sewing.
Prepare Your Fabric
Make sure the fabric edges where you want to attach the hook and bar are finished or neatly folded.
This is where the closure will be placed, often at the waistband or the top of a zipper.
Position the Hook and Bar
Decide which side you want to attach first – the hook or the bar. Place one piece of the hook or bar where you want it to be on your fabric. Use pins to secure it in place, ensuring it’s centered and aligned with its counterpart.
Thread Your Needle
Thread your needle with a length of thread (about 18 inches long) and tie a knot at the end.
You can double the thread for added strength. Customize the size of the thread and needle as per your needs.
Start Sewing the Hook or Bar
Insert your needle from the backside of the fabric, coming up through one of the holes on the hook or bar. Pull the thread through until the knot catches on the fabric.
Stitch Securely
Begin stitching around the edges of the hook or bar, making small and neat stitches. Ensure the stitches are close together to provide a stronghold. Sew around the entire perimeter of the hook or bar.
Knot the Thread
Once you’ve sewn around the hook or bar, insert your needle into the backside of the fabric and make a small knot to secure the thread. Cut off any excess thread. Now, repeat the process on the opposite side of your fabric with the corresponding hook or bar piece.
Test the Closure
Close and open your fabric to ensure the hook and bar closure work smoothly. Examine your work to ensure that the hook and bar are aligned and securely attached. Make any necessary adjustments if they are not sitting properly.
Press Your Fabric
Finally, press your fabric to remove any wrinkles and set the stitches. Be cautious when pressing delicate fabrics to avoid damage. You’ve now successfully sewn on a hook and bar closure.
This technique adds functionality and a polished finish to your garments, particularly in waistbands and pants closures.
With practice, you’ll become more skilled at creating secure and professional-looking closures. Happy sewing!
What Are the Other Ways to Stitch Hook and Eye?

While the basic method I described earlier is a common way to sew on a hook and eye, there are a few variations and techniques you can explore depending on your preference and the specific needs of your sewing project.
Here are a few alternative methods:
Sewing with a Fabric Tab
Instead of sewing the hook or eye directly onto the fabric, you can create a small fabric tab or loop to attach them.
This can be especially useful when working with delicate fabrics or when you want to hide the stitching.
To do this, cut a small strip of fabric, fold it in half to create a loop, and then attach the hook or eye to the loop. Sew the loop onto your fabric, concealing the stitching under the loop.
Sewing with a Ribbon
Another decorative option is to use a ribbon to attach the hook and eye. Cut a piece of ribbon long enough to extend beyond the hook and eye pieces, and sew the ribbon onto your fabric.
You can add decorative stitches or use a contrasting ribbon for a stylish look.
Reinforcing with Interfacing
For added durability and stability, especially in areas that will endure a lot of stress, consider reinforcing the fabric with interfacing before attaching the hook and eye.
Apply interfacing to the area where you plan to sew the closure. This will provide extra support and help prevent the fabric from fraying around the closure.
Using Sewing Machine Attachments
If you have a sewing machine with various presser feet and attachments, some machines have specific presser feet designed for attaching hook and eye closures. These feet can help you sew the closures neatly and efficiently.
Hidden Closure
If you want a completely hidden closure, you can sew the hook and eye on the inside of the garment, between the layers of fabric.
This is often done in high-end garments to maintain a seamless exterior appearance.
Hand-Stitched Buttonhole
For a more decorative and traditional closure, you can create a hand-stitched buttonhole and attach a button and loop instead of a hook and eye.
The choice of method depends on your specific project, the fabric you’re working with, and the desired aesthetic.
Each of these techniques offers its own unique look and functionality, so feel free to experiment and choose the one that best suits your needs.
FAQs
Can I sew a hook and eye closure with a sewing machine?
Yes, you can sew a hook and eye closure with a sewing machine. Many sewing machines have zigzag or satin stitch options that work well for securing these closures.
Just be sure to use the appropriate presser foot and adjust the stitch width and length to your liking.
How do I choose the right size hook and eye for my project?
The size of the hook and eye should be proportionate to your garment and the weight of the fabric.
For lighter fabrics, choose smaller closures, and for heavier fabrics, opt for larger ones. The packaging of hook and eye sets often indicates the fabric weight they are suitable for.
Can I reuse a hook and eye closure if I make a mistake?
Reusing a hook and eye closure can be challenging because they are typically secured with small stitches.
If you need to remove one, carefully cut the threads and try to preserve the hook and eyepieces. However, it’s often easier to replace them with new ones.
What’s the difference between a hook and eye and a snap fastener?
Both are used for closures, but snap fasteners consist of two separate pieces (male and female) that snap together, while hook and eye closures are one piece with a hook and an eye that fit together. Snap fasteners can be quicker to open and close but not that secure.
Can I sew hook and eye closures on knits or stretch fabrics?
Sewing hook and eye closures on stretchy fabrics like knits can be challenging due to the fabric’s stretchiness.
In such cases, it’s best to reinforce the area with stabilizing interfacing or use a stretch-friendly closure option like a sew-on snap.
Conclusion
Mastering the art of sewing a hook and eye closure is a valuable skill that can elevate your sewing projects to a new level of sophistication and functionality.
This seemingly small detail can make a big difference in how your garments fit and feel, ensuring they stay securely fastened while maintaining a seamless appearance.
We’ve covered the essential steps, from choosing the right materials to stitching with precision. Remember that practice makes perfect, so don’t be discouraged if your first attempts aren’t flawless.
With time and dedication, you’ll become proficient in attaching hook and eye closures effortlessly.
As you continue to explore the world of sewing, you’ll find that these closures are not just practical but also versatile in their application.
So, whether you’re sewing for yourself, friends, or clients, the knowledge you’ve gained here will serve you well in creating clothing and accessories that are both functional and fashionable.
Leave a Reply