Sewing is a skill that allows us to transform fabric into beautiful and functional creations. Whether you’re a seasoned seamstress or a novice with a passion for crafting, learning how to sew a lapped zipper is a valuable addition to your repertoire.
In this comprehensive guide, we’ll discuss how to sew a lapped zipper. With a lapped zipper, you’ll achieve a polished and professional finish on your garments and accessories.
No more fear of sewing zippers! We’ll demystify the process and equip you with the confidence and skills needed to tackle zipper insertion with ease.
Grab your sewing machine, select your favorite fabric, and let’s dive into the world of sewing with zippers. Whether you’re making clothes for yourself or crafting thoughtful gifts for loved ones, this tutorial will empower you to create with style and precision. Let’s get started!
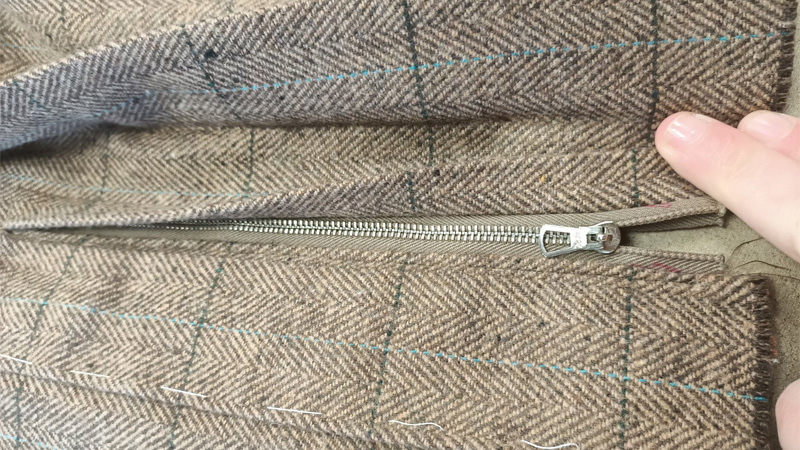
How to Sew a Lapped Zipper? 8 Steps
Lapped zippers are a fantastic addition to your sewing skills because they offer a polished and professional finish to garments and accessories. In this detailed step-by-step guide, we’ll break down the process into easy-to-follow instructions. Here are the details:
Materials You’ll Need
Before we dive into the steps, gather these essential materials: Choose the fabric for your project. It’s a good idea to practice on scrap fabric first to gain confidence. Select a suitable zipper for your project. For beginners, a longer zipper (around 9-12 inches) is easier to work with.
Ensure you have the right color of thread to blend seamlessly with your fabric. You’ll need pins to hold the fabric pieces together while sewing. A standard sewing machine will work perfectly for this task.
Most sewing machines come with a zipper foot attachment, which makes sewing zippers much easier. If your machine doesn’t have one, you can usually purchase a universal zipper foot separately.
Step 1: Prepare Your Fabric
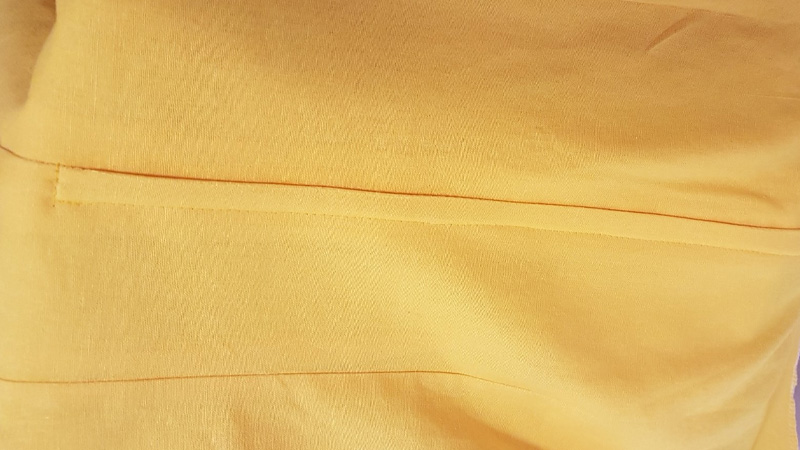
Begin by ironing your fabric to remove any wrinkles. A smooth fabric surface makes sewing much easier. Lay your fabric pieces flat with their right sides facing each other. Ensure the edges where the zipper will be attached are aligned properly to avoid unwanted hassles.
Step 2: Mark Your Seam Allowance
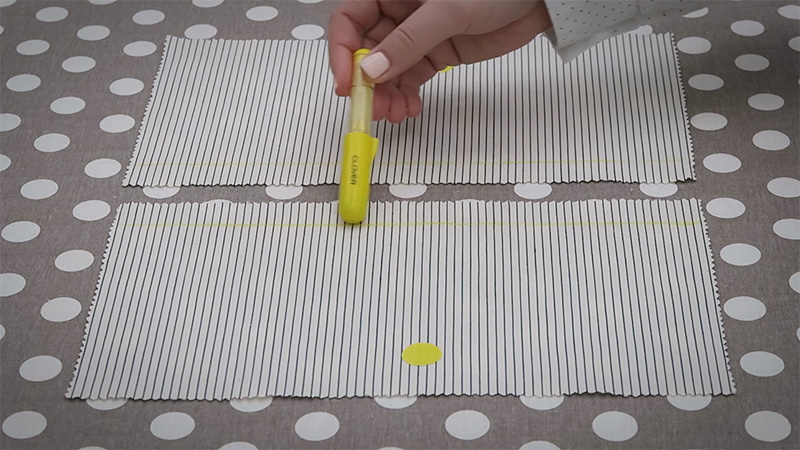
Measure and mark a line on your fabric where you want to place the zipper. The line should match the seam allowance specified in your sewing pattern (typically 5/8 inch or 1.5 cm). This line will guide you as you sew.
Step 3: Pin the Zipper
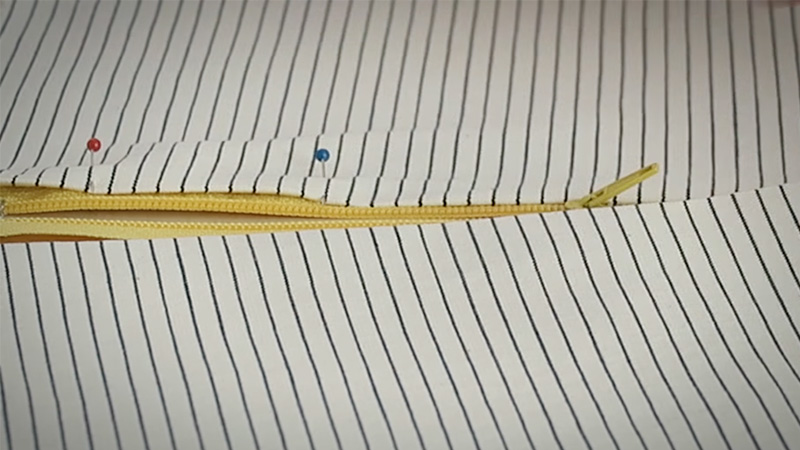
Open the zipper and place it face down on one of the fabric pieces, aligning its teeth with the marked seam allowance line. Pin the zipper in place, ensuring it’s centered along the line. Use as many pins as needed to secure it firmly.
Step 4: Baste the Zipper
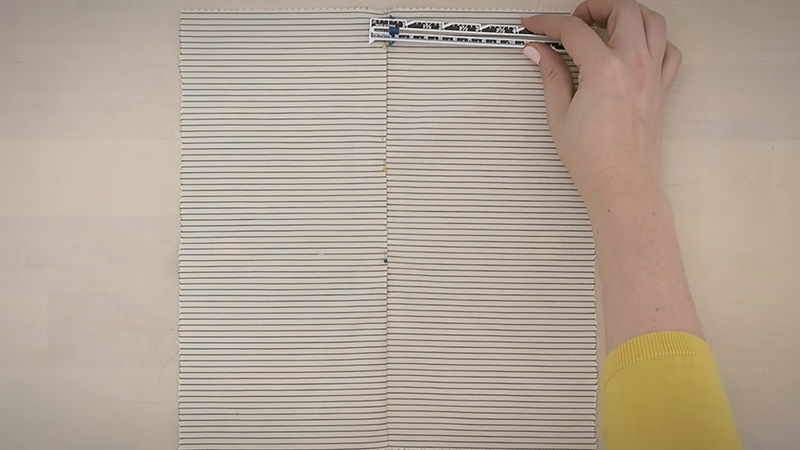
Replace your regular presser foot with a zipper foot on your sewing machine. Set your machine to a basting stitch, which is a long and loose straight stitch.
Baste the zipper in place, sewing close to the edge of the fabric. This temporary stitch will hold the zipper in place as you work.
Step 5: Close the Zipper and Pin the Other Side
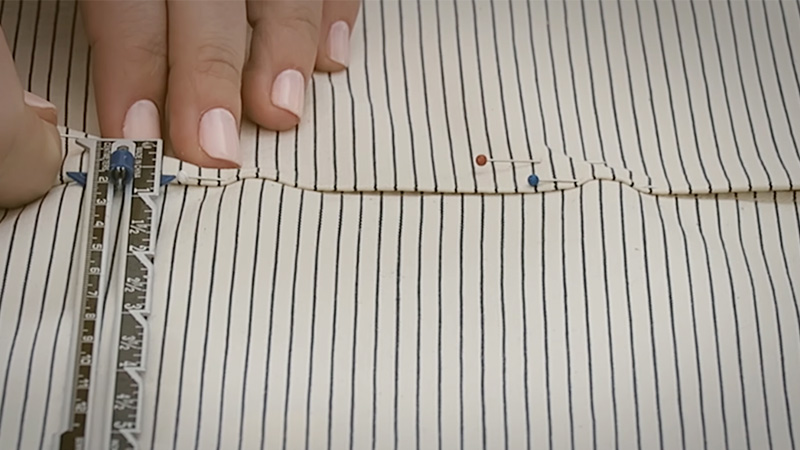
Carefully close the zipper. Lay the other fabric piece on top of the closed zipper, with its right side facing down. Align the edges with the already attached fabric piece.
Pin the second side of the zipper to the fabric, ensuring it lines up with the seam allowance line you marked earlier.
Step 6: Sew the Second Side
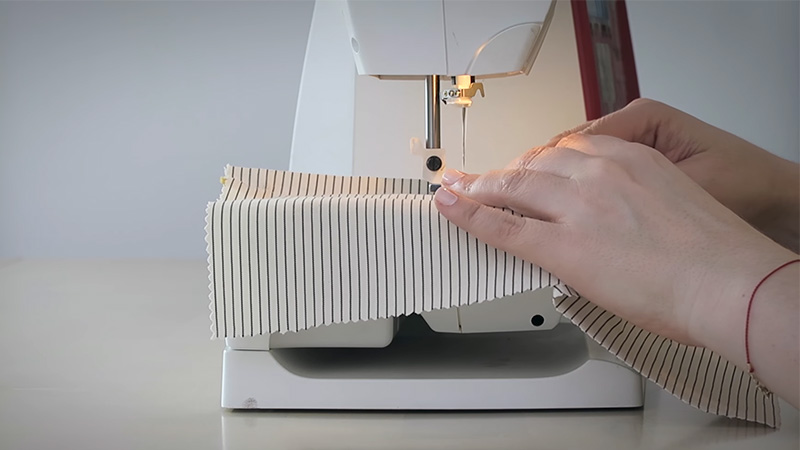
With the zipper foot still attached, sew the second side of the zipper, removing the basting stitches as you go. Sew as close to the zipper teeth as possible, but be careful not to catch the teeth with your needle.
Once you reach the zipper pull, lift the presser foot, pivot the fabric to continue sewing across the bottom of the zipper, and then pivot again to sew up the other side. This creates a rectangular box shape at the base of the zipper, securing it in place.
Step 7: Test the Zipper
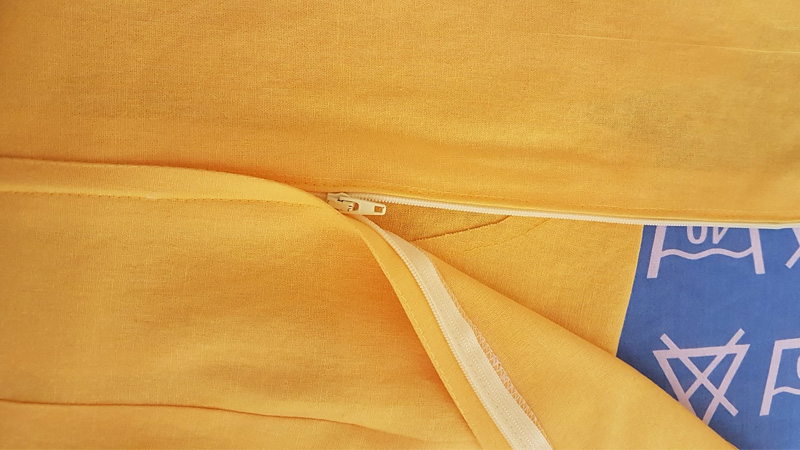
Unzip the zipper to ensure it functions smoothly. If it gets stuck or doesn’t open and close easily, carefully go back and check your stitching to make sure you haven’t caught the zipper fabric.
With the zipper attached, you can now finish sewing the rest of your seam. Ensure that both fabric pieces are aligned correctly and that the seam allowance matches the pattern’s instructions.
Sew from the top of the zipper to the bottom, using the regular presser foot. Remember to backstitch at the beginning and end of your seam to secure the stitches.
Step 8: Press Your Work
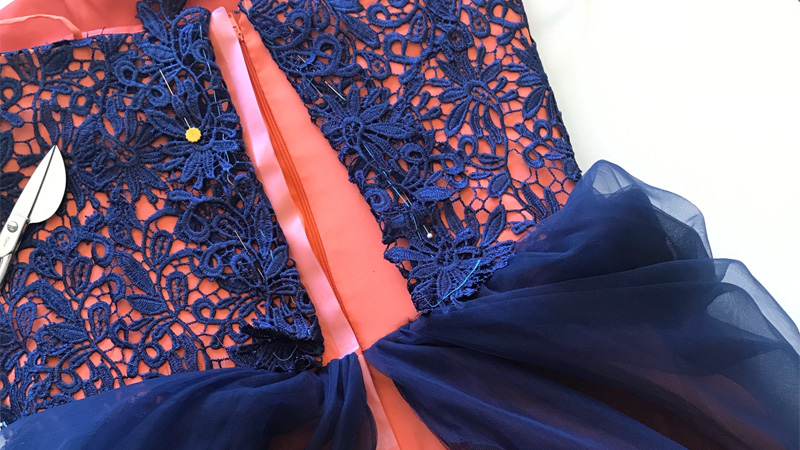
Finally, give your project a professional touch by pressing the seam open. Use an iron on a suitable heat setting for your fabric to flatten the seam.
Congratulations! You’ve successfully sewn a lapped zipper into your project. With practice, this technique will become second nature, allowing you to create beautifully finished garments and accessories.
Whether you’re sewing a dress, a skirt, a cushion cover, or any other project that requires a zipper, mastering this skill opens up a world of creative possibilities in your sewing journey. Keep experimenting, refining your techniques, and enjoying the art of sewing!
Why Use a Lapped Zipper?
Using a lapped zipper in your sewing projects offers several advantages that make it a popular choice for both beginners and experienced seamstresses.
A lapped zipper, often referred to as a “concealed” or “invisible” zipper, is a type of zipper installation that results in a polished and professional finish.
Here are several reasons why you should consider using a lapped zipper in your sewing endeavors:
Aesthetic Appeal
One of the primary reasons to opt for a lapped zipper is its aesthetic appeal. Unlike standard zippers, which are sewn with the teeth exposed, lapped zippers are concealed beneath the fabric layers.
This creates a clean and streamlined appearance on the outside of your garment or project. The absence of visible stitching along the zipper path enhances the overall look and allows the fabric’s pattern or design to shine without interruption.
Durability
Lapped zippers are known for their durability. When sewn correctly, they securely hold fabric pieces together, preventing the zipper from catching on the fabric or snagging.
This durability ensures that your garments or accessories will withstand the test of time, making lapped zippers an excellent choice for items you want to wear or use frequently.
Comfort
Lapped zippers provide a comfortable wearing experience. Because the teeth are concealed, you won’t feel them against your skin.
This is particularly important for garments like dresses, skirts, or trousers, where comfort is a key factor in the design. Lapped zippers eliminate any potential discomfort or irritation that exposed zipper teeth can cause.
Professional Finish
If you’re striving for a professional finish in your sewing projects, lapped zippers are the way to go. It’s a subtle detail that speaks volumes about your sewing skills.
Whether you’re making clothing, accessories, or home decor items, a concealed zipper adds a level of sophistication and craftsmanship that sets your work apart.
Versatility
Lapped zippers are versatile and can be used in a wide range of sewing projects. They’re suitable for clothing items such as dresses, blouses, skirts, and trousers.
Additionally, lapped zippers are perfect for home decor projects like cushions, pillow covers, and even curtains. Their clean and polished look complements various design aesthetics.
Customization
Lapped zippers come in various lengths, colors, and styles, allowing you to choose the perfect zipper for your project. You can match the zipper color to your fabric or opt for a contrasting color to create a design element.
This level of customization enhances your creative options and gives you more control over the final look of your creation.
Clean and Neat Interior
Another advantage of lapped zippers is the tidy interior finish they provide. When you open a garment with a lapped zipper, you’ll find that the inside looks as clean and neat as the outside.
The seam allowances are usually enclosed or finished neatly, contributing to the overall quality of your work.
No Need for a Lining
In some cases, a lapped zipper can eliminate the need for a lining in your garment. Because it conceals the raw edges of the fabric, you can use the same fabric for both the inside and outside of your project. This simplifies the sewing process and can save you time and effort.
Less Chance of Fabric Snags
Since lapped zippers are hidden under the fabric layers, there’s less chance of the zipper getting caught on the fabric, which can lead to snags or damage.
This is particularly beneficial when working with delicate or fine fabrics. Lapped zippers offer a combination of aesthetics, durability, and comfort that make them an excellent choice for sewing projects.
FAQs
How do I choose the right-lapped zipper for my project?
When selecting a lapped zipper, consider the length, color, and style that best suits your project.
Longer zippers (around 9-12 inches) are versatile and easier to work with for beginners. Choose a zipper color that complements or contrasts with your fabric, depending on your design preference.
Can I sew a lapped zipper by hand?
Yes, you can sew a lapped zipper by hand, but it may be more time-consuming than using a sewing machine. To do so, use a backstitch or slipstitch for a clean finish.
Hand-sewing can be a good option for delicate fabrics where machine stitching might be too visible.
Are there any shortcuts or tips for sewing a lapped zipper more easily?
To make sewing lapped zippers easier, use basting stitches to temporarily hold the zipper in place before final stitching. Additionally, marking your seam allowance accurately and pinning the zipper carefully can help ensure a neat and even finish.
Can I sew lapped zippers on stretchy fabrics?
Sewing lapped zippers on stretchy fabrics like jersey or spandex can be a bit more challenging, but it’s certainly possible.
Use a stabilizer or interfacing on the fabric to prevent stretching while sewing. Take your time and practice on scrap fabric to get comfortable with the technique.
What should I do if I make a mistake while sewing a lapped zipper?
Don’t worry if you make a mistake; sewing is a learning process. If you catch the zipper fabric or make other errors, you can use a seam ripper to carefully undo the stitching and try again. Practice and patience are key to improving your lapped zipper sewing skills.
Conclusion
Congratulations! You’ve now mastered the art of sewing a lapped zipper. By following this step-by-step guide, you’ve learned a valuable skill that will elevate your sewing projects to a whole new level.
With practice, you’ll be able to seamlessly incorporate lapped zippers into your creations, whether it’s clothing, home decor, or accessories.
Remember that sewing is not just about technique; it’s also about creativity and self-expression. Feel free to experiment with different fabrics, colors, and zipper styles to add your unique touch to every project. Don’t be discouraged by any initial challenges; every stitch you make is a step toward improvement.
As you continue your sewing journey, keep exploring new techniques and expanding your knowledge. Sewing is a lifelong learning process, and there’s always something new to discover. So, keep your sewing machine humming, and let your creativity run wild.
Leave a Reply