Sewing pintucks is a timeless and intricate sewing technique that can transform ordinary fabric into a canvas of texture and elegance.
Pintucks, small parallel folds of fabric stitched tightly together, add a touch of sophistication to garments, linens, and home decor.
The art of creating pintucks may seem daunting at first, but with the right guidance, it becomes an accessible and rewarding skill.
In this comprehensive guide, we will explore the step-by-step process of sewing pintucks, from fabric preparation to finishing touches.
Whether you’re a seasoned seamstress looking to enhance your repertoire or a novice eager to embark on a creative journey, mastering the art of pintucking will open up a world of design possibilities.
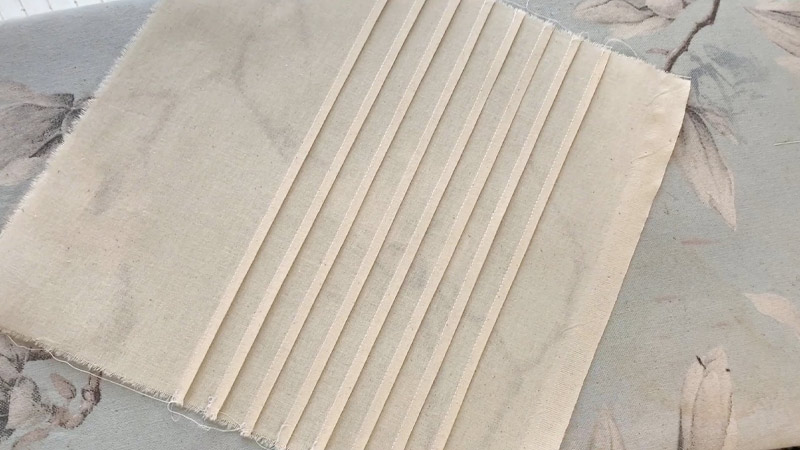
Easy 9 Steps to Sew a Pintuck
Sewing pintucks is a delicate and elegant way to add texture and detail to your clothing or home decor projects.
Pintucks are small, narrow folds of fabric that are stitched close together to create a raised, decorative pattern.
They can be used on garments, pillowcases, table linens, and more to add a touch of sophistication to your creations.
Let’s walk through the steps to sew a pintuck:
Materials You’ll Need:
- Fabric
- Thread
- Pintuck Foot
- Iron and Ironing Board
- Sewing Machine
Step-by-Step Instructions:
Step 1: Preparation

Begin by preparing your fabric meticulously. Washing and pressing your fabric is a crucial first step.
Washing removes any sizing or dirt from the fabric and can also help prevent shrinkage later on.
Pressing the fabric with a hot iron ensures it is smooth, wrinkle-free, and ready for pintucking. Proper preparation is key to achieving neat and professional-looking pintucks.
Step 2: Mark Your Pintuck Lines
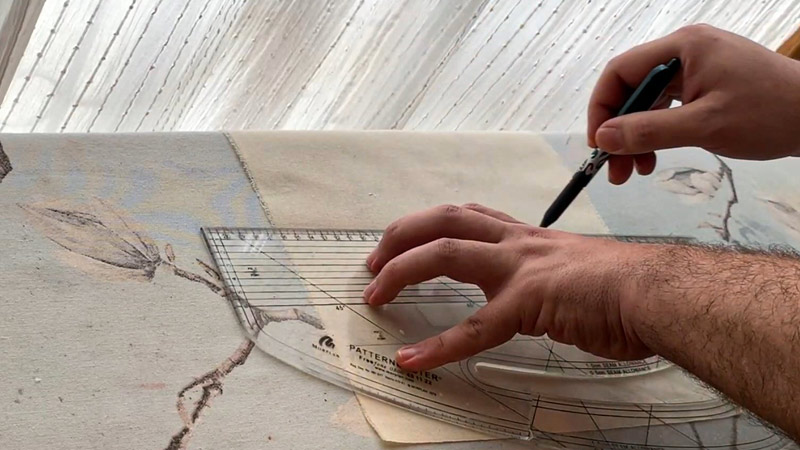
Take your time in this step to plan and mark your pintuck lines precisely. The placement of these lines determines the overall look of your pintucked fabric.
Using a ruler and fabric marking pen or tailor’s chalk, measure and mark the pintuck lines evenly and accurately.
The precision of your markings will be reflected in the final result, so it’s worth the extra effort.
Step 3: Set Up Your Machine
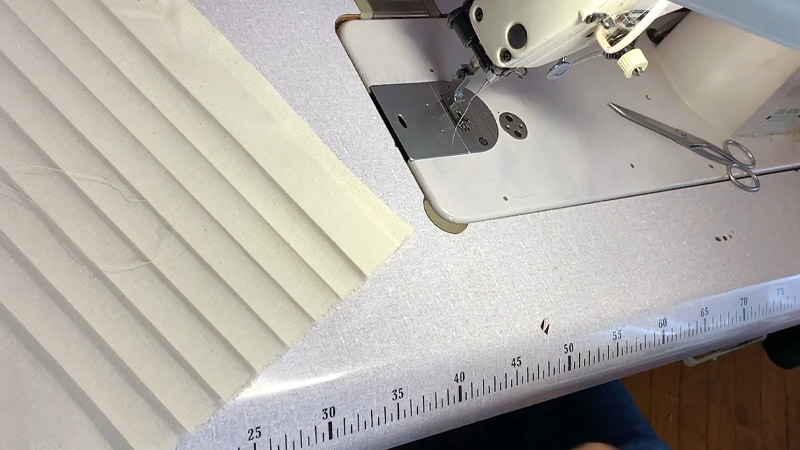
Attach the pintuck foot to your sewing machine. This specialized foot is designed to make creating evenly spaced pintucks a breeze.
If you don’t have a pintuck foot, you can still proceed with a regular presser foot. However, using a pintuck foot ensures greater ease and consistency.
Step 4: Thread Your Machine
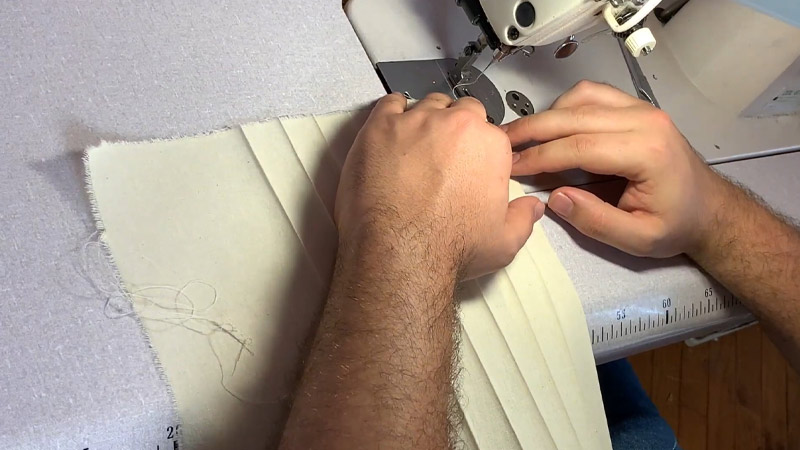
Select a thread color that complements your fabric or adds a decorative element to your design. Threading your machine correctly is essential to prevent issues with thread tension and stitching.
Make sure both the upper thread and bobbin are loaded with the same thread color.
Step 5: Adjust Tension and Stitch Length
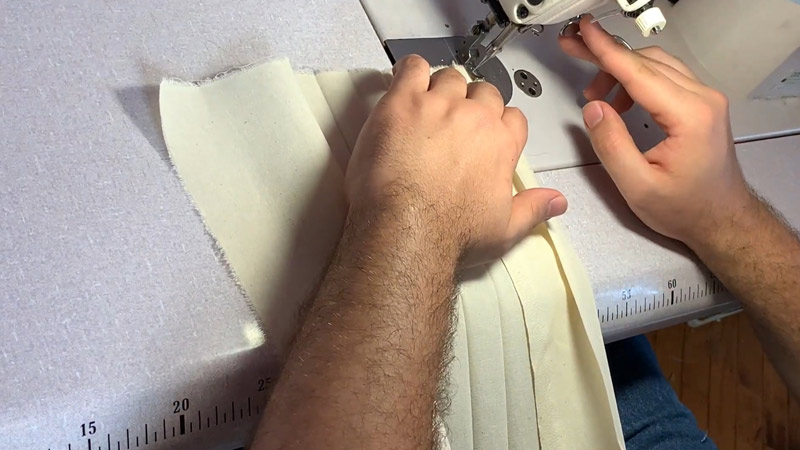
Experiment with your sewing machine’s tension and stitch length settings to achieve the desired pintuck effect.
Pintucks typically require higher tension and shorter stitch lengths to create tight, closely spaced stitches.
Make adjustments as needed and make test stitches on a fabric scrap to fine-tune your settings before moving on to your project fabric.
Step 6: Start Sewing
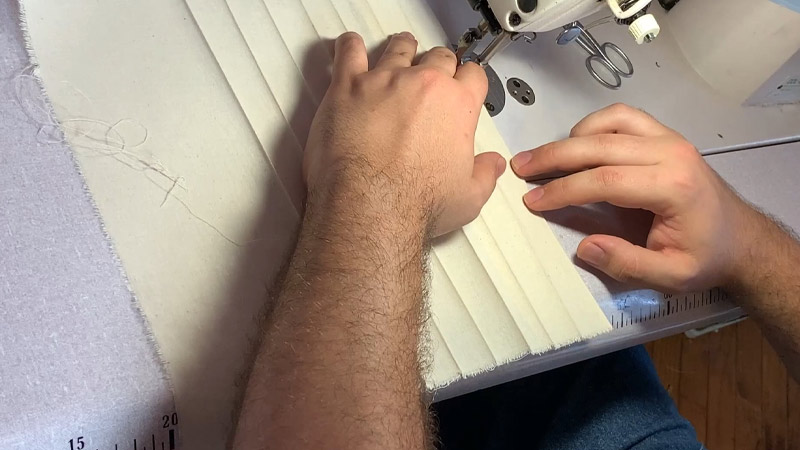
With your machine properly set up, position your fabric under the presser foot. Align the edge of the fabric with the marked pintuck line. Lower the presser foot and begin sewing slowly along the marked line.
Maintain a steady pace and guide the fabric evenly to ensure the pintucks are straight and consistent. Remember to backstitch at the beginning and end of each pintuck to secure the stitches.
Step 7: Continue Sewing
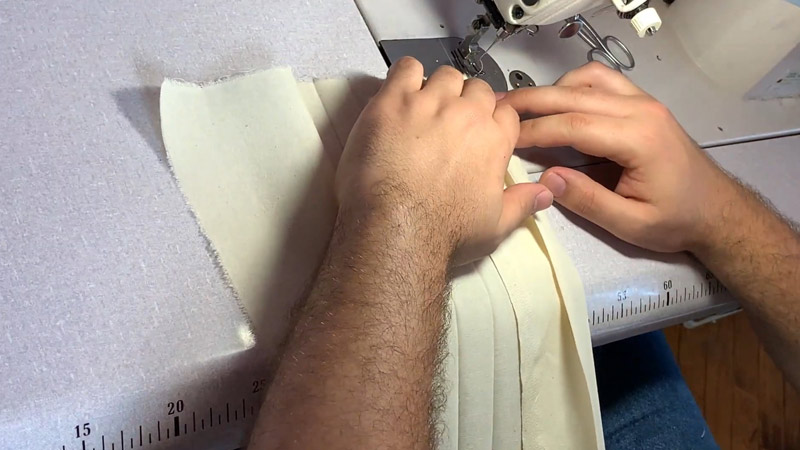
Continue sewing pintucks along all the marked lines on your fabric. Consistency in spacing and stitch quality is essential for a polished final look.
As you repeat this step, you’ll witness the pleasing pattern of pintucks emerging on your fabric, and the repetitive nature of the task can be quite satisfying.
Step 8: Press the Pintucks
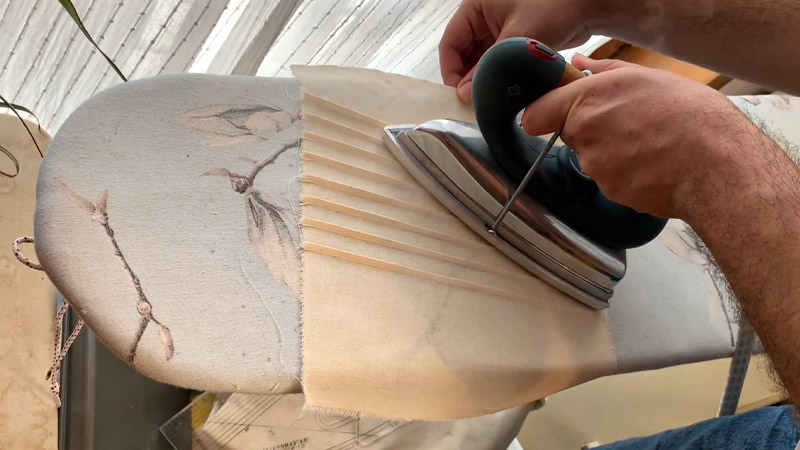
Once all your pintucks are sewn, it’s time to enhance their crispness. Use a hot iron set to the appropriate temperature for your fabric. Gently press the pintucks in the same direction as the pintuck lines.
This pressing step sets the stitches and ensures sharp, well-defined pintucks that elevate the overall appearance of your fabric.
Step 9: Finish Your Project
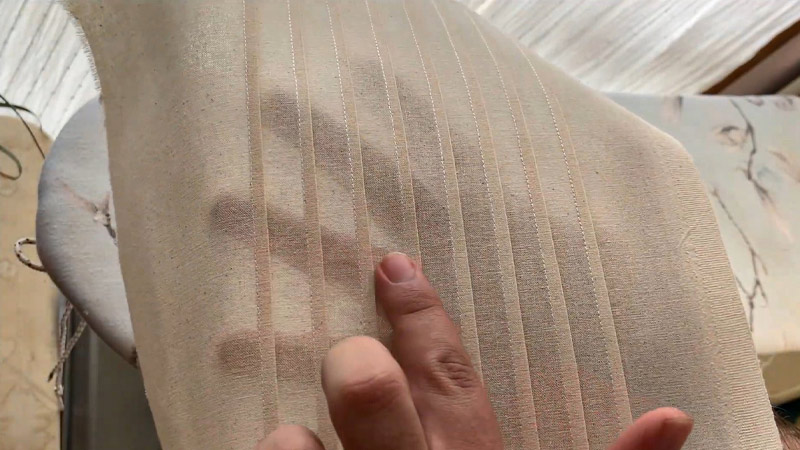
With your pintucks beautifully crafted, you can now proceed with your sewing project.
Whether you’re making a dress, a decorative pillow, or any other creative item, the addition of pintucks adds elegance and sophistication to your finished piece.
Take pride in your craftsmanship and the unique, handmade quality of your creation.
Tips to Sew a Pintuck Perfectly
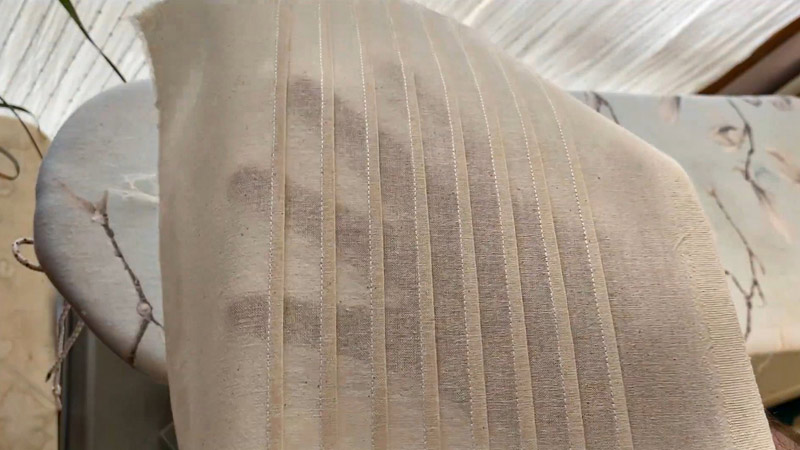
Here are some tips to sew a pintuck perfectly
Use the Right Tools
Choosing the right tools is essential for sewing perfect pintucks. If you have a pintuck foot designed for your sewing machine, it will make the process much easier.
This specialized foot ensures even spacing between pintucks, giving your work a professional appearance.
However, if you don’t have a pintuck foot, don’t worry; you can still achieve excellent results using a regular presser foot. Just be prepared for some extra measuring and precision in guiding your fabric.
Choose the Right Fabric
Selecting the appropriate fabric is crucial. Lightweight materials such as cotton, silk, or linen are ideal for pintucking.
These fabrics hold pintucks well and create elegant, delicate folds. Avoid heavy or thick fabrics, as they can be challenging to pintuck neatly.
Prepare Your Fabric
Fabric preparation sets the foundation for successful pintucks. Always start by washing and pressing your fabric.
Washing removes any sizing or impurities from the fabric and can help prevent shrinkage later on. Pressing ensures your fabric is smooth and free of wrinkles, creating an ideal canvas for your pintucks.
Mark Your Pintuck Lines Carefully
Taking the time to mark your pintuck lines accurately is critical. Use a ruler and a fabric marking pen or tailor’s chalk to create clear, straight lines.
The precision of your markings will directly impact the final appearance of your pintucks, so be meticulous in your measurements and markings.
Adjust Tension and Stitch Length
Experimentation with your sewing machine’s tension and stitch length settings is necessary. Pintucks typically require higher tension and shorter stitch lengths to create tight, closely spaced stitches. Be patient and adjust these settings until you achieve the desired effect.
Practice on Scrap Fabric
Before diving into your main project, practice sewing pintucks on a scrap piece of the same fabric. This allows you to become familiar with your sewing machine settings and the specific pintuck width you want to achieve. It’s a valuable step in refining your technique.
Maintain Even Speed
Maintaining a consistent sewing speed is crucial. Sewing too quickly can result in uneven stitches and spacing between pintucks, while sewing too slowly may lead to a lack of uniformity. Find a pace that works for you and stick to it for the best results.
Backstitch at the Beginning and End
Always remember to backstitch at the beginning and end of each pintuck. This secures the stitches and prevents them from unraveling, ensuring your pintucks remain intact and durable.
Press Pintucks After Sewing
After sewing your pintucks, use a hot iron to press them. Press in the same direction as the pintuck lines, which sets the stitches and creates sharp, well-defined pintucks. Proper pressing is the final touch that enhances the overall appearance of your work.
Consider Decorative Elements
To add a unique touch to your pintucks, experiment with different thread colors or types. Using contrasting thread can create eye-catching and decorative detailing within your pintucks. Don’t be afraid to get creative with your choices.
Stay Patient and Practiced
Sewing perfect pintucks is a skill that develops over time with practice. Don’t be discouraged by initial imperfections.
As you gain experience, your pintucking will become more precise and refined, resulting in beautiful, professional-looking work.
Maintain Consistent Spacing
Consistency in spacing between pintucks is crucial for a polished appearance. Pay close attention to your measurements and make sure each pintuck is equidistant from the next. This attention to detail significantly impacts the final outcome.
Experiment with Pintuck Variations
Once you’ve mastered the basics, don’t hesitate to experiment with pintuck variations. Try creating curved pintucks, angled pintucks, or varying pintuck widths to add creativity and flair to your sewing projects.
These variations can take your work to the next level, allowing you to express your unique style and imagination.
Different Types of Pintuck Styles -Explore and Implement
Pintucks are a versatile and elegant sewing technique that can be adapted to create various styles and effects.
By altering the spacing, width, and arrangement of pintucks, you can achieve a wide range of decorative and functional outcomes.
Here are some different types of pintuck styles to explore:
Classic parallel pintucks are the most common style. These pintucks are evenly spaced and run parallel to each other, creating a clean and sophisticated look. They are often used to add texture and detail to garments, such as blouses and dresses.
Decorative Pinwheel Pintucks
Pinwheel pintucks form a decorative circular or spiral pattern. To create this style, start with a central pintuck and then sew additional pintucks radiating outwards. Pinwheel pintucks are eye-catching and can be used as a focal point on clothing or home decor items.
Curved Pintucks
Curved pintucks follow a gently curving or wavy path instead of a straight line. They add a sense of fluidity and movement to your fabric. Curved pintucks are excellent for creating unique and artistic designs on clothing.
Diagonal Pintucks
Diagonal pintucks are sewn at an angle to the fabric’s grain, forming a diagonal pattern. This style adds visual interest and can be used to create dynamic and asymmetrical designs on garments or accessories.
Angled Pintucks
Angled pintucks are similar to diagonal pintucks but are sewn at specific angles other than 45 degrees. Experimenting with different angles can result in striking geometric patterns and designs.
V-Shaped Pintucks
V-shaped pintucks create a series of inverted V shapes on the fabric. They are often used to embellish collars, cuffs, and other areas of clothing where a delicate yet decorative touch is desired.
Box Pintucks
Box pintucks form a grid-like pattern by intersecting horizontal and vertical pintucks. This style is commonly used on pillowcases, tablecloths, and other home decor items to create a structured and textured appearance.
Diamond Pintucks
Diamond pintucks involve sewing intersecting diagonal pintucks, forming diamond-shaped patterns on the fabric. This style is both elegant and eye-catching and can be used to create a sense of depth and dimension.
Pintuck Panels
Creating panels of pintucks involves sewing parallel pintucks in one section of your fabric while leaving other sections plain.
This approach allows you to combine pintucked and non-pintucked areas for a contrasting and visually appealing effect.
Pintuck Insets
Pintuck insets involve sewing pintucks within a specific shape or area of a larger fabric piece, such as within a neckline or along the edge of a pocket. This style adds a focal point and intricate detailing to your sewing projects.
Graduated Pintucks
Graduated pintucks are spaced closer together at one end and gradually widen or space out towards the other end. This style can create a sense of movement or dimension and is often used on flared skirts or bodices.
Lattice or Grid Pintucks
Lattice or grid pintucks create a pattern resembling a lattice or grid. They can be used to embellish cuffs, collars, or the front of a blouse, giving a structured and textured look.
FAQS
Yes, it’s possible to create pintucks on stretch fabrics like jersey or spandex, but it can be more challenging due to the fabric’s elasticity.
While sewing pintucks by hand is possible, it can be time-consuming and may not yield as consistent results as using a sewing machine.
To add a unique touch to your pintucks, consider using contrasting or metallic threads.
Pintucks are typically narrow, ranging from 1/8 inch to 1/4 inch in width for delicate, subtle detailing.
While straight pintucks are more common, you can create curved pintucks by marking a curved line on your fabric and carefully sewing along it.
To Recap
Mastering the art of sewing pintucks is a gratifying journey that empowers you to infuse your creations with timeless elegance and intricate detailing.
Through meticulous fabric preparation, precise marking, and thoughtful adjustments on your sewing machine, you can craft stunning pintuck designs that elevate your sewing projects to new heights of sophistication.
As you press those final, crisply defined pintucks with care, you’ll witness the transformation of fabric into a work of art.
Whether you’re embellishing clothing, linens, or home decor items, the texture and refinement of pintucks will undoubtedly leave a lasting impression.
So, embrace this skill, nurture your creativity, and let your sewing endeavors shine with the exquisite beauty of pintucks.
Leave a Reply