Sewing your own egg-gathering apron is a delightful and practical project for poultry enthusiasts and homesteaders.
This charming accessory not only adds flair to your chicken-tending attire but also streamlines the process of collecting fresh eggs from your flock.
In this comprehensive guide, we’ll walk you through each step, from selecting the right materials to sewing pockets and creating a comfortable waistband.
By the end of this journey, you’ll have a custom-made apron perfectly suited to your needs and style, making egg collection a breeze and adding a touch of DIY charm to your daily chores. So, let’s thread the needle and start stitching!
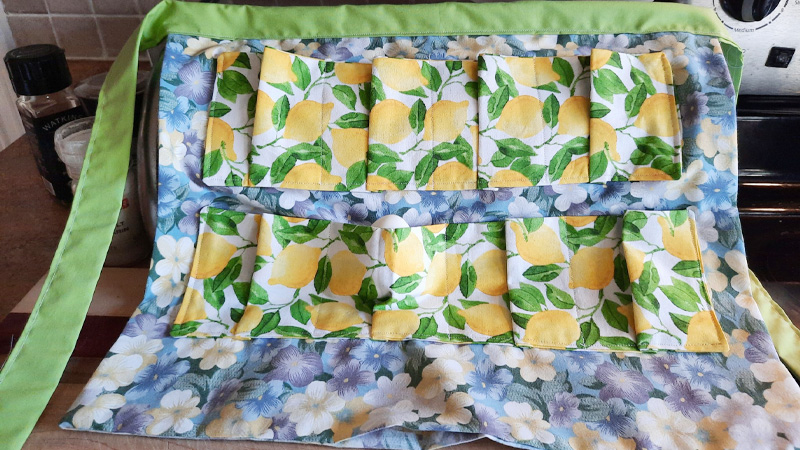
What Is an Egg Gathering Apron?
An egg-gathering apron is a practical and charming accessory for individuals who keep backyard chickens.
This specialized apron is designed to simplify the process of collecting freshly laid eggs.
It typically features multiple pockets strategically sewn onto the front, allowing the wearer to effortlessly gather and transport eggs without the need for additional containers.
Egg-gathering aprons come in various styles, colors, and fabrics, making them both functional and fashionable.
They offer a hands-free solution for chicken keepers, allowing them to focus on their flock while conveniently storing their harvest.
These aprons are not only useful but also add a rustic and homely touch to the attire of those tending to their feathered friends, making them a popular choice among hobbyists and small-scale poultry enthusiasts.
How to Sew an Egg Gathering Apron?
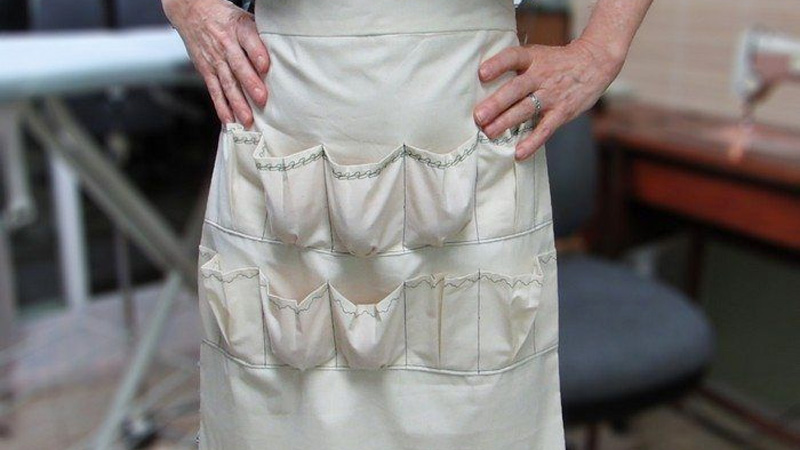
An egg-gathering apron is a practical and charming accessory for any backyard chicken keeper.
It allows you to collect eggs easily and keep your hands free while tending to your flock. Making your own egg-gathering apron is a fun and rewarding sewing project.
In this guide, I’ll walk you through the steps to create your very own egg-gathering apron.
Materials You’ll Need
- Fabric: Choose a sturdy and breathable fabric like cotton or canvas. You’ll need about half a yard, depending on your size and the number of pockets you want. You can mix and match fabrics for a more colorful apron.
- Thread: A strong thread that matches your fabric.
- Sewing Machine: While you can hand-sew your apron, a sewing machine will make the process faster and more precise.
- Scissors: For cutting fabric and thread.
- Measuring Tape: To take measurements and ensure a proper fit.
- Pins: To hold fabric pieces together while sewing.
- Ribbon or Bias Tape: About 2-3 yards for the ties and edges.
Steps to Sew an Egg Gathering Apron:
Step 1: Measure and Cut Fabric
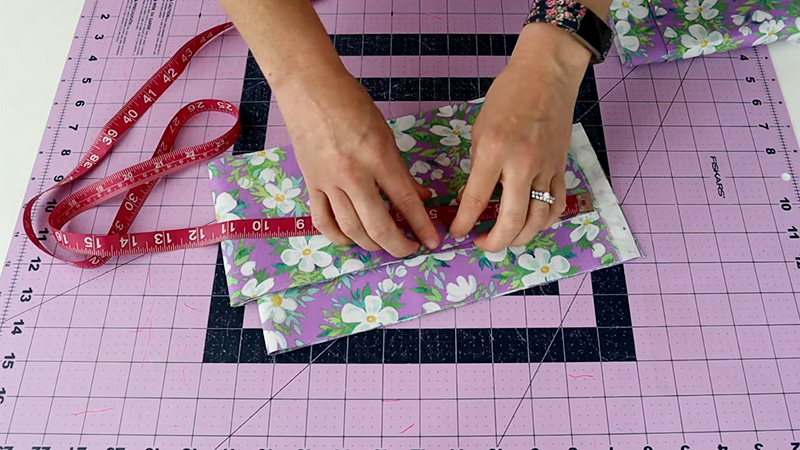
Start by measuring your waist. Add a few inches for comfort and tying a bow or knot.
This measurement will determine the width of your apron. For example, if your waist measures 30 inches, cut a fabric strip that is about 34 inches wide.
For the length, decide how long you want your apron to be. It typically goes from your waist to just above your knees. Add a few inches for seam allowances.
Step 2: Create Pockets
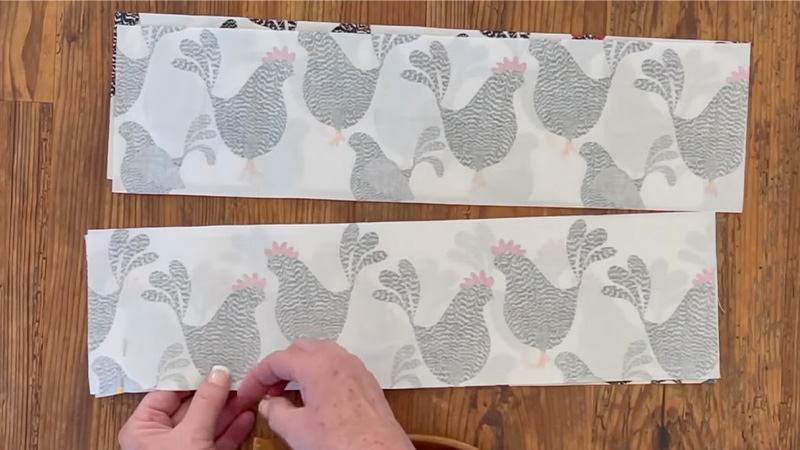
Decide how many pockets you want on your apron. Traditionally, egg gathering aprons have rows of pockets where you can place the eggs.
Cut rectangular pieces of fabric for each pocket, ensuring they are wide enough to comfortably hold an egg and long enough to reach from the top of your apron to the bottom.
Step 3: Attach Pockets
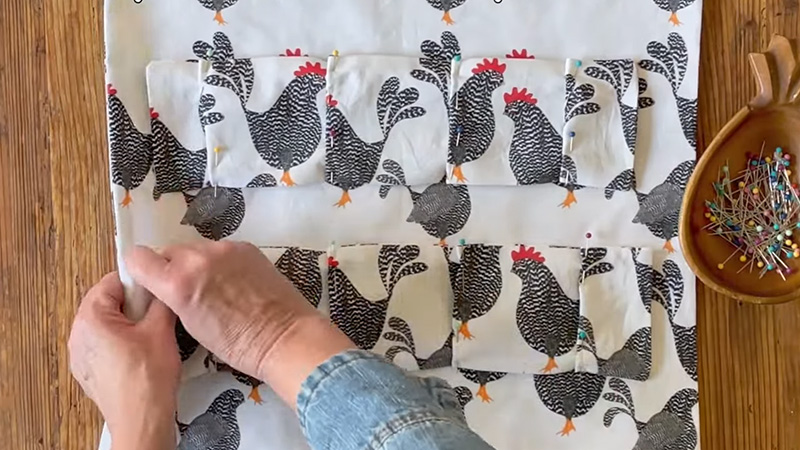
Fold the top edge of each pocket piece over and hem it. Then, pin the pockets onto the main body of the apron, evenly spaced.
Make sure to leave some space between the pockets for ease of use and to prevent overcrowding.
Step 4: Sew Pockets
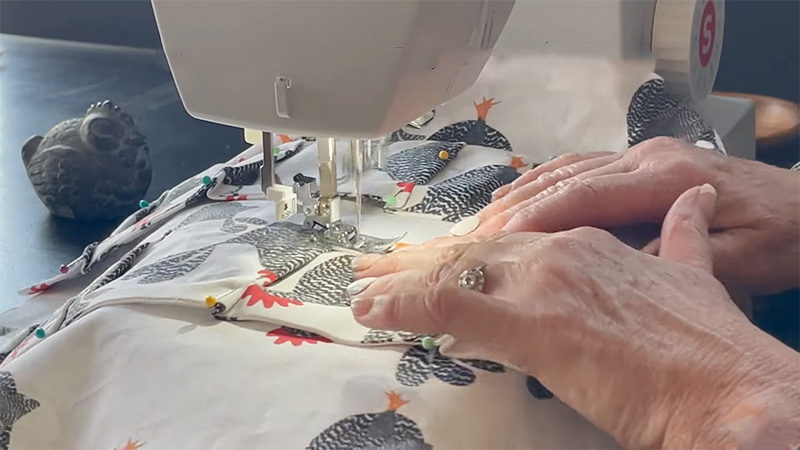
Use your sewing machine or hand-sew to secure the pockets in place. Start by sewing along the sides of each pocket, ensuring that you leave the top open.
A straight stitch or a zigzag stitch will work, depending on your preference and the fabric you’re using.
Reinforce the stitching at the bottom corners to prevent the pockets from tearing over time.
Step 5: Add Ties
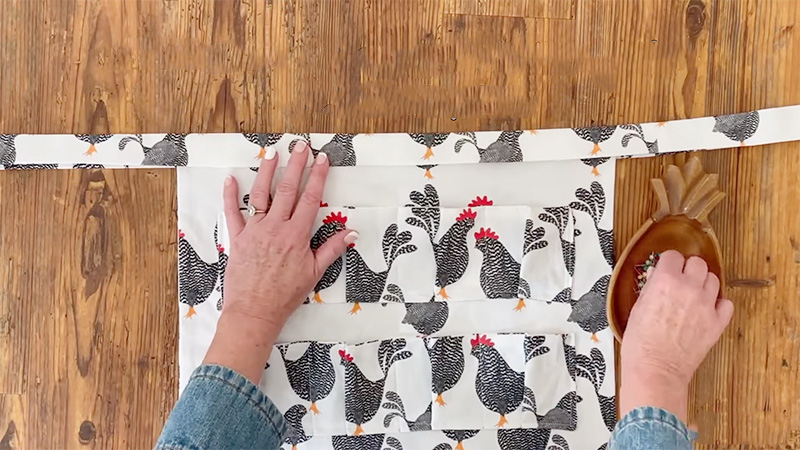
To create the waist ties, cut two long strips of ribbon or bias tape. Attach them to the top corners of the apron’s main body.
These ties will wrap around your waist and secure the apron in place. You can sew them directly onto the fabric or make small loops and attach them.
Step 6: Finish Edges
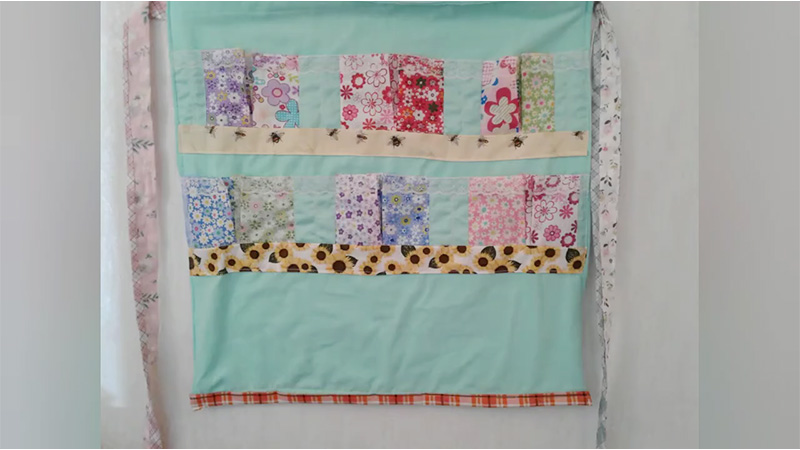
To give your apron a polished and clean look while preventing fraying, you’ll need to finish the raw edges.
Start by folding the ribbon or bias tape over the edge of the fabric and pin it in place.
Ensure that the edges are neatly encased within the tape. Continue pinning the tape along all the edges of your apron, including the sides and bottom.
Step 7: Final Touches
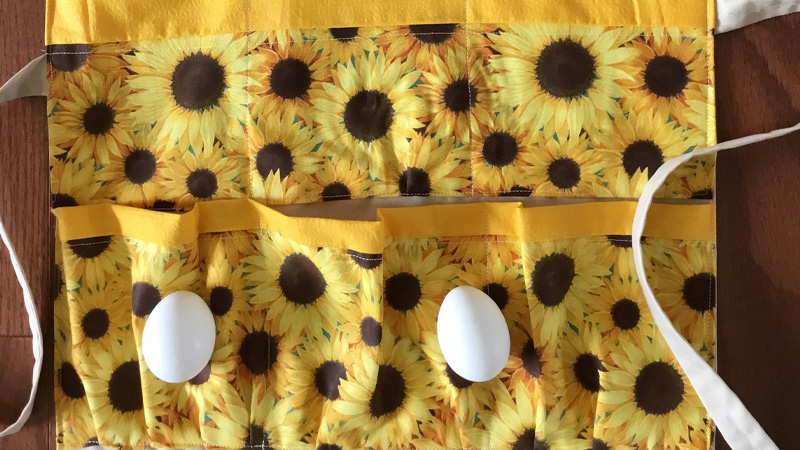
After completing the sewing process, take a moment to admire your handiwork!
But before you’re ready to wear your egg gathering apron, there are a couple of final touches you can add:
Pressing
Use an iron to press the entire apron, especially the pockets and edges. This will remove any wrinkles and creases, making your apron look neat and tidy.
Try It On
Finally, put on your apron and adjust the ties to ensure a comfortable and secure fit around your waist. Tie a bow or knot at the back, and you’re all set to gather eggs in style!
How Do You Make the Waistband for the Apron?
Creating a waistband for your egg-gathering apron is an essential step to ensure a secure and comfortable fit around your waist.
Here’s how to make a waistband for your apron:
Materials You’ll Need
- Fabric strip: You can use the same fabric as your apron or a coordinating one. The length of the strip should be your waist measurement plus a few extra inches for tying a bow or knot, and the width should be about 3-4 inches.
Steps to Make the Waistband:
Measure and Cut the Fabric
Start by measuring your waist and adding a few inches for comfort and tying a bow or knot.
For example, if your waist measures 30 inches, you might want a fabric strip that’s around 36-40 inches long.
The width of the strip should be about 3-4 inches to create a comfortable and supportive waistband. You can adjust the width according to your preference.
Fold and Iron
Fold the fabric strip in half lengthwise with the right sides facing each other, creating a long, narrow strip. This folded strip will be the waistband.
Use an iron to press the fold in place. This will create a crease along the length of the strip.
Sew the Waistband
With the fabric still folded in half lengthwise, sew along the open long edge, leaving the short ends open.
Use a 1/4 inch to 1/2 inch seam allowance. Backstitch at the beginning and end to secure the stitches.
Turn the Waistband Right Side Out
Carefully turn the waistband right side out by gently pulling the fabric through the open ends.
Use a pencil, chopstick, or a turning tool to help push the corners out and make the strip lie flat.
Press the Waistband
Use an iron to press the waistband flat, ensuring the seam is centered along one edge and the folded edge is neat and even.
Attach the Waistband to the Apron
To attach the waistband to your apron, position it at the top edge of the main body of the apron.
The folded edge of the waistband should align with the top edge of the apron, and the open ends of the waistband should extend beyond the sides of the apron.
Secure and Finish
Pin the waistband in place along the top edge of the apron, making sure it’s centered.
Sew the waistband to the apron by stitching along the top edge of the apron, securing the waistband in place. You can sew close to the edge for a clean finish.
Tie Your Apron
After attaching the waistband, tie your apron around your waist, securing it with a bow or knot. Adjust the length of the waistband ties to achieve a comfortable and secure fit.
What Type of Fabric Is Best for Making an Egg Gathering Apron?
The best type of fabric for making an egg-gathering apron is a sturdy and breathable material.
Here are some fabric options that work well:
Cotton
Cotton is a popular choice for egg gathering aprons. It’s breathable, comfortable to wear, and comes in a wide variety of colors and patterns.
Medium to heavy-weight cotton fabrics provide durability and can withstand the weight of collected eggs.
Canvas
Canvas fabric is exceptionally durable and strong, making it an excellent option for aprons that need to hold up to frequent use. It’s a bit heavier than cotton but provides added sturdiness.
Duck Cloth
Duck cloth is a heavyweight cotton fabric known for its durability. It’s a great choice if you anticipate collecting a large number of eggs regularly.
Denim
Denim is another sturdy and long-lasting fabric that works well for egg gathering aprons. It’s especially suitable if you want a rustic or farmhouse look.
Muslin
Muslin is a lightweight, breathable cotton fabric that can work for aprons if you prefer a more lightweight option.
However, for durability, it’s best to use multiple layers or line muslin with a sturdier fabric.
Some Ideas for Adding Embellishments to an Apron
Adding embellishments to your egg gathering apron is a great way to personalize it and make it even more attractive.
Here are some creative ideas and tips for embellishing your apron:
Embroidery
Embroidery is a classic way to add intricate designs, names, or patterns to your apron. You can embroider chicken motifs, your name, or any decorative design you like. Choose thread colors that complement your apron’s fabric for a cohesive look.
Applique
Applique involves attaching pieces of fabric in different shapes and colors onto your apron.
You can create fun shapes like chickens, eggs, or flowers and stitch them onto the apron’s pockets or bib.
Fabric Paint
Fabric paints come in a variety of colors and can be used to add vibrant designs to your apron. You can use stencils or freehand painting to create unique patterns and images.
Ribbon and Lace
Adding ribbons or lace trim can give your apron a charming and feminine touch. You can sew them along the edges or create decorative patterns on the pockets.
Buttons and Beads
Sewing buttons or beads onto your apron can create a whimsical and eye-catching effect. You can use them to outline pockets, create patterns, or even spell out words.
FAQs
You’ll need fabric (cotton or canvas is ideal), thread, scissors, measuring tape, pins, a sewing machine, and ribbon or bias tape for ties and edges.
The number of pockets is a matter of preference. Commonly, aprons have multiple pockets (6-12) for eggs, but you can adjust this to suit your needs and design.
Yes, you can certainly hand-sew an apron, but it may take more time and effort. Make sure to use strong, durable stitches for longevity.
You can embellish your apron with embroidery, fabric paint, appliqué, buttons, lace, patches, or even personalized labels to add a personal touch.
Measure your waist and desired length for the apron to ensure a comfortable fit. Typically, aprons go from the waist to just above the knees, with a few inches added for seam allowances and ties.
To Wrap Up
Crafting your own egg gathering apron is a rewarding endeavor that combines functionality with creativity.
By following the steps outlined in this guide, you’ve learned how to select materials, design pockets, add a waistband, and even embellish your apron to suit your unique style.
As you step into your chicken coop, adorned with your homemade creation, you’ll find egg collection to be more efficient and enjoyable.
Beyond its practicality, this apron embodies the spirit of self-sufficiency and craftsmanship.
It’s a testament to your dedication to tending to your flock and a charming addition to your homesteading repertoire. Happy egg gathering and happy sewing!
Leave a Reply