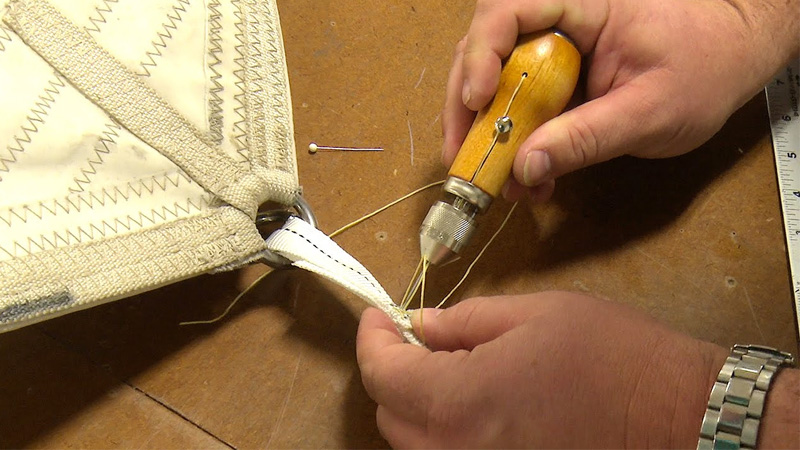
Nylon webbing is a versatile and durable material commonly used for various purposes, from outdoor gear and backpack straps to dog collars and harnesses.
Knowing how to sew nylon webbing by hand can be a valuable skill, allowing you to repair, customize, or create functional and secure connections. In this comprehensive guide, we will walk you through the process of hand-sewing nylon webbing with precision and strength.
Whether you’re an outdoor enthusiast looking to mend a backpack strap, a DIY enthusiast aiming to craft a customized accessory, or simply someone intrigued by the art of hand sewing, this guide is for you.
We’ll cover essential techniques, tools, and tips to help you confidently tackle your next nylon webbing sewing project. So, grab your needle and thread, and let’s dive into the world of hand-sewing nylon webbing to create strong and reliable connections.

How to Sew Nylon Webbing by Hand?
Sewing nylon webbing by hand is a useful skill for various DIY projects, repairs, and customizations. Nylon webbing is a durable, versatile material commonly found in backpacks, pet harnesses, outdoor gear, and more.
In this step-by-step guide, we will walk you through the process of hand-sewing nylon webbing with precision and strength.
Materials You’ll Need
Before you start, gather the following materials. Nylon webbing is the webbing you wish to sew. It comes in various widths and colors.
Choose a strong, durable thread that complements the color of your webbing. Nylon or polyester threads are excellent choices.
Use needles designed for heavy fabrics and strong enough to handle the webbing. A curved upholstery needle can be handy for certain projects.
Sharp scissors for cutting the webbing and thread. Take a measuring tape or ruler for precise measurements and alignment. Lighter (optional) to seal the thread ends.
Measure and Cut the Webbing
Determine the length of nylon webbing you need for your project. Use a measuring tape or ruler to ensure accuracy, and then cut the webbing to the desired length using sharp scissors.
Thread Your Needle
Double-thread your needle by pulling the thread through the needle’s eye and tying a knot at the end. Ensure your thread is long enough for your entire project, but not too long to be unwieldy.
Prepare the Webbing Ends (Optional)
To prevent fraying, you can use a lighter to gently melt the cut ends of the webbing. Be cautious not to burn or overheat the material; a quick pass with the flame should suffice. Allow it to cool before proceeding.
Align and Secure the Webbing
Position the two ends of the webbing you want to join together. Overlap them by about an inch (2.5 cm) to create a strong bond. You can use sewing pins or clips to hold the webbing in place if necessary.
Begin Stitching
Start your stitching by inserting the needle from the underside of the webbing, coming up through both layers where they overlap. This initial stitch secures the webbing together.
Sewing Technique
There are two common hand stitches you can use for sewing nylon webbing. Box stitch is a strong and secure stitch suitable for heavy loads. Insert the needle diagonally across the webbing layers, going from the bottom left to the top right.
Pull the thread tight. Insert the needle from the top right to the bottom left, forming an “X” pattern. Pull the thread tight again. Repeat this process to create a box-shaped pattern.
Running Stitch
This is a simple, straight stitch suitable for lighter applications. Insert the needle through both layers of webbing from one side to the other. Pull the thread tight. Insert the needle back through both layers, repeating the process to create a straight line of stitches.
Stitch Length and Spacing
The length of your stitches and the space between them depend on your project’s requirements. In general, shorter, closely spaced stitches provide greater strength and security.
Secure the End
Once you’ve reached the end of your stitching, insert the needle back through the webbing layers and tie a knot. Ensure the knot is tight and secure.
Use scissors to trim any excess thread, leaving a small tail if desired. You can also use a lighter to melt the thread end slightly, which can help prevent unraveling.
Test the Strength
Before using your hand-sewn webbing for its intended purpose, give it a gentle tug to ensure it’s securely stitched and can handle the load.
For added strength, you can sew a second line of stitching parallel to the first, reinforcing the bond between the webbing layers. When sewing multiple pieces of webbing together, ensure they are properly aligned and secure before stitching.
If your project requires specific patterns or designs, plan your stitching accordingly, and mark your guidelines with chalk or removable fabric markers.
Now that you’ve learned how to hand sew nylon webbing, you can confidently tackle a wide range of DIY projects, repairs, and customizations.
This skill allows you to create durable and reliable connections in your gear, accessories, and outdoor equipment, making them ready for your next adventure.
What Is the Best Needle for Sewing Nylon Webbing?

The best needle for sewing nylon webbing is one that is specifically designed for heavy fabrics and can handle the thickness and durability of nylon webbing. Here are two types of needles that work well for sewing nylon webbing:
Heavy-duty sewing Machine Needle (for machine sewing)
If you’re using a sewing machine to sew nylon webbing, you should use a heavy-duty sewing machine needle. Look for needles labeled as “Heavy-Duty” or “Denim/Jeans” needles.
These needles are designed to handle thick and heavy fabrics, including nylon webbing. They have a stronger, thicker shaft and a larger eye to accommodate thicker threads.
Upholstery or Canvas Hand-Sewing Needle (for hand sewing)
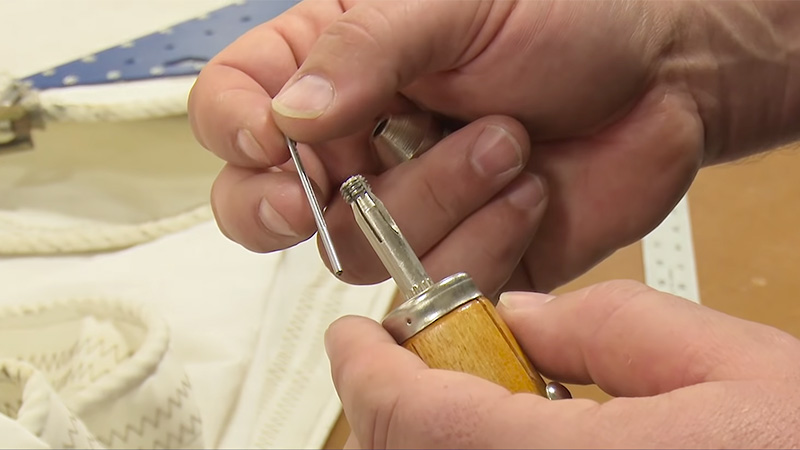
When sewing nylon webbing by hand, choose a heavy-duty needle designed for upholstery or canvas work. These needles have a thicker and sharper point, making it easier to penetrate tough fabrics like nylon webbing.
Some upholstery needles are curved, which can be helpful for certain projects, allowing you to sew in tight or awkward spaces.
When selecting the needle, consider the thickness of the nylon webbing and the type of thread you plan to use. If you’re sewing multiple layers of webbing or working on a particularly thick piece, you may want to opt for a larger needle size.
Always test your chosen needle on a scrap piece of webbing to ensure it can penetrate and sew smoothly before starting your project.
What Is the Best Stitch for Webbing?
The best stitch for webbing depends on the specific project and its intended use. Two common and effective stitches for sewing webbing are the “Box Stitch” and the “Bar Tack Stitch.” Here’s a breakdown of each stitch and when to use them:
Box Stitch`
The box stitch is known for its exceptional strength and durability, making it ideal for applications where webbing will be subjected to heavy loads or stress. It forms a square or rectangular pattern, which is both functional and visually appealing.
Box stitches are commonly used for securing straps, handles, and load-bearing webbing in backpacks, harnesses, belts, and outdoor gear.
Start with a diagonal stitch, then sew parallel lines on each side to create a square or rectangular shape. Repeat this pattern for added strength.
Bar Tack Stitch
Bar tack stitches are also very strong and suitable for reinforcing stress points in webbing. They appear as a cluster of closely spaced stitches at a single point, creating a “tack” or bar-like pattern.
Bar tack stitches are often used at the end of straps, on loops, and at attachment points in gear, such as climbing harnesses and tactical equipment.
Begin by sewing a straight line of closely spaced stitches at the desired point. Reverse the machine (if using a sewing machine) and sew back over the same line to reinforce the stitches. Repeat this process to create a sturdy bar tack.
When choosing between these stitches, consider the specific application and load-bearing requirements. For critical load-bearing points or where exceptional strength is needed, opt for the box stitch.
For reinforcing attachment points or creating loops, the bar tack stitch can be highly effective. In some cases, a combination of both stitches may be used for added security.
Always test your chosen stitch on a scrap piece of webbing before working on your actual project to ensure it meets your strength and appearance requirements. Additionally, adjust the stitch length and thread tension as needed to achieve the desired results.
FAQs
Can I use a regular sewing needle to sew nylon webbing?
It’s not advisable to use a regular sewing needle for nylon webbing. Nylon webbing is a thick and durable material that requires a heavy-duty needle designed for heavy fabrics. Regular sewing needles may break or bend when attempting to sew through nylon webbing.
What type of thread is best for sewing nylon webbing?
The best thread for sewing nylon webbing is a strong and durable thread made of materials like nylon or polyester. These threads are resistant to wear, abrasion, and UV damage, making them ideal for outdoor and heavy-duty applications.
Can I sew nylon webbing by hand using a regular sewing needle?
While it’s possible to hand-sew nylon webbing using a regular sewing needle, it’s not recommended for most projects. Nylon webbing is tough and may be difficult to penetrate with a standard needle.
To achieve secure and reliable stitches, it’s better to use heavy-duty upholstery.
What’s the difference between a box stitch and a bar tack stitch?
A box stitch forms a square or rectangular pattern and is suitable for securing straps and load-bearing webbing. A bar tack stitch appears as a cluster of closely spaced stitches at a single point and is commonly used to reinforce attachment points and loops.
Are there any special techniques for sewing webbing with a sewing machine?
When sewing webbing with a sewing machine, use a heavy-duty needle and a strong thread. Adjust the machine’s settings, including stitch length and tension, to accommodate the thickness of the webbing. Ensure that you backstitch at the beginning and end of each seam.
Conclusion
Mastering the art of hand-sewing nylon webbing opens up a world of possibilities for crafting, repairing, and customizing various functional items. Throughout this guide, we’ve delved into the essential techniques and steps required to create strong and secure connections with nylon webbing.
Whether you’ve sewn a sturdy strap for outdoor gear, repaired a pet’s harness, or designed a unique accessory, your newfound skills in hand-sewing nylon webbing empower you to take on a wide range of projects.
As you embark on your sewing endeavors, remember that practice makes perfect. Experiment with different stitches, thread types, and webbing widths to expand your expertise. With time, your ability to create reliable and durable connections will only grow.
Now, armed with the knowledge and skills you’ve gained, you’re ready to confidently sew nylon webbing by hand, making your projects more functional, stylish, and personalized.
Leave a Reply