Unlock the power of precision crafting with Cricut Design Space’s “Slice” tool. Whether you’re a seasoned DIY enthusiast or just starting your creative journey, slicing is a vital skill for creating custom designs with your Cricut machine.
Slicing in Cricut Design Space allows you to precisely cut, merge, and manipulate images and text to create custom designs for a wide range of projects.
So, how to Slice in Cricut Design Space? In this guide, we’ll take you through the step-by-step process of using the Slice tool to cut, merge, and manipulate images and text like a pro.
Whether you’re looking to make intricate paper crafts, personalized apparel, or stunning home decor, you’ll discover that slicing in Cricut Design Space opens up a world of possibilities.
Join us as we dive deep into this versatile feature, and soon you’ll be crafting with a level of precision and creativity you never thought possible.

How to Slice in Cricut Design Space? 7 Steps
Let’s learn how to use the Slice tool in Cricut Design Space. You’ll know how to separate and combine different elements, customize designs, and create intricate projects like a pro.
Step 1: Accessing Cricut Design Space
Now, let’s delve into the process of slicing in Cricut Design Space. If you’re not already logged in, log into your Cricut Design Space account. Make sure your Cricut machine is connected and powered on. Click on “New Project” to start a new design canvas.
Step 2: Uploading or Selecting Images
If you have your own designs or images you want to slice, click on the “Upload” button on the left-hand panel. You can upload PNG, JPG, SVG, or other compatible file types.
If you’re working with Cricut Access or Cricut images, click on “Images” to explore the vast Cricut library and select the images you want to use.
Once you’ve uploaded or selected your images, click “Insert Images” to add them to your canvas.
Step 3: Position and Overlap Images
Position the images on your canvas as you desire. You can resize, rotate, and arrange them to create your custom design. Overlapping elements that you want to slice is crucial.
Click and drag your mouse to select all the overlapping elements you want to slice. You can hold down the “Shift” key while clicking to select multiple elements.
Step 4: The Slice Tool
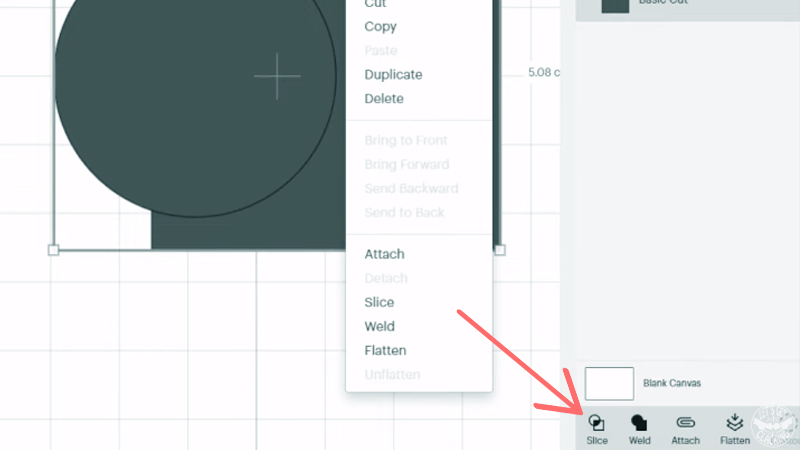
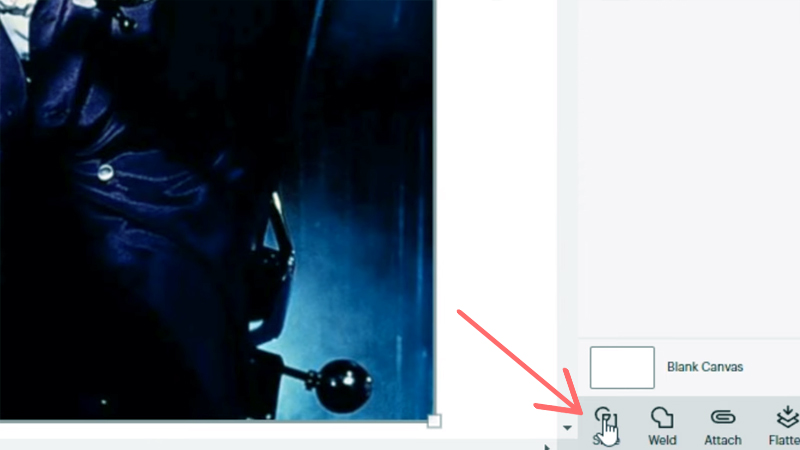
In the bottom right corner of your Layers panel, click on the “Slice” button. This button will only be active (not grayed out) when you have selected at least two overlapping elements.
After clicking the “Slice” button, Cricut Design Space will process the slice action. This will separate the selected elements, creating new layers for each section that was sliced.
Step 5: Remove Unwanted Elements
Click on and delete the sections or elements that you don’t want in your design. You can do this by selecting the element and pressing the “Delete” key on your keyboard or using the “Delete” option in the right-click menu.
Step 6: Customize Your Design
Now that your elements are separated, you can reposition and modify them as needed. This gives you full control over the placement and style of your design.
If you want to maintain the positioning of certain elements, you can group or attach them to ensure they are cut or drawn together. Grouping keeps elements together for layout purposes, while attaching ensures they stay in the same location during cutting.
Step 7: Ready to Make It
Once you’re satisfied with your design, click the “Make It” button to proceed to the cutting or drawing phase. Follow the prompts in Cricut Design Space to select your materials, cutting settings, and machine operations.
Load your standard grip cutting mat with your chosen material into your Cricut machine. Then, follow the on-screen instructions to cut your design.
Tips and Tricks
Practice Makes Perfect
Slicing in Cricut Design Space may take some practice. Don’t be discouraged if your first few attempts aren’t flawless. As you experiment and learn, your slicing skills will improve.
Use Contour and Save
The Contour tool is a great companion to slicing. It allows you to hide or show specific parts of an image, enabling even more customization.
Don’t forget to save your projects in Cricut Design Space. You can also share your designs with the Cricut community or save them for future use.
Duplicate and Offset
To create shadow or offset effects around your sliced elements, consider duplicating the layers, changing their size or color, and layering them behind your main design. With a bit of patience and practice, you’ll become a slicing pro in no time.
Explore the Weld Tool
The Weld tool can be used to combine multiple shapes or text into one cohesive element. This is especially useful when working with script fonts or intricate designs.
Altogether, Slicing in Cricut Design Space empowers you to create personalized, intricate, and unique designs for a wide range of projects.
Can You Slice Multiple Images on Cricut?

In Cricut Design Space, you can indeed slice multiple images at once. The Slice tool allows you to create complex designs by separating multiple overlapping elements or shapes simultaneously.
Slicing multiple images can help you achieve intricate and customized designs for a wide range of crafting projects. Here’s a step-by-step guide on how to slice multiple images in Cricut Design Space:
Step 1: Access Cricut Design Space
Open Cricut Design Space on your computer or mobile device. Start a new project by clicking “New Project.” To add the images you want to slice, click on the “Images” option in the left-hand panel.
Browse and select the images you’d like to use from Cricut’s library or any uploaded images you have. Click “Insert Images” to add them to your canvas.
Step 2: Position and Overlap Images
Arrange the images on your canvas, positioning them as you desire for your design. You can resize, rotate, and align them as needed.
Ensure that the images you want to slice overlap in the areas where you want to create custom cutouts or shapes. Overlapping is key to using the Slice tool effectively.
Step 3: Select and Slice Multiple Images
Click and drag your mouse to select all the overlapping images you want to slice. You can hold down the “Shift” key while clicking to select multiple elements.
Once you’ve selected the images, go to the “Layers” panel on the right side of the screen. You should see all the selected images listed in this panel.
At this point, the “Slice” button at the bottom right corner of the “Layers” panel should be active (not grayed out). Click on the “Slice” button to execute the slicing action.
Step 4: Remove Unwanted Sections
After you’ve used the Slice tool, the selected images will be separated into individual sections, each represented as its own layer in the “Layers” panel.
To remove unwanted sections or elements from your design, click on the section or element you want to delete in the “Layers” panel, and then press the “Delete” key on your keyboard or use the “Delete” option in the right-click menu.
Step 5: Customize Your Design
With your multiple images successfully sliced and the undesired sections removed, you now have full control over customizing your design. You can reposition and modify the sliced elements as needed.
Group or attach specific elements if you want to maintain their placement relative to one another during the cutting or drawing process.
Step 6: Ready to Make It
Once you’ve perfected your design, click the “Make It” button to proceed to the cutting or drawing phase. Follow the on-screen instructions in Cricut Design Space to select your materials, cutting settings, and machine operations.
Load your standard grip cutting mat with the chosen material into your Cricut machine, and follow the prompts to cut your customized design.
FAQs
What is the difference between “Flatten” and “Attach” in Cricut Design Space?
The “Flatten” feature combines selected design elements into a single, printable or cuttable image. “Attach” keeps elements in their exact positions on the canvas, ensuring they cut or draw in the desired arrangement.
Why is my Flatten button grayed out in Cricut Design Space?
The Flatten button is grayed out when the selected elements can’t be flattened due to the complexity of the design or the presence of incompatible elements like text or grouped layers. Make sure to select elements that are eligible for flattening.
Can I unflatten a design in Cricut Design Space?
No, you can’t directly unflatten a design in Cricut Design Space. Once you’ve used the Flatten feature, the elements are merged into a single layer. If you wish to make changes, you’ll need to start over with the original, unflattened elements.
Can I flatten images with different colors in Cricut Design Space?
Yes, you can flatten images with different colors. When you flatten them, they’ll merge into a single layer. Keep in mind that the colors may be retained if you intend to print the design. If you plan to cut, the merged image will be a single color.
How do I avoid white lines or borders when using the Flatten feature for print and then cut in Cricut Design Space?
To avoid white lines or borders around your print then cut design, ensure that your uploaded images are in high-resolution formats, like PNG or JPG. Additionally, use a bleed option if available to extend the image slightly beyond the cut line to prevent these lines from appearing.
Conclusion
Mastering the art of slicing in Cricut Design Space offers you unparalleled creative freedom. With this powerful tool, you can craft personalized, intricate, and unique designs that will leave a lasting impression.
Whether you’re transforming simple materials into extraordinary creations or customizing your world with precision, slicing opens the door to endless possibilities.
As you continue your crafting journey, remember that practice and experimentation are your greatest allies. Don’t hesitate to explore new ideas and push the boundaries of your creativity.
With each project, you’ll gain more confidence and expertise, making your crafting experience even more enjoyable.
So, armed with the knowledge and skills you’ve gained from this guide, step confidently into your next project.
Whether it’s a beautifully embellished card, a custom-designed shirt, or a one-of-a-kind home decor piece, you now have the tools to bring your vision to life with Cricut’s slicing feature.
Leave a Reply