Slipping a stitch in knitting is akin to wielding a brush in painting, an essential technique that imparts texture, structure, and creativity to your fabric canvas.
This deceptively simple maneuver involves transferring a stitch from one needle to another without knitting it, yielding various effects from neat edges to intricate patterns.
Understanding when to slip a stitch purlwise or knitwise is fundamental to executing various designs. It’s a technique that both beginners and seasoned knitters alike will find invaluable in their repertoire.
This guide’ll delve into the art of slipping stitches, unraveling their nuances, and showcasing how this skill can elevate your knitting projects to new heights.

What Does It Mean to Slip a Stitch in Knitting?
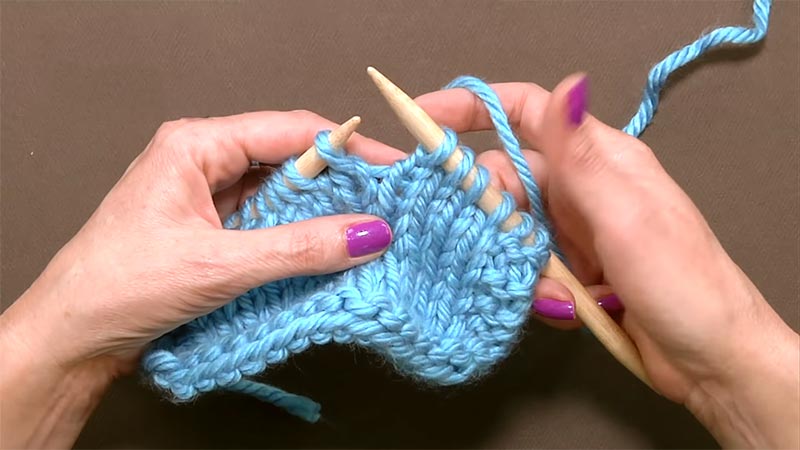
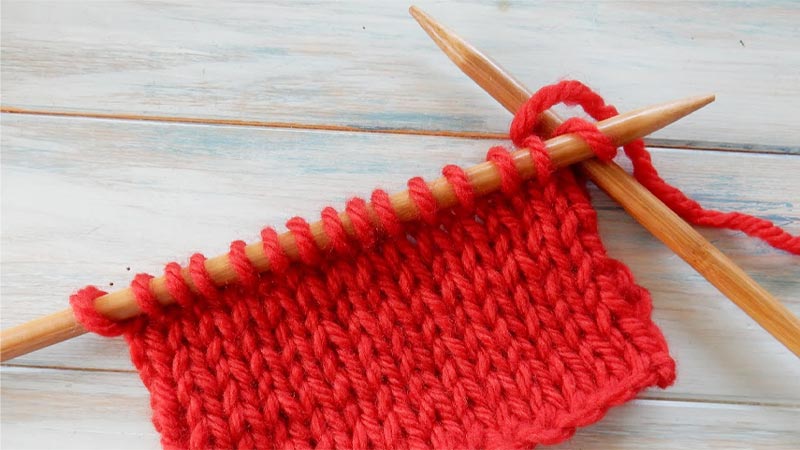
To “slip a stitch” in knitting means to transfer a stitch from one needle to the other without knitting it. This technique is used for various purposes, like creating a smooth edge, altering the texture of the fabric, or setting up intricate stitch patterns.
There are two common methods: slipping purlwise and slipping knitwise. When slipping purlwise, the needle is inserted as if to purl, and the stitch is moved. When slipping knitwise, the needle is inserted as if to knit.
Both methods involve moving the stitch without actually working it. This simple action allows knitters to introduce new textures and patterns into their creations, expanding the range of possible designs.
How to Slip a Stitch in Knitting? Step-By-Step Guide
Slipping a stitch in knitting is a technique used to create texture, change the direction of a stitch pattern, or move a stitch from one needle to the other without knitting or purling it. It’s a fundamental skill that every knitter should learn.
Here’s a step-by-step guide on how to slip a stitch in knitting:
Materials Needed:
- Knitting needles
- Yarn
Steps:
Hold Your Needles
Begin by holding your knitting needles comfortably in your hands. Having a relaxed grip is important to prevent hand strain during your knitting session.
Your right hand should hold the needle with the stitches you intend to slip, and your left hand should hold the empty needle (if applicable). Ensure your working yarn is attached to your knitting, either from a skein or a ball of yarn.
Identify the Stitch
Examine your knitting closely to pinpoint the specific stitch you want to slip. It should be positioned on the left needle, awaiting further action.
Insert Your Right Needle
Insert the tip into the first stitch on your left needle with your right knitting needle. The motion should resemble preparing to knit. Carefully slide your right needle from left to right into the chosen stitch.
Don’t Knit or Purl
This is a key distinction from standard knitting techniques. Remember that you are not actively knitting or purling a stitch when slipping it.
Instead, gently slide the selected stitch from the left needle to the right needle without altering its structure or performing any yarn manipulations. The stitch moves from the left needle to the right needle, untouched.
Keep Tension Consistent
Maintaining consistent tension is essential for achieving a polished appearance in your knitting. Pay attention to the tension of the working yarn as you slip the stitch.
Aim for an even and smooth transition to ensure that the slipped stitch blends seamlessly with the surrounding stitches.
Continue the Pattern
Depending on your knitting pattern, you may encounter varying instructions for slipping stitches. Always adhere to the pattern’s guidelines regarding how to slip the stitch. Some patterns may specify slipping purlwise or knitwise, as detailed below:
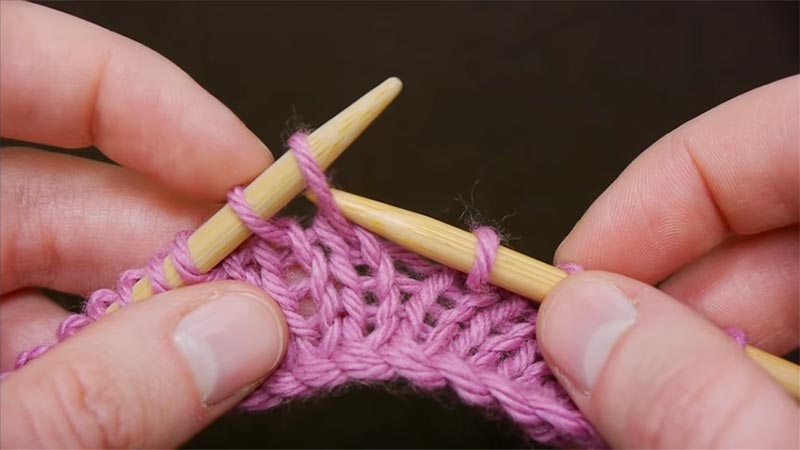
- Slipping Purlwise: To slip a stitch purlwise, insert your right needle from right to left into the stitch, then smoothly slide it from the left needle to the right without performing any knitting or purling action.
- Slipping Knitwise: To slip a stitch knitwise, insert your right needle from left to right into the stitch, then gently slide it from the left needle to the right without any knitting or purling.
Follow Pattern Instructions
Always prioritize adhering to the pattern instructions. If your pattern specifies how to slip a stitch, make sure to execute it precisely as directed. Accurate adherence to the pattern ensures that your project maintains its intended design and texture.
Continue Knitting
After successfully slipping the designated stitch, follow your pattern’s instructions and knitting the remaining stitches in the row.
Slipping a stitch can be employed as part of your knitting toolkit to enhance various aspects of your projects, including creating unique textures and patterns.
When Should You Slip a Stitch Purlwise or Knitwise?

The decision to slip a stitch purlwise or knitwise depends on the specific knitting pattern or technique being used.
Here are some general guidelines:
Slipping Purlwise:
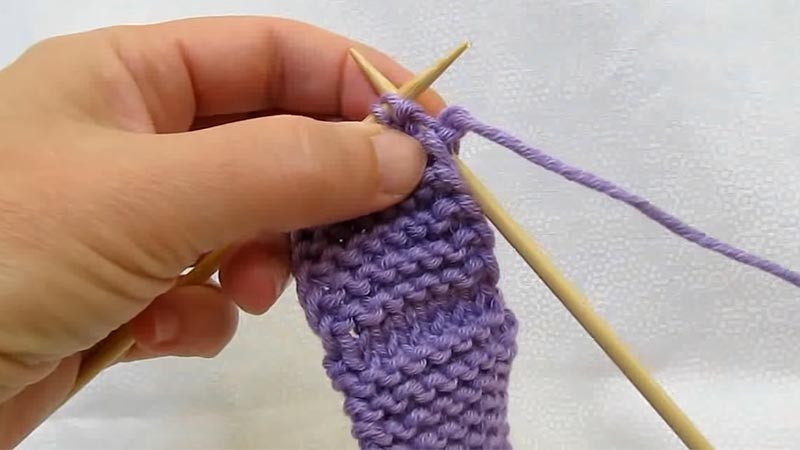
- Maintaining Edge Stitches: Slipping purlwise is common when creating a neat edge, especially in patterns like garter stitch or ribbing. This method creates a smooth, tidy edge on the right side of the fabric.
- Creating Decorative Edges: Some patterns call for slipping stitches to create a decorative border. Slipping purlwise often produces a more refined edge suitable for this purpose.
- Setting Up for Decreases: In certain cases, when preparing for a decrease like a knit-two-together (k2tog) or slip-slip-knit (ssk), you may need to slip a stitch purlwise to orient the stitch correctly for the decrease.
Slipping Knitwise:
- Twisted Stitches: When you want to create a twisted stitch effect, such as in certain cable patterns or brioche knitting, you may need to slip the stitch knitwise. This twists the stitch on the needle, altering its orientation.
- Changing Stitch Patterns: If a pattern calls for a change in stitch pattern, it may instruct you to slip a stitch knitwise. This can be part of the design, creating texture or shaping.
- Setting Up for Increases: Similar to decreases, if you’re preparing for an increase like a yarn over (yo), slipping knitwise can help orient the stitch correctly.
7 Common Uses of Slipping Stitches

Slipping stitches in knitting have several common uses, each of which can add unique textures, patterns, or functionality to your knitting projects.
Here are some common uses of slipping stitches in knitting:
1. Creating Texture
Slipping stitches is a highly versatile technique in knitting, allowing you to add depth and texture to your projects.
For instance, the basketweave pattern is achieved by strategically slipping stitches, resulting in a fabric resembling a basket’s interwoven strands.
On the other hand, the linen stitch alternates between slipped stitches and knits or purls, creating a dense and visually appealing fabric with a textured, woven appearance.
2. Shaping Techniques
Showing is crucial in knitting to achieve a garment’s desired fit and form. Short rows, a technique that involves knitting only a portion of the stitches in a row, are frequently used for shaping.
Slipping stitches at specific points along the row allow you to create curves, angles, and contours, making short rows essential for shaping projects like sock heels, shoulders, or seamless garment construction.
3. Colorwork
Slipping stitches is a fundamental technique in various colorwork methods. Mosaic knitting, for example, utilizes slipped stitches to create intricate color patterns.
Slipping stitches from one needle to the other without knitting them can effectively carry one color over another, resulting in a visually stunning fabric.
This technique provides a simpler alternative to stranded colorwork, making it accessible to knitters of varying skill levels.
4. Preventing Color Bleeding
In stranded colorwork, where multiple colors are used in a single row, it’s important to maintain clear and distinct color separation.
Slipping stitches helps prevent colors from bleeding into one another, ensuring that each shade maintains its vibrant and defined appearance. This technique is especially crucial in projects with intricate colorwork patterns.
5. Buttonholes
Creating functional and aesthetically pleasing buttonholes is an essential skill in knitting. Slipping stitches in a specific sequence and then binding them off allows for creating neat and sturdy buttonholes.
This technique ensures that the buttonholes seamlessly integrate into the overall design of your project, providing both form and function.
6. Edging and Selvages
The first stitch of each row is often slipped to create a polished and tidy edge. This technique is particularly useful in projects like scarves, blankets, or shawls, where a clean and finished edge enhances the overall appearance.
By consistently slipping the first stitch, you create a smooth border that complements the main body of the fabric.
7. Texture Contrast
Integrating slipped stitches with other stitch patterns, such as ribbing or cables, introduces a captivating contrast in texture. For example, combining slipped stitches with a ribbed pattern creates a visually dynamic fabric with alternating textures.
This technique adds depth and visual interest to your knitting, making it especially effective for projects like scarves, cowls, or blankets.
Further Tips and Tricks for Knitting Success

With its rich tapestry of techniques, knitting offers a world of creative possibilities. One such technique that opens up a realm of design options is “slipping stitches.”
Whether you’re a beginner or a seasoned knitter, mastering this skill can add a touch of elegance and versatility to your projects.
Here are some valuable tips and tricks to help you make the most of this intriguing technique:
Mind Your Tension
Achieving the right tension in your knitting is like finding the perfect balance. It’s not too tight nor too loose.
Practice finding that sweet spot where your stitches are even and consistent. Don’t be discouraged if it takes some time to get it right; it’s a skill that develops with experience.
Use Stitch Markers
Stitch markers are invaluable tools, especially in intricate patterns. They help you track where specific stitches or sections begin and end.
Place them at key points in your pattern, like the start of a round or where a specific stitch pattern begins. This ensures you don’t lose your place in more complex projects.
Count Your Stitches
Regularly counting your stitches is akin to taking stock of your progress. It’s a preventive measure that can save you from unraveling significant portions of your work due to unnoticed mistakes.
Counting becomes particularly crucial for complex patterns, preventing any major disruptions to your flow.
Read Your Knitting
Being able to ‘read’ your stitches is like deciphering a code. Each type of stitch leaves a distinct mark.
Knowing what a knit stitch looks like versus a purl stitch allows you to identify early mistakes. This skill is a game-changer when it comes to troubleshooting your work.
Embrace Lifelines
Lifelines are a safety net for your knitting projects. They involve threading a length of contrasting yarn through a row of stitches.
When you make a mistake and need to unravel, the lifeline prevents your work from unraveling all the way down. It’s a small step that can save you from a major headache.
Practice Good Posture
Knitting for extended periods can take a toll on your body. Sit in a chair with good back support, and ensure your neck and shoulders are relaxed.
Take regular breaks to stretch and move around. Proper posture keeps you comfortable and helps you knit more efficiently.
Organize Your Yarn
A tangled mess of yarn can lead to frustration and slow progress. Invest in tools like yarn bowls, bags, or organizers to keep your yarn tidy and untangled. This saves time and helps you focus on your knitting without constant interruptions.
Experiment with Yarn Weights and Fibers
Different yarns offer unique textures, drapes, and warmth. Explore a variety of yarn weights and fiber types to see how they affect your projects.
This experimentation can lead to stunning and unexpected results, allowing you to personalize your creations truly.
Blocking is Key
Blocking is the finishing touch that transforms your project from “good” to “professional.”
It involves wetting your finished piece and shaping it to the desired dimensions. This smooths out any uneven stitches and gives your work a polished look.
Join a Knitting Community
Connecting with other knitters in person or through online communities provides a wealth of support, inspiration, and camaraderie. It’s a wonderful way to share ideas, troubleshoot challenges, and celebrate your knitting achievements together.
Stay Patient and Persistent
Like any skill, knitting takes time to master. Don’t be discouraged by mistakes or slow progress.
When something doesn’t turn out as expected, consider it a learning experience and an opportunity to improve. Remember, every seasoned knitter was once a beginner, too.
Have Fun and Be Creative
Knitting is an art form, and you’re the artist. Play with colors, experiment with different stitch patterns, and let your imagination run wild. Your unique touch will make your projects special and reflect your style.
FAQs
Can I slip a stitch with any knitting needle?
Yes, you can slip a stitch with any knitting needle, whether it’s straight, circular, or double-pointed.
Is slipping a stitch the same as dropping a stitch?
Slipping a stitch means transferring it from one needle to another without working it. Dropping a stitch, on the other hand, is an accidental loss of a stitch from the needle.
Do I need to slip stitches in every knitting pattern?
No, slipping stitches is a technique used in specific patterns or situations. It’s not a universal step in every knitting project.
Can I use a crochet hook to slip a stitch?
Yes, you can use a crochet hook to slip a stitch. This can be especially helpful if you’ve dropped a stitch and need to pick it up.
Is slipping a stitch reversible, or does it only affect one side of the fabric?
Depending on the pattern and how it’s used, slipping a stitch can either affect one or both sides of the fabric.
Wrap Up
In knitting, the simple act of slipping a stitch opens up a world of creative possibilities.
Whether done purlwise or knitwise, this technique influences texture, edges, and intricate stitch patterns. Choosing when to slip a stitch depends on the desired outcome and the specific pattern instructions.
It’s a versatile tool for knitters, offering opportunities to refine edges, create decorative borders, or introduce twisted stitches. Understanding how to slip a stitch empowers knitters to add depth and dimension to their projects.
With practice, this skill becomes second nature, unlocking the full potential of knitting and enabling the creation of truly unique and beautiful pieces.
Leave a Reply