Tie-dyeing a spiral pattern is a captivating art form that infuses fabrics with vibrant, swirling bursts of color, creating a dynamic visual effect.
This technique involves precise folding, twisting, and dye application, resulting in a unique and mesmerizing design.
From t-shirts to tapestries, mastering the spiral pattern adds a creative flair to a wide range of textiles. In this guide, we’ll delve into the step-by-step process, offering detailed instructions and expert tips to help you achieve stunning results.
Whether you’re a seasoned tie-dye enthusiast or embarking on this colorful journey for the first time, this guide will empower you to create your very own captivating spiral tie-dye creations.
What Is a Spiral Tie-Dye Pattern?
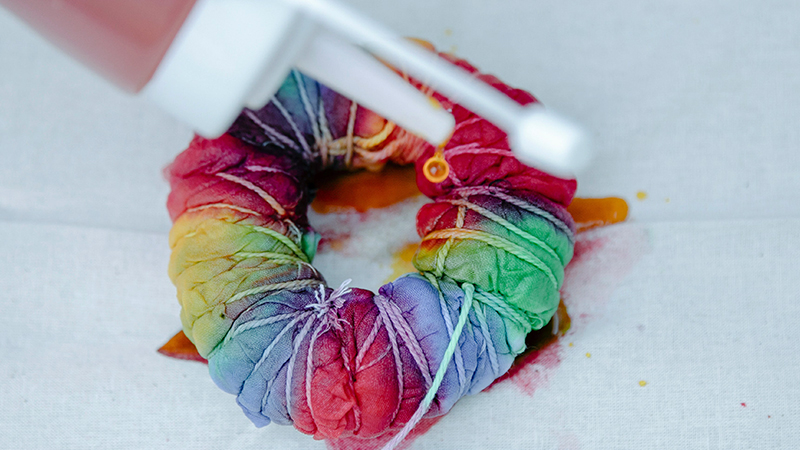
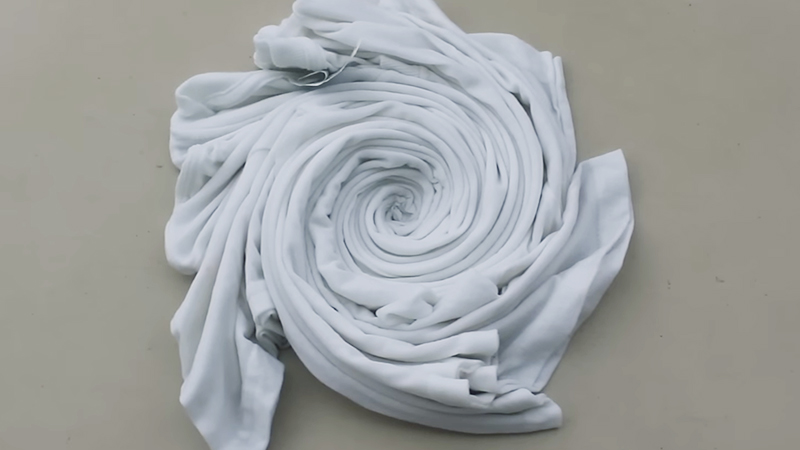
A spiral tie-dye pattern is a dynamic and visually striking design achieved through a specific folding and dyeing technique. It begins with a flat, typically circular piece of fabric, often a t-shirt or other clothing item.
The fabric is pinched or held at a central point and then twisted in a clockwise or counterclockwise motion.
As the fabric spirals outward from the center, it creates a mesmerizing, swirling effect. The resulting pattern resembles a vibrant, multi-colored spiral radiating from a central hub.
This technique allows for a kaleidoscope of colors to blend and intertwine, resulting in a unique and eye-catching design that has become an iconic representation of tie-dye artistry.
How to Tie Dye a Spiral Pattern?
Tie-dyeing is a creative and fun way to add vibrant colors and patterns to plain fabrics.
One of the most popular tie-dye patterns is the spiral design. It’s characterized by a vibrant, swirling burst of colors emanating from a central point.
Here’s a step-by-step guide on how to tie-dye a spiral pattern:
Materials Needed:
- White Cotton Fabric.
- Fabric Dye.
- Plastic Squeeze Bottles or Spray Bottles.
- Rubber Bands.
- Plastic Gloves.
- Plastic Table Cover or Garbage Bags.
- Plastic Bags or Plastic Wrap.
- Bucket or Sink.
Step-by-Step Instructions:
Pre-Wash the Fabric
Use warm water and a mild detergent to wash the fabric. This step not only removes any sizing or finishes but also ensures that the fabric is clean and ready to absorb the dye. Rinse thoroughly and either tumble dry on low or air dry.
Prepare Your Work Area
Lay down a plastic table cover or garbage bags to shield your work surface.
It’s wise to work in a well-ventilated area and consider wearing old clothes or an apron to protect yourself from any accidental splatters.
Create the Spiral
While creating the spiral, experiment with different techniques for various effects. For instance, a loose twist will result in a larger, more open spiral, while a tight twist will yield a smaller, more intricate pattern. Be patient and take your time to get the desired effect.
Secure with Rubber Bands
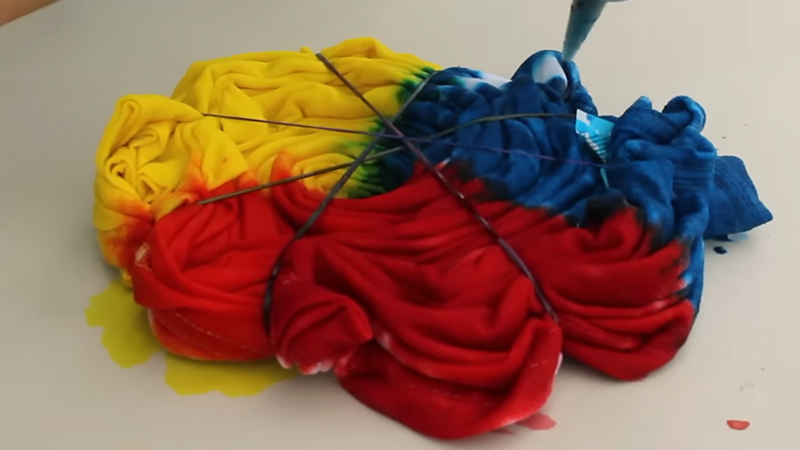
Use a combination of thicker and thinner rubber bands to vary the width of the color sections. If you want a more defined pattern, add extra rubber bands. Remember, the bands act as barriers, preventing the dye from seeping into certain areas.
Apply Dye
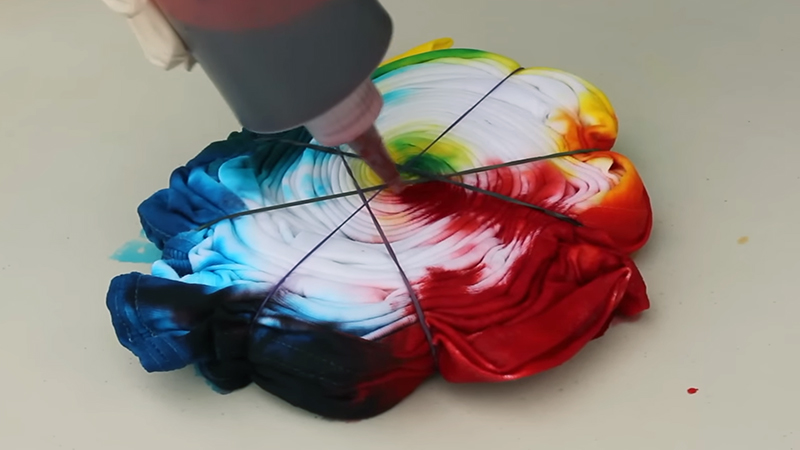
Squeeze bottles offer more control, while spray bottles give a more diffuse effect. Start with lighter colors, as they can be easily overpowered by darker ones.
Consider blending colors at the edges to create a smooth transition. Be generous with the dye application, ensuring that it soaks through the layers.
Flip and Repeat
When flipping the fabric, take care not to disturb the spiral pattern. This step ensures that both sides of the fabric receive an equal amount of dye, resulting in a balanced and vibrant tie-dye.
Wrap and Let Set
To enhance color saturation, place the dyed fabric in a sealed plastic bag or wrap it in plastic.
This retains moisture and allows the dye to penetrate deeper. For a bolder look, let it set for a longer period, up to 24 hours. Check periodically to ensure the fabric stays damp.
Rinse and Unwrap
Use cold water to rinse the fabric. Start with the lightest color sections and gradually move to darker ones. Continue rinsing until the water runs clear. Removing excess dye thoroughly at this stage helps prevent color bleeding later on.
Wash and Dry
Wash the tie-dyed fabric separately in cold water with a mild detergent. Avoid using bleach or harsh chemicals, as they can fade the colors. Air drying is recommended to preserve the vibrancy of the dyes. If using a dryer, select a low-heat setting.
Enjoy Your Spiral Tie-Dye Creation
Admire the beautiful, one-of-a-kind pattern you’ve created. Your tie-dyed fabric is now ready to be worn, used, or displayed. Embrace the uniqueness of your creation and proudly show it off!
What Type of Fabric Is Best for Tie-Dyeing a Spiral Pattern?
Choosing the right fabric is crucial for achieving vibrant and long-lasting tie-dye results, especially when creating intricate patterns like the spiral design.
Here are some points to consider when selecting the best fabric for tie-dyeing a spiral pattern:
Natural Fibers are Ideal
Fabrics made from natural fibers like cotton, rayon, linen, and hemp are the best choices for tie-dyeing.
Among these, 100% cotton is the most popular and widely recommended for its excellent dye absorption.
Cotton for Optimal Results
100% cotton is highly recommended due to its high absorbency and ability to hold dyes well. The tightly woven fibers of cotton allow for even dye distribution, resulting in vibrant and long-lasting colors.
Avoid Synthetic Fabrics
Synthetic fabrics like polyester, nylon, and acrylic do not absorb dye as effectively as natural fibers. They may result in less vibrant colors and the patterns may not be as defined.
Consider a Blend
When you have a fabric with a blend of natural and synthetic fibers, keep in mind that the dye may take differently to different parts of the fabric. Expect variations in color intensity.
Pre-Washed Fabrics are Preferred
Choosing pre-washed fabric is beneficial as it removes any sizing, finishes, or impurities that might hinder dye absorption. This ensures a clean canvas for the dye to adhere to.
Light-Colored Fabric Works Best
Light-colored fabrics provide a neutral base that allows the tie-dye colors to shine brightly. While tie-dyeing dark-colored fabric is possible, it may yield less vibrant results.
Consider Thread Count
Fabrics with a higher thread count tend to absorb the dye more evenly. They have a smoother surface, which allows for better dye penetration and color saturation.
Fabric Weight Matters
Medium-weight fabrics are often preferred for tie-dye projects as they are easy to manipulate and hold the dye well.
Lighter fabrics may result in more subtle patterns, while heavier fabrics may be more challenging to work with.
Stretchy Fabrics Require Special Consideration
Fabrics with stretch (like jersey knit) may distort the spiral pattern during twisting.
If you choose a stretchy fabric, consider stabilizing it with a backing fabric or use techniques that accommodate the stretch.
Consider the End Use
Think about what you’ll be making with the tie-dyed fabric. For example, if you’re making clothing, consider the drape and feel of the fabric. If it’s for a wall hanging, a sturdier fabric might be preferable.
Suggestions for Using the Tie-Dyed Fabric in Various Creative Projects
Once you’ve mastered the art of tie-dyeing and created vibrant, unique patterns, it’s time to turn that beautifully dyed fabric into functional and eye-catching creations.
Here are some suggestions for creative projects that showcase your tie-dye masterpieces:
Tie-Dye T-Shirts and Apparel
Cut and sew your tie-dyed fabric into a variety of clothing items. Consider creating custom t-shirts, tank tops, dresses, or even lounge pants.
The dynamic patterns will infuse a burst of personality into your wardrobe, and you’ll have the satisfaction of wearing a truly unique piece.
Tie-Dye Accessories
Utilize smaller scraps of tie-dyed fabric to fashion an array of stylish accessories.
Craft headbands, scarves, or bandanas that will not only add a splash of color to your attire but also serve as eye-catching statement pieces.
Tie-Dye Home Decor
Elevate your living space by incorporating tie-dyed fabric into various home decor projects.
Consider making pillow covers in contrasting tie-dye patterns, crafting a striking table runner, or even creating wall hangings that serve as captivating focal points in any room.
Tie-Dye Bags and Totes
Fashion practical and fashionable bags using your tie-dyed fabric. Whether it’s a tote bag for daily errands or a backpack for outdoor adventures, the vibrant patterns will not only make a statement but also promote sustainability by reducing the need for disposable plastic bags.
Tie-dye quilts and Blankets
Piece together sections of tie-dyed fabric to create stunning quilts or cozy blankets. These unique creations can serve as striking bedding or be hung as captivating wall art. The intricate patterns will add a dynamic and artistic touch to any space.
Tie-Dye Stationery
Add a personal touch to your correspondence or journaling by crafting greeting cards or notebooks with tie-dyed fabric covers.
These one-of-a-kind stationery items make for meaningful gifts or can be cherished as keepsakes.
Tie-Dye Masks and Accessories
In today’s world, tie-dyed face masks have become a fashionable and essential accessory.
Create custom masks using your tie-dyed fabric for unique and stylish protective gear. Consider complementing them with matching accessories like scrunchies or headbands.
Tie-Dye Pet Accessories
Pamper your furry companions with tie-dyed accessories. Craft vibrant bandanas, leashes, or bed covers that will not only add a pop of color to your pet’s ensemble but also showcase your creative flair.
Tie-Dye Crafts for Kids
Engage children in a fun and educational tie-dye activity. From custom pillowcases to friendship bracelets, there are numerous kid-friendly projects to explore.
These hands-on crafts can serve as memorable bonding experiences and encourage creativity in young minds.
Tie-Dye Gifts
Share the joy of tie-dyeing by gifting your creations to loved ones. Whether it’s a custom tote bag, a set of coasters, or a hand-dyed scarf, these thoughtful gifts are sure to be treasured. They convey a personal touch and the effort put into creating something special.
Common Tie-Dyeing Issues and How to Fix Them
Tie-dyeing is a captivating craft that allows for endless creativity, but like any art form, it comes with its share of challenges.
Here are some common tie-dyeing problems and how to address them:
Uneven Color Distribution
- Issue: Some areas of the fabric are darker or lighter than others.
- Solution: Ensure thorough saturation by applying dye generously. Consider using a spray bottle for better control. Additionally, make sure to flip the fabric and apply dye on both sides to achieve even color distribution.
Colors Bleeding Together
- Issue: The colors bleed into each other, creating muddy or undesired shades.
- Solution: Apply colors strategically, ensuring they don’t overlap too much. Give each color some space to breathe. If needed, rinse the fabric slightly between color applications to prevent bleeding.
Fading Colors after Washing
- Issue: The vibrancy of the colors fades after the first wash.
- Solution: Use a mild detergent, wash the fabric in cold water, and avoid using bleach or harsh chemicals. Air drying is recommended, as excessive heat from a dryer can cause fading.
Dye Not Penetrating Fully
- Issue: Some areas remain white or very light after dyeing.
- Solution: Ensure that the fabric is thoroughly wet before applying dye. Also, make sure the dye is mixed properly and not too diluted. Consider allowing the dyed fabric to sit for a longer period during the setting process.
Rubber Bands Breaking or Slipping
- Issue: The rubber bands used to secure the fabric during the dyeing process break or shift, affecting the pattern.
- Solution: Use good-quality, sturdy rubber bands. Double up or triple the bands for added strength. Make sure they’re placed tightly and evenly to prevent shifting.
Dye Colors Not as Expected
- Issue: The colors after dyeing do not match what was anticipated.
- Solution: Understand color theory and how colors may blend together. Consider experimenting with color combinations on a small piece of fabric before dyeing the entire item.
Wrinkles in Fabric
- Issue: Fabric comes out of the dyeing process with wrinkles.
- Solution: Smooth out the fabric before applying dye. If wrinkles persist, consider using a fabric steamer or iron on a low setting to remove them.
Excessive Dye Runoff
- Issue: After rinsing, there’s a significant amount of dye runoff.
- Solution: Rinse the fabric thoroughly under cold water until the water runs clear. If the fabric continues to bleed, you may need to wash it separately with a mild detergent to remove excess dye.
Design Not as Expected
- Issue: The tie-dye pattern doesn’t turn out as envisioned.
- Solution: Experiment with different folding and tying techniques. Adjust the tightness of the twists or folds to achieve different effects. Each tie-dye project is unique, so embrace the unpredictability!
Color Fading Over Time
- Issue: Over time, tie-dye colors may fade with repeated washings.
- Solution: To preserve the vibrancy, wash tie-dye items in cold water with a mild detergent. Avoid using bleach or harsh chemicals. Consider air drying rather than using a dryer.
Tips for Achieving Vibrant and Long-Lasting Colors
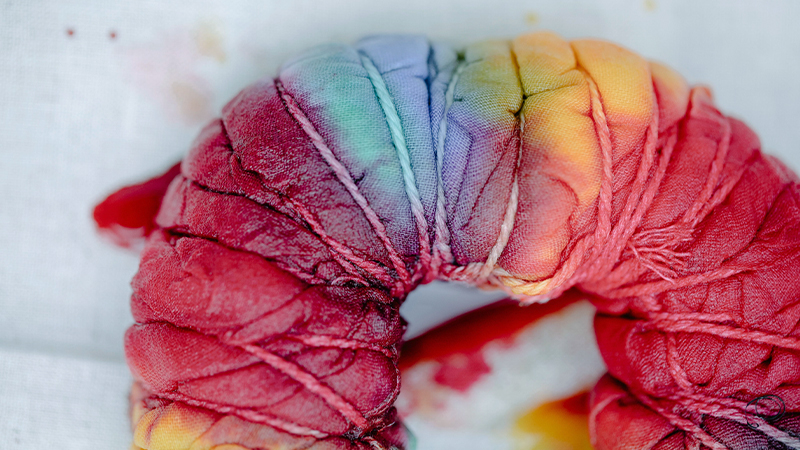
Achieving vibrant and long-lasting tie-dye colors requires attention to detail throughout the entire tie-dyeing process.
Here are some tips to help you achieve the best results:
Use High-Quality Fabric
Opt for natural fibers like 100% cotton, as they absorb and hold dye much better than synthetic fabrics. The quality of the fabric will significantly impact the vibrancy and longevity of your tie-dye.
Pre-Wash the Fabric
Thoroughly wash the fabric with a mild detergent to remove any sizing or finishes that might hinder dye absorption. Rinse it well and ensure it’s completely dry before starting the tie-dye process.
Prepare the Dye Properly
Follow the manufacturer’s instructions meticulously when mixing the dye. Ensure it’s fully dissolved and well-mixed for consistent and vibrant results. Properly prepared dye ensures that colors are distributed evenly.
Apply Dye Generously
Be generous with the dye application. This ensures that the colors penetrate deeply into the fabric, resulting in a more intense and vibrant outcome. Apply with confidence, allowing the dye to soak through all layers.
Consider Concentrated Dye
Professional-grade or concentrated dyes often yield more vivid and long-lasting results compared to standard tie-dye kits. If you’re aiming for exceptionally vibrant colors, consider investing in high-quality dyes.
Wrap and Let Set
Wrapping the dyed fabric in plastic or placing it in a plastic bag helps to retain moisture, allowing the dye to penetrate the fabric more effectively. Longer setting times lead to deeper color saturation.
Rinse Thoroughly
Rinse the fabric under cold water until the water runs clear. This step is crucial for removing excess dye that could cause fading or bleeding later on. Take your time during this process to ensure all excess dye is removed.
Wash Gently
Wash tie-dyed items separately in cold water with a mild detergent. Avoid using bleach or harsh chemicals, as they can fade the colors.
Turning the garments inside out provides an extra layer of protection for the design during washing.
Air Dry or Low Heat
Whenever possible, air-dry your tie-dyed items. High heat from a dryer can cause colors to fade faster. If you must use a dryer, set it to a low heat or delicate cycle to protect the vibrancy of the colors.
Avoid Direct Sunlight
Prolonged exposure to direct sunlight can cause colors to fade over time. Store tie-dyed items away from direct sunlight when not in use. Consider keeping them in a cool, dark place to preserve their vibrancy.
Use a Fixative
Applying a textile fixative or soda ash when setting your tie-dye can enhance colorfastness. This additional step can help the dye bond more effectively with the fabric fibers, leading to longer-lasting colors.
Experiment with Techniques
Different tie-dye techniques yield varying results. Try out different folding, twisting, and tying techniques to create unique and dynamic patterns.
The more you experiment, the better you’ll understand how to achieve the effects you desire.
Practice and Patience
Achieving vibrant and long-lasting tie-dye colors is a skill that may require practice and patience.
Don’t be discouraged by initial results. Each project is an opportunity to learn and improve your tie-dyeing skills.
FAQs
What is a Spiral Tie-Dye Pattern?
A spiral tie-dye pattern is a design characterized by vibrant, swirling bursts of color emanating from a central point.
Can I Use Different Colors for a Spiral Pattern?
Yes, you can use a variety of colors for a spiral pattern. In fact, using different colors adds depth and visual interest to the design, creating a dynamic and eye-catching result.
Do I Need Special Equipment to Tie-Dye a Spiral Pattern?
No, you don’t need special equipment. Basic tie-dye supplies like fabric dye, rubber bands, plastic squeeze bottles or spray bottles, and white cotton fabric are sufficient.
Is It Necessary to Pre-Wash the Fabric Before Tie-Dyeing?
Yes, it’s crucial to pre-wash the fabric. This removes any sizing or finishes that may interfere with the dye absorption.
What Should I Do if the Colors Bleed Together in a Spiral Pattern?
If colors bleed together, consider being more mindful of the dye application. Apply colors strategically, allowing some space between them.
Wrap Up
Embracing the art of tie-dyeing a spiral pattern opens up a world of vibrant creativity.
With careful folding, twisting, and dye application, you’ve transformed plain fabric into a mesmerizing burst of color. Each creation is a testament to your skill and artistic vision.
Remember, practice and experimentation are the keys to mastering this technique. Whether adorning clothing, home decor, or personal accessories, your tie-dye creations will radiate individuality and charm.
So, unleash your creativity, explore new color combinations, and let your imagination soar.
With each spiral tie-dye project, you’re not only crafting a unique masterpiece but also celebrating the beauty of self-expression through this timeless art form
Leave a Reply