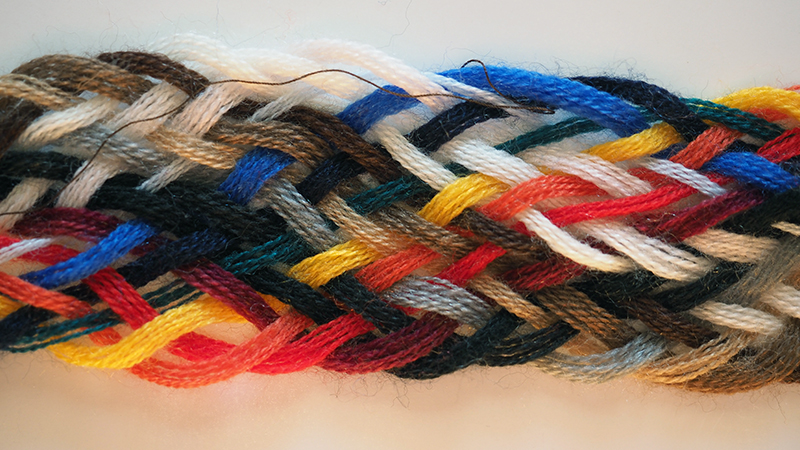
Creating friendship bracelets is a delightful craft that fosters connections and creativity.
Mastering the four fundamental friendship bracelet knots opens the door to crafting an array of intricate designs. The forward knot, backward knot, forward-backward knot, and backward-forward knot are the building blocks of these charming tokens of affection.
Each knot carries its own unique technique, allowing for endless possibilities in pattern-making. In this guide, we’ll take you step-by-step through the process, offering detailed instructions on how to tie each knot.
With a palette of vibrant threads and a little patience, you’ll soon be crafting beautiful, personalized bracelets that symbolize enduring friendships.

How to Tie the 4 Basic Friendship Bracelet Knots?
Creating friendship bracelets is a fun and creative way to show your appreciation for your friends and loved ones. These bracelets are not only a symbol of friendship but also a fantastic DIY craft project.
To get started, you’ll need to learn the four basic friendship bracelet knots: the forward knot, the backward knot, the forward-backward knot (also known as the double knot), and the backward-forward knot.
Here’s a step-by-step guide on how to tie these knots:
Materials Needed:
- Embroidery floss in your desired colors
- Scissors
- Clipboard or tape to hold your bracelet in place
Choose Your Colors
Consider the personality and style of the person you’re making the bracelet for.
Bright and contrasting colors can create a lively and eye-catching bracelet, while softer shades can result in an elegant and subtle piece. Think about color combinations that hold special meaning for you and your friend.
Cut the Thread
Using a pair of sharp scissors, carefully trim the embroidery floss. Aim for each strand to be approximately 60-70 inches long.
This length provides ample room to work with, ensuring you won’t run out of thread before completing your bracelet. Remember, it’s always better to have a bit extra than not enough.
Arrange the Threads
Lay out your selected threads in a neat, organized manner. Ensure they’re side by side and free from any tangles or knots.
When folding them in half to create a loop, take care to align the ends as closely as possible. A tidy start will make the entire process smoother.
Secure the Bracelet
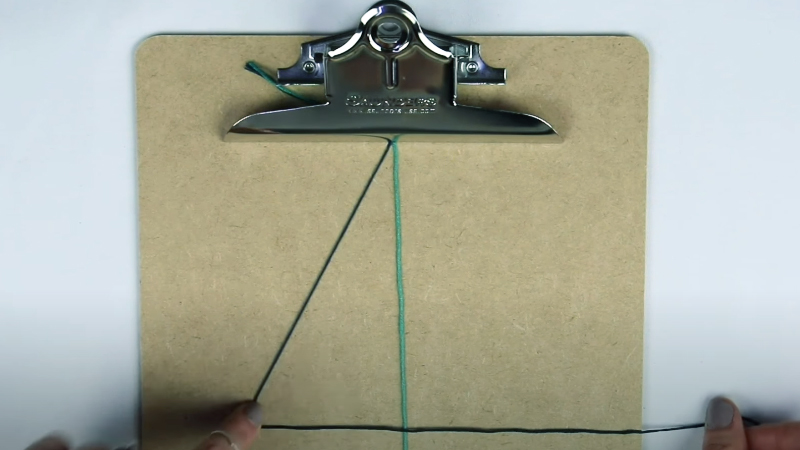
Using a clipboard or tape to hold the looped end in place is a great way to stabilize your work. This ensures the threads stay in position while you’re knotting.
When you don’t have a clipboard or tape, maintain a firm grip on the looped end with your fingers. Just be sure to keep the tension steady.
Forward Knot (F)
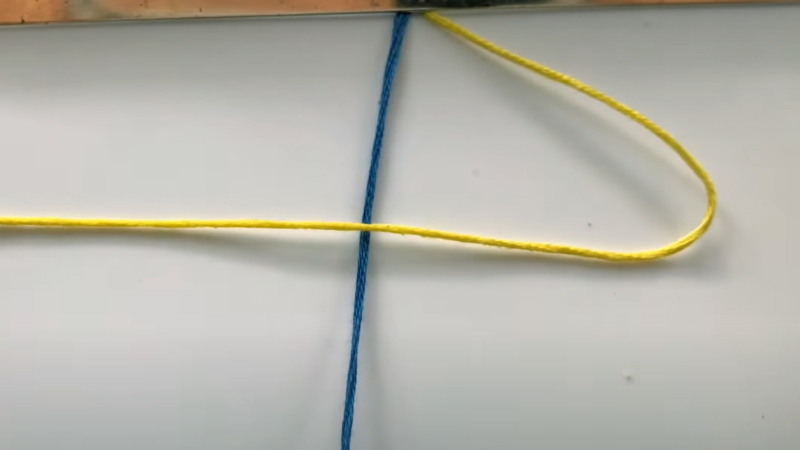
When tying the forward knot, focus on forming a clear “4” shape:
- Make certain that the leftmost thread (Thread A) is positioned over the next thread (Thread B).
- Guide Thread A under Thread B, pulling it up through the space created by the “4” shape.
- Gently tug both threads to tighten the knot. This will cause Thread A to shift to the right side.
Backward Knot (B)
Executing the backward knot involves mirroring the shape of a reversed “4”:
- Begin with the rightmost thread (Thread B) over the adjacent thread (Thread A).
- Pass Thread B under Thread A, drawing it up through the gap formed by the reversed “4” shape.
- Apply a gentle tug on both threads to secure the knot. This action will position Thread B on the left side.
Forward-Backward Knot
Combining the forward and backward knots results in a robust double knot:
- Start with Thread A on the left and Thread B on the right.
- Execute a forward knot (Step 5) with Thread A over Thread B.
- Follow this with a backward knot (Step 6) with Thread B over Thread A.
- Tighten both knots to form a double knot. This will return Thread A and Thread B to their initial positions.
Backward-Forward Knot (BF)
Initiate with Thread A on the left and Thread B on the right:
- Begin by tying a backward knot (Step 6) with Thread A over Thread B.
- Proceed to tie a forward knot (Step 5) with Thread B over Thread A.
- Tighten both knots to create a double knot. This will restore Thread A and Thread B to their starting positions.
Repeat
Continue the process of forward knot, backward knot, forward-backward knot, and backward-forward knot until your bracelet reaches the desired length. The rhythmic repetition of these knots allows for a smooth and meditative crafting experience.
Finishing
Upon reaching the desired length, secure the bracelet by tying a tight knot with all the threads. Leave a small tail for a neat finish. Trim any excess thread, ensuring it’s not too short to unravel.
Creating Patterns with Combination Knots

Creating patterns with combination knots is an advanced technique in friendship bracelet making. It involves combining the four basic knots (forward, backward, double, and backward-forward) in various sequences to form intricate designs.
Here’s a guide to get you started:
Materials Needed:
- Embroidery floss in multiple colors
- Scissors
- Clipboard or tape
- Friendship bracelet pattern or design chart
Step-by-Step Guide:
Select Your Pattern
Choosing the right pattern sets the foundation for your bracelet. Consider the complexity and style you’re aiming for.
Simple geometric patterns are great for beginners, while more intricate designs can be a rewarding challenge for experienced crafters. Pay attention to the number of threads and their arrangement in the pattern.
Choose Your Colors
The color scheme can greatly influence the final appearance of your bracelet. Think about the mood you want to convey and the preferences of the person who will receive it.
Bright, contrasting colors create a lively effect, while softer shades can evoke a more subtle and elegant look. Consider how the colors will interact in the pattern.
Set Up Your Workspace
Preparing your workspace is crucial. If you have a clipboard or tape, use it to secure the looped end of your threads. This ensures they stay in place as you work.
If not, hold the looped end firmly with your fingers, maintaining a consistent tension. Ensure that your workspace is well-lit and comfortable to work in for an extended period.
Plan Your Knots
Examine your chosen pattern and strategize which combination of knots will bring it to life. Consider how each knot affects the placement and color arrangement of the threads.
This planning stage is crucial for a seamless execution. It may be helpful to mark important points in the pattern to keep track of your progress.
Execute the Knots
Begin knotting according to your planned sequence. Skillfully intertwine forward, backward, double, and backward-forward knots, watching your pattern gradually unfold.
Pay close attention to each knot’s impact on the threads. Take your time and ensure each knot is tied securely.
Maintain Tension
Consistent tension is key to achieving a polished result. Keep a steady pull on the threads as you knot, ensuring each one is snug but not overly tight.
This helps maintain the integrity of the pattern. Avoid rushing this step, as even tension is crucial for a professional-looking bracelet.
Follow the Chart
When you have a pattern chart, it serves as your roadmap. Refer to it regularly to ensure you’re following the correct knotting sequence.
The chart offers a visual guide, indicating which knots to use for each row. It can also help you keep track of your progress and avoid mistakes.
Check Your Progress
Take moments to step back and view your work from a slight distance. This perspective allows you to evaluate the emerging pattern and make any necessary adjustments. Consider how the colors are interacting and whether the pattern is developing as expected.
Adjust as Needed
Mistakes are a natural part of the creative process. If you notice an error or if the pattern isn’t aligning as expected, don’t hesitate to backtrack.
Gently undo the knots and rework them until you’re satisfied. Patience and precision are key in this step.
Complete Your Pattern
With persistence and attention to detail, continue knotting until you’ve covered the entire pattern.
This step may require patience, especially for intricate and detailed designs. Take breaks as needed to avoid strain and maintain focus.
Finish and Secure
As you approach the end of your pattern, tie a secure knot with all the threads. Leave a small tail for a neat finish.
Trim any excess thread, ensuring it’s not too short to risk unraveling. Take a moment to admire your creation and ensure all knots are secure.
Practice Projects for Beginners

Embarking on your journey in friendship bracelet-making is an exciting and creative endeavor. These practice projects are designed to build your skills and confidence, setting the stage for more intricate designs.
Here are some beginner-friendly practice projects for making friendship bracelets:
Single Color Basic Bracelet
Begin with a simple, single-color bracelet. This project helps you become familiar with the knotting process and develops your muscle memory. Pay attention to achieving even knots and maintaining consistent tension.
Two-Color Striped Bracelet
Expand your skills by incorporating a second color. Experiment with creating clean, even stripes for a visually appealing design.
This project introduces color changes and helps you practice transitioning between different threads.
Chevron Pattern Bracelet
This classic pattern introduces the concept of alternating forward and backward knots.
It’s a stepping stone towards more complex designs. The chevron pattern creates a distinctive V-shape, allowing you to practice the rhythm of different knot types.
Diagonal Stripes Bracelet
Explore diagonal stripes to add movement and visual interest to your bracelets. This project challenges you to work with angles and diagonals, honing your color placement skills.
Pay attention to thread arrangement and tension to achieve clean and precise diagonal lines.
Zigzag Pattern Bracelet
Take a step towards more intricate designs with a zigzag pattern. This project introduces the concept of varying thread placement, allowing you to create a dynamic and textured look.
Practice precision in knotting and focus on achieving sharp angles for a well-defined zigzag pattern.
Heart Pattern Bracelet
Create a charming heart pattern to showcase your growing skills. This project requires attention to detail in shaping the heart, making it a great exercise in precision. Take your time to create even curves and maintain symmetry in the design.
Diamond Pattern Bracelet
Challenge yourself with a diamond pattern that incorporates multiple colors. This project offers a taste of more advanced color work.
Pay careful attention to color changes and thread placement to achieve a balanced and visually appealing diamond pattern.
Wrapped and Braided Bracelet
Experiment with incorporating wrapping and braiding techniques for a unique, textured bracelet. This project introduces additional elements to your creations, allowing you to explore different textures and patterns.
Focus on achieving a balanced and visually appealing combination of knots, wraps, and braids.
Tips for Neat and Professional-Looking Bracelets

Creating neat and professional-looking friendship bracelets takes practice and attention to detail.
Here are some tips to help you achieve polished results:
Choose Quality Materials
Begin your project with high-quality embroidery floss. Opt for vibrant, colorfast threads that won’t fade or bleed over time. Investing in good materials ensures a polished and long-lasting result.
Maintain Consistent Tension
As you knot, pay close attention to the tension in the threads. Aim for a balance – not too loose that it looks sloppy, and not too tight that it distorts the pattern. Consistent tension contributes to a professional finish.
Ensure Even Knots
Achieving uniform knots is a hallmark of a well-crafted bracelet. Take your time with each knot, ensuring they’re all roughly the same size. This creates a clean and visually pleasing final product.
Plan Your Pattern
Before you dive in, carefully study your chosen pattern. Understand the sequence of knots and color placements. This foresight prevents mistakes and streamlines the knotting process.
Use Pattern Charts
Pattern charts serve as a visual guide, particularly for complex designs. Marking your progress on the chart helps you stay on track and minimizes errors.
Take Your Time
Friendship bracelet-making is an art form that rewards patience. Avoid rushing through the process. Each knot deserves your careful attention for a polished outcome.
Pay Attention to Color Placement
Consider how each color interacts within the pattern. Misplacing a color can alter the entire look of the bracelet. Be mindful of the intended color scheme.
Work in Proper Lighting
A well-lit workspace is essential for precision. Proper lighting ensures you can clearly see the threads and make accurate color choices.
Practice Consistency in Knot Direction
When your pattern includes both forward and backward knots, maintain a consistent direction. This subtle detail contributes to a clean and professional appearance.
Secure Knots Properly
Tie knots with a firm hand, but avoid excessive force. A securely tied knot prevents unraveling, while avoiding overly tight knots that can distort the pattern.
Trim Excess Thread Neatly
At the end of your bracelet, trim excess thread evenly. Leave enough length to prevent unraveling, but not so much that it appears untidy. This step gives your bracelet a polished finish.
FAQs
What materials do I need to start making friendship bracelets?
You’ll need embroidery floss in your chosen colors, scissors, and optionally, a clipboard or tape to secure your work.
How long should I cut the threads for my bracelet?
Cut each strand to be about 60-70 inches long. This provides enough length to work with without running out of thread.
Can I use more than two colors for my bracelet?
Absolutely! You can use as many colors as you like. The basic knots work with multiple threads of different colors.
What if I make a mistake in the knotting process?
Don’t worry! Mistakes can be corrected by carefully undoing the knot and retying it. Take your time and be patient with the process.
Can I create complex patterns with these basic knots?
Yes, definitely! These basic knots form the foundation for a wide variety of intricate patterns.
Wrap Up
Mastering the four basic friendship bracelet knots opens a world of creative expression and heartfelt gestures.
With practice, you’ll not only weave threads together but also weave bonds of friendship. The forward, backward, double, and backward-forward knots are more than just techniques; they’re symbols of care and thoughtfulness.
As you tie these knots, remember that each loop and pull represents a moment of connection. Your finished bracelets will be more than just accessories; they’ll be tangible expressions of love and friendship.
So, gather your threads, be patient with the process, and let your creativity flow. Craft away, and watch your friendships flourish.
Leave a Reply