Cricut Design Space, the digital companion to Cricut cutting machines, empowers crafters and creators to bring their imaginative projects to life. One essential skill every user should master is the art of uploading images.
This process opens the door to a world of creative possibilities, allowing you to personalize, cut, and craft with precision.
Whether it’s intricate designs, custom logos, or cherished family photos, uploading images into Cricut Design Space is the first step in turning your vision into a tangible reality.
In this guide, we’ll explore the step-by-step process, offer expert tips, and provide solutions to common challenges, ensuring your designs are of the highest quality.
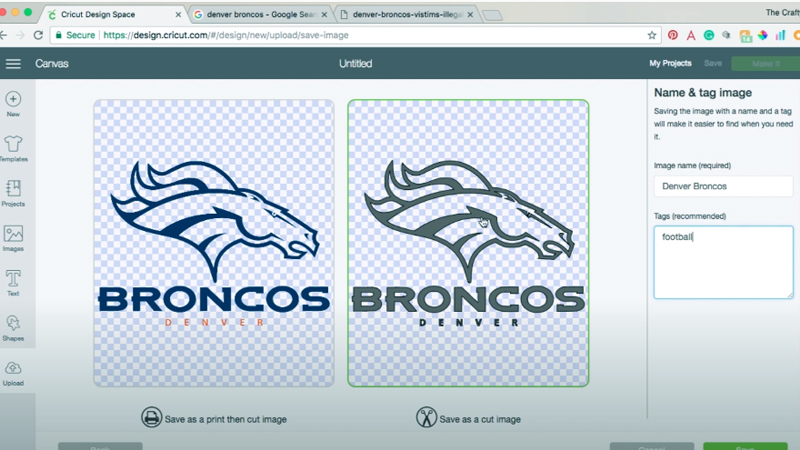
How to Upload Images to Cricut Design Space?
Uploading images to Cricut Design Space is an essential step in creating personalized projects with your Cricut machine.
Whether you’re working on a vinyl decal, a greeting card, or a custom t-shirt, adding images is a fundamental part of the design process.
Follow these steps to successfully upload images to Cricut Design Space:
Step 1: Open Cricut Design Space
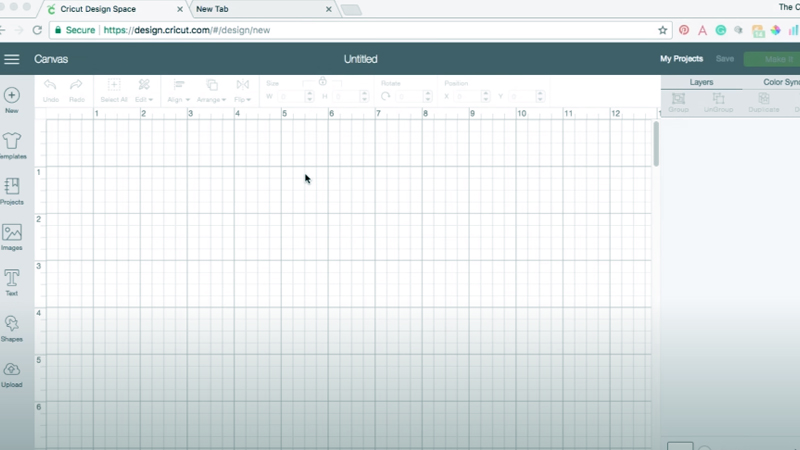
Make sure you have a stable internet connection and launch the Cricut Design Space application on your computer or open the mobile app on your device.
When you’re new to Cricut, you may need to sign up for a free account or log in if you already have one. This step ensures that you have access to all the features and functionalities of the software.
Step 2: Create a New Project
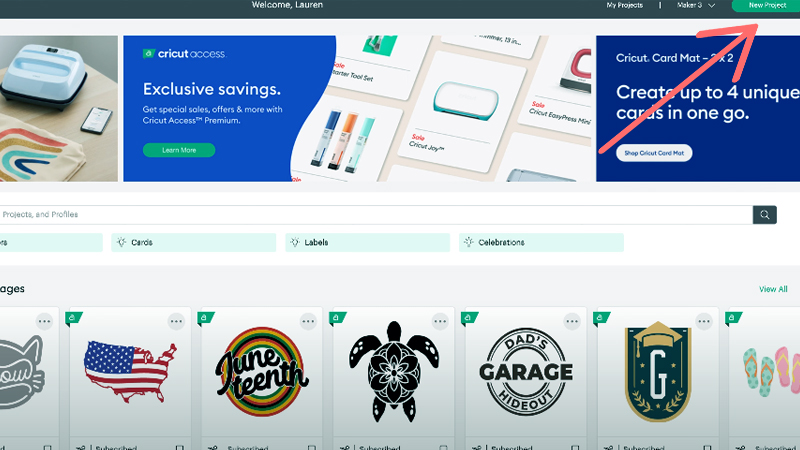
Click on the “New Project” button to start a new project. If you’re continuing a previous project, simply click on its thumbnail from the dashboard. This allows you to seamlessly pick up where you left off.
Step 3: Open the Upload Panel
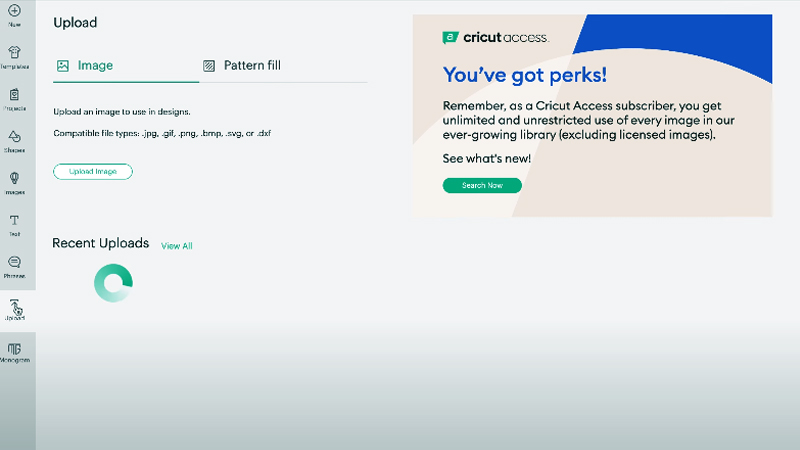
Located on the left-hand side of the screen, you’ll find a set of icons. Click on the “Upload” icon.
This action will take you to the upload section, where you can manage and import images into your project.
Step 4: Select Your Image
In the upload panel, you’ll see two options: “Upload Image” and “Vector Upload”. Choose “Upload Image” for most image types like photographs, clipart, or designs.
When you have an SVG file or another vector format, select “Vector Upload”. This step allows you to bring in external images to incorporate into your project.
Step 5: Browse and Select Your Image
Click on the “Upload Image” button or drag and drop your image file into the designated area.
Cricut Design Space supports various common image formats like JPG, PNG, BMP, GIF, and SVG. Once you’ve located your file, select it and click “Open”. This action loads your chosen image into the software.
Step 6: Choose Image Type
Determine the complexity of your image by categorizing it as “Complex”, “Moderate”, or “Simple”. This helps Cricut’s software understand how to process the image for cutting or printing.
Select the appropriate type based on the intricacy of your design. This step ensures optimal results in your final project.
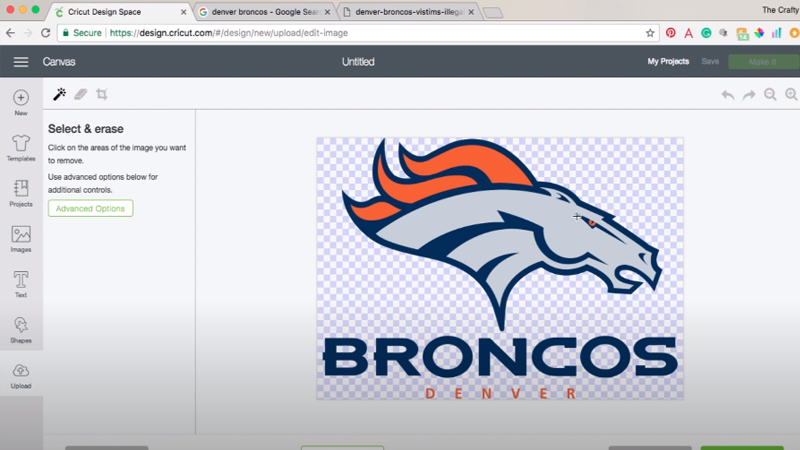
Step 7: Clean Up the Image
For images categorized as “Complex” or “Moderate”, you’ll be directed to a screen where you can fine-tune the image further.
Use the provided tools to remove any unwanted parts. This step is particularly valuable for eliminating backgrounds or refining intricate details for a cleaner final result.
Step 8: Add Image to Canvas
After refining your image (if necessary), click “Continue”. You’ll now see a preview of your image. To incorporate it into your project, click on the image and then click “Insert Images”.
This action places the image onto your project canvas, allowing you to further manipulate and incorporate it into your design.
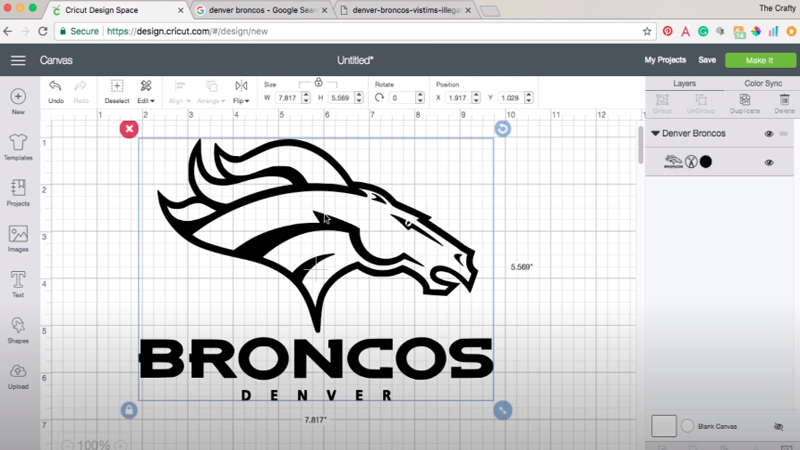
Step 9: Resize and Position
The image will now be on your canvas. To resize it, click and drag any of the corners. To reposition it, click and drag the image to your desired location.
Additionally, you can rotate the image by clicking and dragging the circular arrow icon. This step empowers you to precisely arrange and size your image according to your project’s requirements.
Step 10: Save Your Project
Before making any further adjustments or proceeding with your project, it’s crucial to save your progress. Click on the “Save” button at the top-right corner of the screen.
Provide your project a meaningful name and click “Save” once more to ensure your work is securely stored. This step safeguards your project against any unexpected disruptions.
What Types of Images Can I Upload to Cricut Design Space?
When using Cricut Design Space to create your crafting and cutting projects, it’s important to know what types of images you can upload.
Cricut Design Space is quite versatile, allowing you to upload a variety of image formats to use in your designs.
Here’s a breakdown of the types of images you can upload:
Raster Images (Bitmap)
- JPG: This common image format is suitable for photographs and images with various colors and details.
- PNG: PNG images are ideal for designs with transparency, making them suitable for stickers, labels, and layered projects.
- BMP: While less common, BMP files are also supported, often used for simple graphics and icons.
- GIF: GIFs are used for animated images, but in Cricut Design Space, they are treated as static images.
Vector Images
- SVG (Scalable Vector Graphics): SVG files are highly versatile and maintain their quality when scaled up or down. They are perfect for intricate designs, logos, and illustrations.
Patterns
You can also upload pattern images in JPG or PNG format to use as backgrounds or fill patterns for your designs.
Single-Color Designs
Cricut Design Space allows you to work with single-color designs in SVG format, which are commonly used for simple vinyl cuts or stencils.
System Fonts
While not images per se, you can also access system fonts installed on your computer to create text-based designs. These fonts are an integral part of your design possibilities in Cricut Design Space.
Cricut Image Library
Cricut offers an extensive image library with a wide range of pre-designed images, shapes, and patterns that you can access with a Cricut Access subscription or by purchasing individual images.
How Can You Store an Image in Your Cricut Library?
Storing an image in your Cricut Library is a convenient way to access and reuse it in various projects within the Cricut Design Space.
Here’s how you can store an image in your Cricut Library:
Open Cricut Design Space
Ensure you have a stable internet connection and launch the Cricut Design Space application on your computer or open the mobile app on your device.
Log in to your Cricut account if you haven’t already. This step is crucial for accessing your personal library and saving images.
Start a New Project or Open an Existing One
Once you’re in Cricut Design Space, you have the option to either begin a new project by clicking “New Project” or open an existing project if you have one in progress. Storing an image in your library can be done within both new and existing projects.
Access the Image Upload Panel
Located on the left-hand sidebar, there’s a series of icons. Click on the “Upload” icon.
This action takes you to the upload section, where you can manage and import images into your project.
Choose Your Image
Click on the “Upload Image” button to browse and select the image you want to store in your library.
This is where you’ll navigate through your computer or device files to locate the image file. Remember, supported formats include JPG, PNG, BMP, GIF, and SVG.
Categorize Your Image
After your image is uploaded, you’ll be presented with a preview. Categorize your image as “Simple,” “Moderate,” or “Complex” based on its complexity. This categorization helps when searching for images in your library later on.
Add to Library
Click on the uploaded image to select it, then click the “Add to Library” button. This action effectively stores the image in your Cricut Library for easy access in future projects.
Give Your Image a Name
When you want to add a specific name or tag to your image for easy identification in your library, you have the option to do so. This step can be particularly useful when you have a large number of stored images.
Insert the Image into Your Project
Having stored the image in your library, you can effortlessly access it for use in your current project.
Navigate to the “Images” tab in the Design Space canvas, where you’ll find your stored image in the “My Images” section. Select the image and insert it into your project as needed.
Accessing Stored Images
In the future, you can retrieve your stored images by clicking on the “Images” tab and selecting “My Images.” This section contains all the images you’ve stored in your library for easy access.
Common Issues and Their Solutions
While using Cricut Design Space and your Cricut machine, you may encounter common issues that can be frustrating but are usually easily resolved.
Here are some of these issues and their solutions:
Image Not Uploading Correctly
- Issue: The uploaded image appears distorted, blurry, or with incorrect colors.
- Solution: Ensure you’re uploading a high-quality image in a supported format (JPG, PNG, BMP, GIF, SVG). If the image still appears distorted, try resizing or adjusting it in an image editing software before uploading.
Design Space Running Slowly
- Issue: Cricut Design Space is lagging or freezing during use.
- Solution: Clear your browser’s cache and cookies. Close unnecessary browser tabs and applications to free up system resources. Ensure your internet connection is stable. If possible, use a computer with higher processing power.
Error During Cutting/Printing
- Issue: The Cricut machine encounters an error while cutting or printing.
- Solution: Ensure your material is correctly loaded and secured on the mat. Check that the blade or tool is properly installed. Verify that the cutting settings (pressure, speed, etc.) in Design Space match the material you’re using. Clean the cutting blade or tool if it’s dull or dirty.
Fonts Not Displaying Correctly
- Issue: Fonts appear differently in Design Space compared to the selected font.
- Solution: Make sure you’re using a font that is compatible with Design Space. Some fonts may not render accurately. Consider using system fonts or fonts from the Cricut library.
Machine Not Connecting
- Issue: The Cricut machine is not connecting to your computer or device.
- Solution: Ensure your machine is powered on and properly plugged in. Make sure Bluetooth is enabled on your device if you’re using a wireless connection. Restart both your computer and the Cricut machine.
Issues with Print Then Cut
- Issue: Print Then Cut calibration is off, resulting in inaccurate cuts.
- Solution: Calibrate your machine for Print Then Cut in Cricut Design Space. Ensure your printer is properly calibrated and using the correct settings for printing.
Unexpected Errors or Crashes
- Issue: Design Space crashes or displays error messages.
- Solution: Refresh your browser or restart the Design Space application. Check for any pending updates to the Design Space software. If the issue persists, contact Cricut Support for further assistance.
Issues with SVG Files
- Issue: SVG files are not importing correctly or appear distorted.
- Solution: Ensure the SVG file is compatible with Design Space. Check if the file contains any complex or unsupported elements. Try converting the file to a different format before importing.
Tips for Optimal Image Quality
Achieving optimal image quality in Cricut Design Space is crucial for creating precise and professional-looking projects.
Here are some tips to help you maintain the best possible image quality:
Use SVG Files
SVG files, or Scalable Vector Graphics, are preferred for their ability to maintain image quality regardless of size.
Unlike raster images, which are made up of pixels and can lose clarity when enlarged, SVG files are based on mathematical equations and can be resized without any loss of quality. This makes them ideal for intricate designs and projects that require precise cuts.
High-Resolution Raster Images
When working with raster images (such as JPG or PNG files), it’s important to ensure they have a high resolution.
Resolution is measured in DPI (dots per inch), and a resolution of at least 300 DPI is recommended for projects that involve printing and cutting. High-resolution images provide the necessary level of detail for clean and sharp cuts.
Transparent Backgrounds
PNG images with transparent backgrounds allow for seamless integration into your designs.
This is especially important when layering images, as it ensures that the edges blend smoothly without any unwanted background interference. Transparent backgrounds provide a clean and professional look to your projects.
Avoid Compression
Image compression reduces file size but can lead to a loss of image quality. When saving or exporting images, opt for minimal or no compression settings. This preserves the integrity of the image and ensures that fine details are retained.
Clean and Crisp Images
Selecting high-quality source images is essential for achieving optimal results. Look for images that are clean, sharp, and free from any artifacts or distortions. Avoid using images that are pixelated or blurry, as they can lead to less precise cuts.
Vectorize Your Designs
Vectorizing raster images can greatly improve the quality of your cuts, especially for intricate designs. Vector graphics are based on mathematical equations, which means they can be scaled to any size without losing clarity.
Software like Adobe Illustrator or Inkscape can help convert raster images to vector format.
Proper Image Sizing
Resizing images within Cricut Design Space allows you to maintain image quality. Avoid stretching or distorting images, as this can lead to unintended results.
Pay attention to the dimensions of your canvas and cutting mat to ensure your design fits appropriately.
Use System Fonts
System fonts are designed to be clear and legible, making them ideal for text-based designs. They maintain their sharpness and readability even when scaled down. Avoid overly intricate or decorative fonts that may not cut as cleanly.
Keep Elements Separate
When working with complex designs, it’s often beneficial to keep different elements separate rather than grouping them together. This provides greater control over each individual component and ensures precise cuts.
Test Cuts
Before committing to a final cut, perform a test cut on a small piece of material. This allows you to verify that your settings are correct and that the design will cut accurately. Making adjustments based on the test cut can save materials and prevent potential mistakes.
Calibrate Your Machine
Proper calibration of your Cricut machine is essential for accurate cutting, especially for projects that involve printing and then cutting.
Calibration ensures that the machine’s cutting lines align correctly with printed images, resulting in precise cuts.
Maintain Blade Sharpness
Regularly inspect and, if necessary, replace cutting blades or tools. A sharp blade is crucial for achieving clean and precise cuts. Dull blades can lead to jagged edges and reduced image quality.
FAQs
Can I upload images directly from my smartphone or tablet to Cricut Design Space?
Yes, you can upload images to Cricut Design Space from your smartphone or tablet using the mobile app.
What should I do if my uploaded image is too large for my project in Cricut Design Space?
If your image is too large for your project, you can resize it within Cricut Design Space.
Are there any restrictions on the file size or dimensions of images I can upload to Cricut Design Space?
While there are file size limits, they are quite generous. Cricut Design Space can handle images of various sizes.
Can I upload copyrighted or licensed images to Cricut Design Space for personal use?
It’s important to respect copyright and licensing laws. Generally, you should only upload images that you have the right to use, such as your original designs or images for which you have obtained the necessary permissions.
What should I do if my uploaded image has intricate details that aren’t cutting well on my Cricut machine?
If your image has intricate details that aren’t cutting as expected, consider adjusting the cut settings in Cricut Design Space.
Wrap Up
Uploading images to Cricut Design Space is a fundamental skill for crafting enthusiasts. Whether it’s intricate SVG designs or high-resolution raster images, understanding the process ensures optimal results.
Start by selecting compatible file formats like SVG, JPG, or PNG, ensuring high resolution for detailed projects. Transparent backgrounds and minimal compression maintain image integrity.
For precision, vectorizing raster images and proper sizing within Design Space is key. System fonts and separate elements enhance clarity, while test cuts and machine calibration guarantee accuracy.
Keeping blades sharp ensures clean cuts. By following these steps, users can seamlessly bring their creative visions to life with Cricut Design Space.
Leave a Reply