Blending stumps are invaluable tools for artists, unlocking a world of creative possibilities when working with graphite, charcoal, or pastel mediums.
These cylindrical, pointed instruments, typically made of tightly rolled paper or soft felt, are designed to smudge and blend marks on paper, allowing artists to achieve seamless transitions, subtle shading, and intricate detailing in their artwork.
Learning how to use blending stumps effectively can elevate your artistic skills to new heights. In this guide, we will explore the step-by-step process of harnessing the power of blending stumps, from preparing your drawing to mastering various blending techniques.
Whether you’re a beginner or an experienced artist, understanding how to wield blending stumps will enhance your ability to bring your creative visions to life.
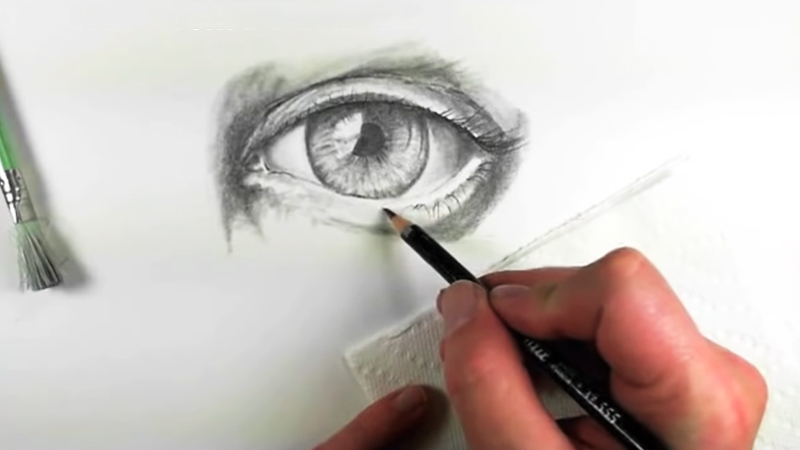
8 Steps to Use Blending Stumps
Blending stumps are designed to blend and smudge the marks made by your drawing materials. Learning how to use blending stumps effectively can significantly enhance your blending stump art skill by creating smoother transitions, shading gradients, and achieving a more polished look.
Here’s a step-by-step guide on blending stump use:
Materials you’ll need:
- Blending Stumps: You can find blending stumps in various sizes, so choose one that suits your drawing and shading needs.
- Drawing Materials: Graphite pencils, charcoal, or pastels are commonly used with blending stumps. Make sure you have your preferred medium ready.
Steps:
Step 1: Prepare Your Drawing
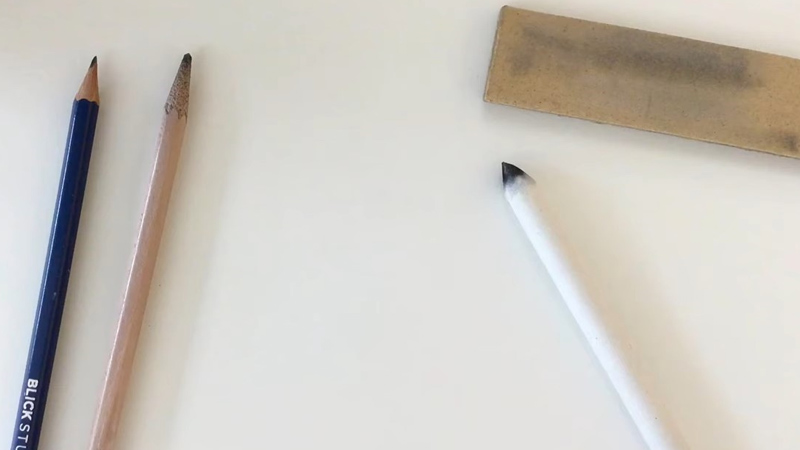
Begin by setting up your workspace with a well-lit area and a clean, sturdy surface. Ensure your drawing paper is secure and free of any smudges or debris.
Take your time to create a well-defined outline or sketch as the foundation for your blending stump artwork.
Pay attention to proportions and details, as the blending stump will enhance the existing lines and shading. Have your drawing materials ready, including the blending stump.
Step 2: Apply the Drawing Medium
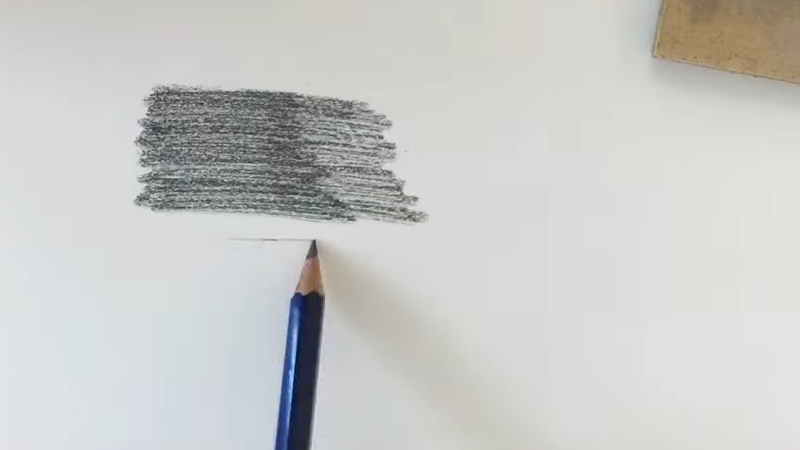
Select your preferred drawing medium, whether it’s graphite, charcoal, or pastels. Start by lightly applying the medium to your paper, gradually building up the intensity as needed.
Create the initial marks and shapes that form the basis of your composition. Use varying pressures and techniques to achieve the desired textures and shading effects by using the best blending stumps.
Step 3: Use the Blending Stump
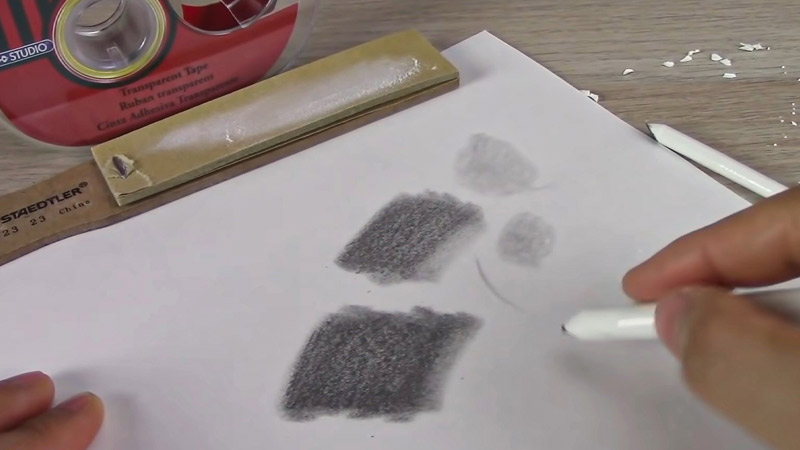
Hold the art blending stumps comfortably, much like you would hold a pencil. Place your fingers near the middle of the stump to ensure better control.
Begin blending by gently rubbing or smudging over the areas where you want to soften or transition the marks. Use circular motions for smoother gradients or back-and-forth motions for more textured effects.
Adjust the pressure according to your desired result, but start with light pressure and build it up gradually. Remember to work from darker areas towards lighter ones to maintain a natural-looking transition.
Step 4: Clean the Blending Stump
As you work, the blending stump may accumulate drawing medium and lose its effectiveness. To maintain its blending capabilities, periodically clean the stump.
Simply rub it on a scrap piece of paper or a tissue until most of the pigment is removed. This ensures that you’re not unintentionally adding excess pigment to your artwork.
Step 5: Build Up Layers
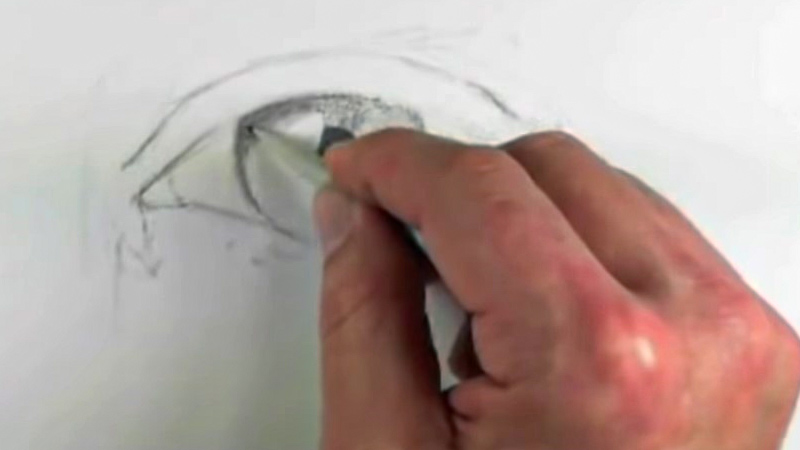
To achieve depth and dimension in your drawing, consider layering the drawing medium and blending with the stump repeatedly.
This technique allows you to create subtle tonal variations and fine-tune the shading. Experiment with layering different densities of your chosen medium to achieve the desired effects.
Step 6: Fine-Tune Details
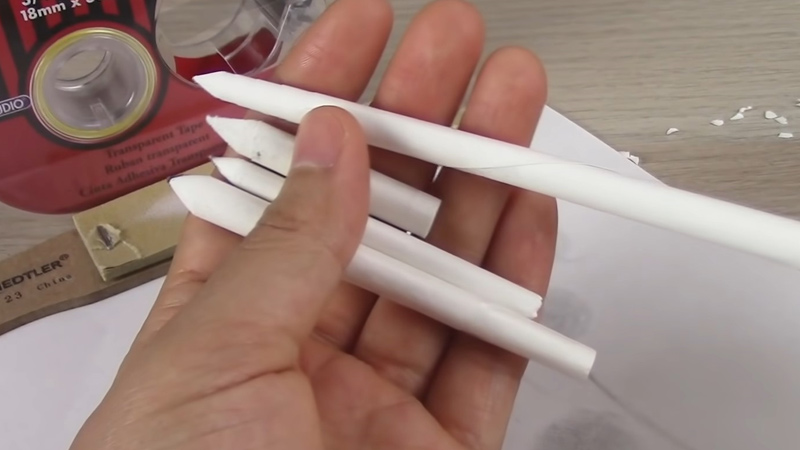
The blending stump can be a valuable tool for refining and enhancing small details in your artwork. Use the tip of the stump for precision work, such as adding subtle highlights or smoothing out intricate areas.
Take your time during this step, as attention to detail can greatly elevate the quality of your drawing.
Step 7: Experiment and Practice
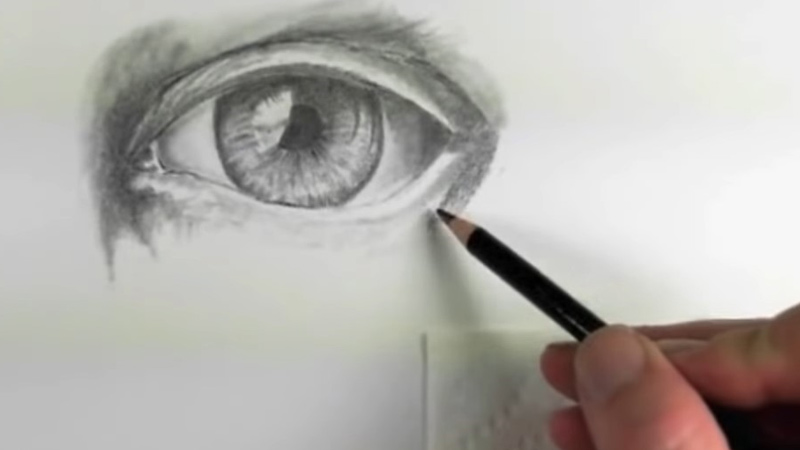
Artistic skill and proficiency with blending stumps improve with practice and experimentation.
Try out different techniques, such as stippling, hatching, or cross-hatching in combination with blending to see how they impact your artwork.
Explore how varying pressure, stump sizes, and different drawing mediums affect your results. Don’t be afraid to make mistakes; they can be valuable learning experiences.
Step 8: Erasing and Correcting
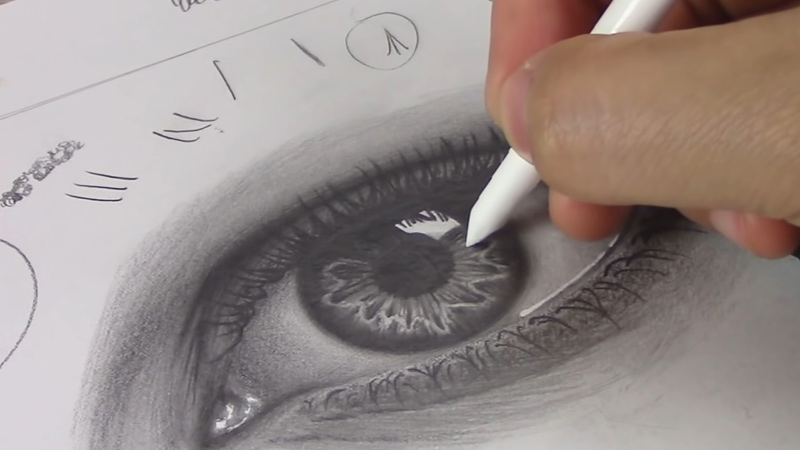
If you need to correct or refine specific areas of your drawing, you can use a kneaded eraser or a regular eraser to lift or lighten the pigment.
After erasing, you can use the blending stump to seamlessly reintegrate the corrected area into the surrounding artwork, ensuring a consistent and polished appearance.
Top 8 Best Blending Stumps for Art
The quality of blending stumps can greatly affect your drawing and blending experience.
While there are various brands and options available, here are some of the best blending stumps that artists often prefer:
1. Tortillon Blending Stumps by Faber-Castell
Faber-Castell’s tortillon blending stumps are favored by many artists for their consistent quality. They are made from tightly rolled paper and have finely sharpened points that allow for precise blending.
The set usually includes multiple stumps of varying sizes, making them versatile for different artistic needs. These stumps are known for their durability, making them a reliable choice for artists who blend frequently.
2. Stumps and Tortillons Set by Royal & Langnickel
Royal & Langnickel offers a comprehensive set of blending tools that cater to a wide range of artistic techniques.
In addition to traditional paper stumps and tortillons, this set often includes specialized blending tools, such as chamois cloth and kneaded erasers.
This versatility makes it an excellent choice for artists looking to explore various blending methods.
3. Blending Stumps and Tortillons Set by Derwent
Derwent’s blending stumps and tortillons are known for their consistency and reliability. They are made from high-quality materials that resist wear and tear.
Artists appreciate the assortment of sizes available in this set, allowing for precise blending in both small and large areas of their artwork.
4. Loew-Cornell Assorted Blending Stumps
Loew-Cornell’s blending stumps are known for their affordability without compromising on quality.
Artists often find these stumps effective for blending both graphite and charcoal. The set includes various sizes, providing flexibility in achieving different blending effects.
5. Pro Art Blending Stumps
Pro Art’s blending stumps are budget-friendly and suitable for artists of all levels. They are easy to work with and produce reliable blending results. The assortment of sizes in the set makes it suitable for various drawing and shading tasks.
6. Strathmore Artist Blending Stumps
Strathmore, renowned for its high-quality art paper, offers blending stumps that are well-crafted to complement their paper products.
These blending stumps are reliable and work seamlessly with Strathmore paper, ensuring compatibility for artists who prefer a cohesive drawing experience.
7. Cretacolor Paper Blending Stumps
Cretacolor’s paper blending stumps are highly regarded for their durability and precision. They are especially favored by artists working with charcoal and pastel mediums. These stumps are capable of creating smooth, velvety transitions and fine details in artwork.
8. General’s Paper Tortillons
General’s Paper Tortillons are known for their accessibility and effectiveness in blending graphite and charcoal. They come in various sizes and are suitable for artists who appreciate traditional blending techniques.
These blending stumps are often available in art supply stores, making them easily accessible to artists.
How to Use Blending Tortillons?
Blending tortillons, also known as paper stumps or blending stumps, are essential tools for artists working with graphite, charcoal, or pastel mediums. They allow for the smooth blending, shading, and detailing of drawings.
Here’s a step-by-step guide on how to use blending tortillons effectively:
Materials you’ll need:
- Blending Tortillons: These come in various sizes, so choose one or more that suit your drawing and shading needs.
- Drawing Materials: Graphite pencils, charcoal, or pastels are commonly used with blending tortillons.
1. Prepare Your Drawing
Start by choosing the right paper for your project. Textured paper often works well with blending tortillons as it holds the medium effectively. Ensure the paper is clean and free from smudges or stray marks.
Create a clear and well-defined outline or sketch as the foundation for your artwork. Take your time to get the proportions and details right, as blending tortillons will enhance these existing lines and shading.
2. Apply the Drawing Medium
Begin by applying your chosen drawing medium to your paper as desired. Vary your pressure to achieve different shades and textures. This is the foundation upon which you’ll use the blending tortillon to work its magic.
3. Use the Blending Tortillon
When using the blending tortillon, consider the angle and pressure applied. A shallow angle with light pressure will produce softer blends, while a steeper angle with more pressure will create bolder effects.
Experiment with various blending motions. Circular motions are great for soft blending and creating gradients, while back-and-forth strokes can mimic textures like fur or wood grain.
Depending on your desired result, you can use different parts of the tortillon. The tip is ideal for precise work, while the broader sides can cover larger areas quickly.
4. Clean the Blending Tortillon
Regularly cleaning the tortillon is crucial to maintaining its effectiveness. When it accumulates too much pigment, it may smudge rather than blend.
Clean it by gently rubbing it on a scrap piece of paper or a tissue until most of the pigment is removed.
5. Layer and Build Up
Blending tortillons work exceptionally well with layering techniques. Consider building up layers of your chosen medium and blending with the tortillon repeatedly to achieve nuanced shading and depth in your artwork.
6. Fine-Tune Details
For refining small details, use the tortillon with precision. Whether it’s smoothing out a face in a portrait or adding intricate texture to a landscape, the blending tortillon can be your tool of choice.
7. Experiment and Practice
Embrace experimentation as a part of your artistic process. Vary the pressure, the angle, and the blending techniques to understand how they influence your artwork. Regular practice is essential for improving your blending skills and achieving the desired effects.
8. Erasing and Correcting
Blending tortillons can also assist in corrections. If you make a mistake or wish to create highlights, employ a kneaded eraser or a regular eraser to remove or lighten the pigment.
Then, gently blend the corrected area with the tortillon to seamlessly integrate it into the surrounding artwork.
FAQS
Do blending stumps work with all types of paper?
Blending stumps are most effective on textured or heavyweight paper. While they can be used on different paper types, they may not yield the same results on very smooth or thin paper.
Can blending stumps be used for erasing mistakes?
Blending stumps are primarily used for blending and smudging. While they can help soften harsh lines, they are not erasers. To correct mistakes, it’s best to use kneaded erasers or regular erasers alongside blending stumps.
Is it possible to sharpen a blending stump?
Blending stumps are not typically sharpened like pencils.
Do blending stumps have an expiration date?
Blending stumps don’t have a specific expiration date. However, over time, they can become worn or too saturated with pigment to work effectively. Regular cleaning can prolong their lifespan.
Can blending stumps be used with watercolor or acrylic paints?
Blending stumps are best suited for dry drawing mediums like graphite, charcoal, and pastels.
To Recap
Mastering the art of using blending stumps is a skill that can significantly enhance an artist’s ability to create stunning and polished works of art.
These unassuming cylindrical tools, often overlooked, have the power to transform your drawings by seamlessly blending and smudging pigments, resulting in smooth transitions, realistic shading, and intricate detailing.
Throughout this guide, we’ve explored the step-by-step process of harnessing the potential of blending stumps. From the initial preparation of your drawing to the fine-tuning of details, each step plays a vital role in achieving professional-quality artwork.
Whether you’re an aspiring artist or a seasoned professional, understanding the nuances of blending stumps can unlock new dimensions of creativity and precision in your craft.
So, embrace these unassuming yet powerful tools and let your artistic visions come to life with grace and sophistication.
Leave a Reply