Tab top curtains offer a charming and versatile window dressing solution, blending functionality with aesthetics.
Crafting your own tab-top curtains is not only a rewarding DIY project but also a chance to tailor window treatments to your unique style and space.
These curtains feature fabric loops (tabs) along the top that slide smoothly onto a curtain rod, creating elegant pleats while maintaining a relaxed, casual appearance.
This guide will walk you through the step-by-step process of making tab top curtains, from selecting the ideal fabric to sewing tabs and achieving a polished finish.
Embrace creativity, enhance your decor, and learn the art of crafting curtains that will adorn your windows with grace and character.
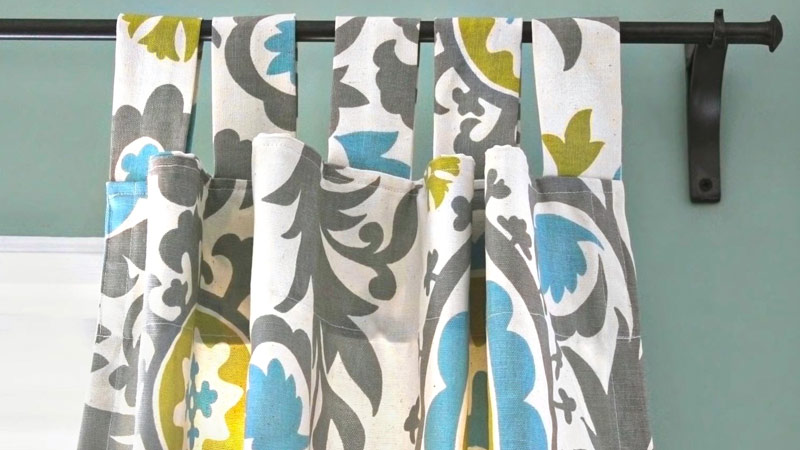
6 Steps to Make Tab Top Curtains
Making tab-top curtains is a stylish and functional window treatment that you can easily make at home.
These curtains have fabric loops (tabs) along the top that slide onto a curtain rod, creating soft pleats and a relaxed, casual look.
Making your own tab top curtains allows you to choose the fabric and customize them to match your decor.
Here’s a step-by-step guide on how to make tab-top curtains:
Materials You’ll Need:
- Fabric of your choice
- Measuring tape
- Scissors
- Sewing machine
- Iron and ironing board
- Curtain rod
- Thread to match your fabric
- Pins
- Tabtop curtain rings
Step 1: Measure and Cut the Fabric
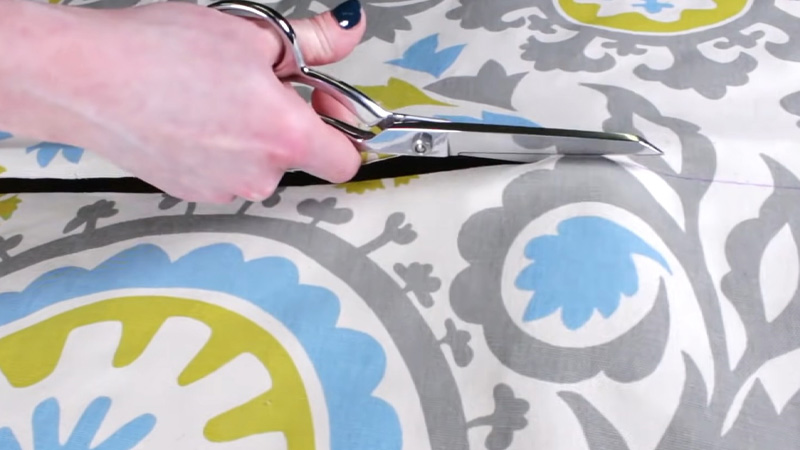
Measure the height and width of your window or the area you want to cover. Add a few inches to the height for hems and tabs, and double the width for fullness. This will be the size of your fabric panel. Cut the fabric to the desired size.
Step 2: Create the Tabs
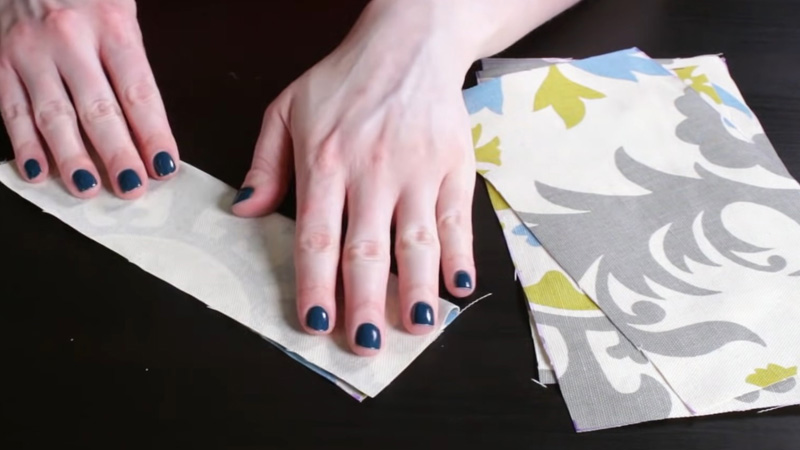
Determine how many tabs you want on your curtain. Tabs should be evenly spaced along the top edge.
A common spacing is 6 to 8 inches apart, but you can adjust this based on your preference.
Cut strips of fabric for the tabs, each strip being double the width of your desired tab width plus an extra inch for seam allowances. For example, if you want 3-inch tabs, cut strips that are 7 inches wide.
Step 3: Fold and Sew the Tabs
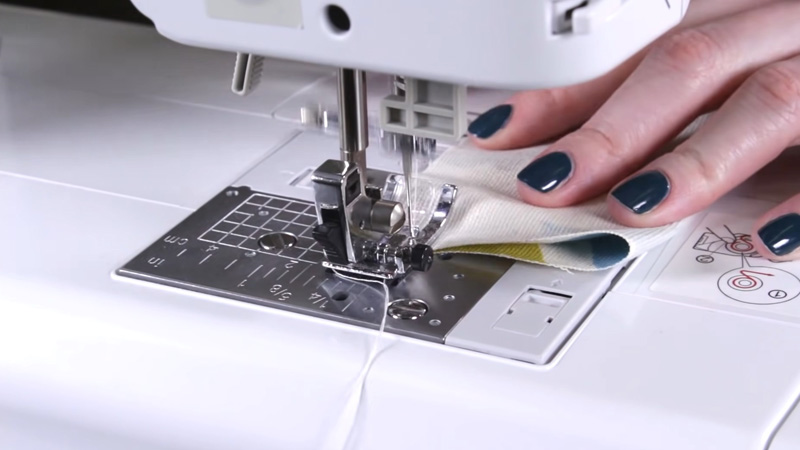
Fold each tab strip in half lengthwise, right sides facing each other. Pin the long edge and one short edge, leaving the other short edge open.
Sew along the pinned edges, using a 1/4-inch seam allowance. Turn the tabs right side out and press them flat with an iron.
Step 4: Attach the Tabs
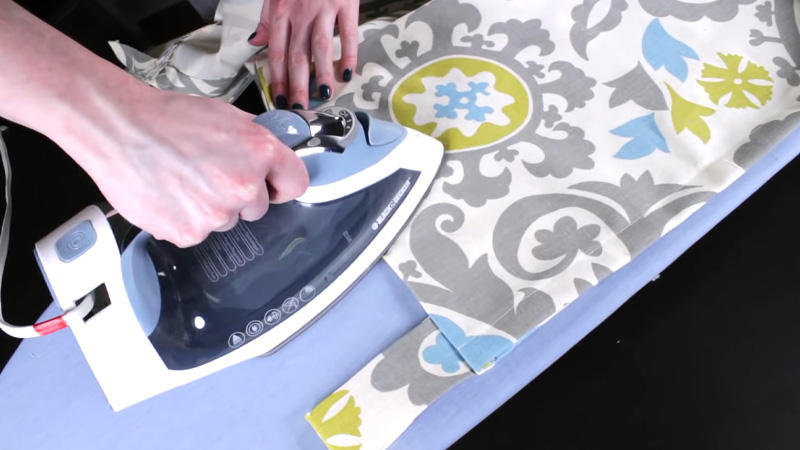
Lay your curtain panel flat with the wrong side facing up. Starting from one end, fold the top edge of the curtain down about 1 inch and iron it to create a hem.
Then, fold it down again about the same width to encase the raw edge and create a double-fold hem.
Now, position the tabs evenly along the folded hem, with the open ends of the tabs tucked under the hem. Pin the tabs in place. Make sure they are spaced evenly and centered.
Step 5: Sew the Tabs
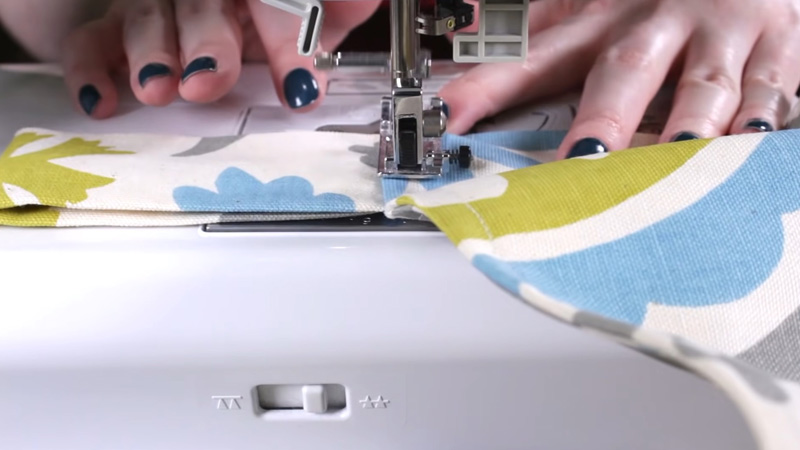
Sew along the bottom edge of the hem, securing the tabs in place. Be sure to reinforce the tabs by sewing over them a few times to ensure they are securely attached.
Step 6: Finishing Touches
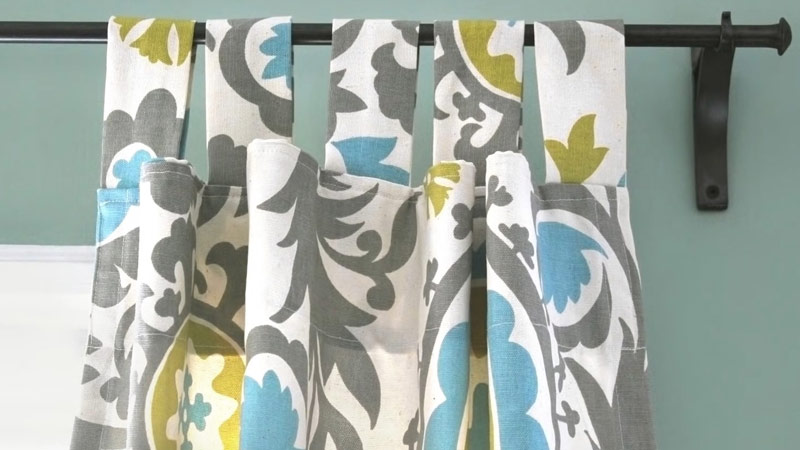
Trim any loose threads and give your curtain a final press with the iron. If you haven’t done so already, install your curtain rod above the window. Slide the tabs onto the rod, and your tab top curtains are ready to hang.
How to Make Tab Top Curtains Slide Easily?
Tab top curtains can sometimes be a bit challenging to slide open and closed because of the way they are designed.
However, there are several steps you can take to make tab top curtains slide more easily.
To make tab top curtains slide more easily, you’ll need these supplies and materials:
- Curtain Rod
- Lubricant
- Cleaning Supplies
- Curtain Rings
- Curtain Hooks
- Curtain Pullbacks or Tiebacks
- Curtains with Proper Spacing
- Fabric Choice
- Sewing Kit
- Replacement Tabs
Step by step instructions:
1. Choose the Right Curtain Rod
Selecting an appropriate curtain rod is essential. Opt for one with a smooth surface, ideally made of materials like metal or plastic.
The diameter of the rod should match the size of the tabs on your curtains. A properly sized and smooth rod will minimize friction, allowing the curtains to move more effortlessly.
2. Lubricate the Curtain Rod
Lubricating the curtain rod is an effective way to reduce friction. You can use a silicone-based lubricant, candle wax, or even a bar of soap.
Apply a small amount of the chosen lubricant along the entire length of the rod. Afterward, wipe off any excess to prevent it from transferring onto the curtains.
3. Adjust the Tabs
Ensure that the tabs on your curtains are evenly spaced along the rod. Tabs that are bunched up or unevenly spaced can cause friction and make it difficult for the curtains to slide smoothly.
Properly spaced tabs will allow for a more even distribution of weight, making the curtains easier to open and close.
4. Clean the Curtain Rod
Dust and dirt can accumulate on the curtain rod over time, causing additional friction. Regularly clean the rod with a damp cloth to remove any debris. A clean surface will help the curtains glide more easily.
5. Consider Using Curtain Rings
If your tab top curtains still don’t slide smoothly after the above steps, consider attaching curtain rings with clips to the tabs.
Curtain rings provide a smoother surface for the curtains to move along the rod, reducing friction and making it easier to open and close them.
6. Choose the Right Fabric
The type of fabric your curtains are made from can affect how easily they slide. Lightweight fabrics like sheer curtains tend to slide more easily than heavier, textured fabrics. When choosing curtains, consider the material and its suitability for smooth movement.
7. Use Curtain Pullbacks or Tiebacks
Curtain pullbacks or tiebacks can be useful when the curtains are not in use. They hold the curtains in place and prevent the tabs from getting caught on the rod or each other. This makes it easier to slide the curtains open and closed without any hindrance.
8. Use Curtain Hooks
Another option to improve curtain movement is to use curtain hooks instead of tabs. Hooks provide a smooth, continuous surface for the curtains to glide along the rod. This can be particularly helpful if you’re experiencing persistent issues with tab top curtains.
9. Regularly Maintain Your Curtains
Periodically inspect the condition of your curtains and tabs. If you notice any damage or signs of wear and tear, make necessary repairs or consider replacing them. Damaged tabs can significantly hinder the smooth operation of the curtains.
10. Adjust the Gathering
Experiment with how you gather or fold the curtains when opening and closing them. Sometimes, a slight adjustment in the gathering can make a big difference in how smoothly the curtains slide along the rod.
How to Make DIY Back Tab Curtains?
Making DIY back tab curtains is a relatively straightforward sewing project that can add a stylish touch to your home decor.
Here are the steps to create your own back tab curtains:
Materials You’ll Need:
- Fabric
- Curtain Rod
- Thread
- Sewing Machine
- Scissors
- Pins
- Iron and Ironing Board
Steps to Make DIY Back Tab Curtains:
Measure and Cut the Fabric
Measure the width of your window and add extra width for fullness or to create a gathered look if desired.
Measure the desired curtain length from the top of the curtain rod to where you want the curtains to end.
Add a few extra inches for hems. Cut the fabric panels according to your measurements. You will need two panels, one for each side of the window.
Hem the Edges
Fold over and press a small hem along the sides and bottom of each fabric panel. This will prevent fraying and give a clean edge to your curtains. Sew the hems in place using a straight stitch.
Create the Tabs
For each tab, cut a strip of fabric that is approximately 4-5 inches wide and the desired length, allowing for a bit of extra for folding and sewing.
Fold the strip in half lengthwise with the right sides facing each other, and then sew along the long edge, leaving one end open.
Turn the strip right side out and press it flat with the seam centered on the back. Repeat this process to create as many tabs as needed. The number of tabs depends on your window’s width and your desired spacing.
Attach the Tabs
Lay out your curtain panel, right side up. Place the tabs on the top edge of the panel, evenly spaced, with the open ends of the tabs facing down and the folded edges facing up.
Pin the tabs in place along the top edge of the curtain panel. Sew a straight line across the top of the panel, securing the tabs in place.
Hang Your Curtains
Once you’ve completed the sewing and tab attachment, it’s time to hang your curtains. Carefully slide the curtain rod through the tabs on the back of the curtain panel.
Ensure that the rod is securely in place and that the tabs are evenly spaced along the length of the rod.
You can adjust the gathers and spacing of the tabs to achieve your desired curtain fullness and appearance. Take a step back and admire your handiwork as your curtains gracefully drape from the rod.
Final Touches
Before you step back to fully appreciate your newly hung curtains, take a moment for some final touches.
Give your curtains one last press with the iron to ensure they hang smoothly and look impeccably finished.
This step not only eliminates any remaining wrinkles but also sets the seams and hems in place for a polished and professional appearance.
Now, your DIY back tab curtains are not only functional but also a stylish addition to your home decor, perfectly tailored to your taste and style.
Care Instructions for Maintaining Tab Top Curtains
Maintaining tab-top curtains is essential to keep them looking fresh and in good condition over time. The care instructions can vary depending on the fabric and any specific manufacturer recommendations.
Here are some general care instructions for maintaining tab-top curtains:
Regular Dusting or Vacuuming
Dust and dirt can accumulate on the surface of your curtains over time. Use a soft brush attachment on your vacuum cleaner or a lint roller to gently remove dust and debris. Regularly dusting or vacuuming can help prolong the time between washes.
Machine Washing
Some tab-top curtains may be machine washable. Check the care label on your curtains for washing instructions.
Use a gentle cycle with cold water and a mild detergent to prevent color fading and damage to the fabric.
To maintain the tab tops, it’s best to fold and secure them with ties or rubber bands before washing to prevent tangling.
Hand Washing
Delicate or sheer fabrics may require hand washing. Fill a large basin or bathtub with cold water and a mild detergent.
Gently agitate the water and immerse the curtains, allowing them to soak for a short time. Gently swish the curtains in the water and then rinse them thoroughly. Avoid wringing out the curtains, as this can damage delicate fabrics.
Drying
After washing, carefully shake out the curtains to remove excess water. Hang them to dry on a clothesline or a sturdy curtain rod.
Ensure that they are hung evenly and not bunched up to avoid stretching or misshaping. Avoid direct sunlight, as it can fade the fabric.
Ironing and Steaming
To remove wrinkles, use a low heat setting on your iron or a garment steamer. Iron the curtains on the reverse side if possible, or use a pressing cloth to protect delicate fabrics. Be cautious not to overheat or scorch the fabric.
Dry Cleaning
For curtains made of more delicate or specialty fabrics, or if the care label specifies “dry clean only,” it’s best to take them to a professional dry cleaner. Inform the cleaner of any stains or specific care requirements.
Stain Removal
Address stains promptly by blotting (not rubbing) the affected area with a clean, dry cloth. Avoid using harsh chemicals or bleach, as they can damage the fabric. If a stain persists, consult a professional cleaner for advice.
Rotate and Adjust
Periodically rotate your curtains to ensure even exposure to light and prevent one side from fading faster than the other. Adjust the curtain rods and tabtops as needed to maintain a consistent appearance.
How to Keep Curtains From Flaring Out at the Bottom?
Curtains that flare out at the bottom can look untidy and disrupt the overall appearance of your window treatment.
To keep your curtains from flaring out at the bottom, you can follow these steps:
Choose the Right Curtain Rod
Ensure that you have a sturdy and appropriately sized curtain rod that can support the weight of your curtains. A well-fitted rod will help maintain the curtains’ shape.
Use Curtain Weights
Curtain weights are small, inconspicuous objects that you can attach to the bottom hem of your curtains.
They help to weigh down the curtains, preventing them from flaring out. Curtain weights can be sewn into the hem or attached using curtain clips or adhesive strips.
Proper Hemming
Make sure the bottom hem of your curtains is properly hemmed. A well-sewn hem adds weight to the curtain’s lower edge and prevents it from billowing out. Use a straight stitch or a blind hem stitch to secure the hem in place.
Choose Heavier Fabrics
When your curtains are made of lightweight materials that tend to flare out, consider switching to heavier fabrics.
Fabrics like velvet, heavy cotton, or lined curtains have more natural weight and are less likely to flare out.
Use Curtain Tiebacks or Holdbacks
Curtain tiebacks or holdbacks can be an effective way to hold your curtains in place when they’re open. Secure the curtains at a desired position on the sides of the window using tiebacks to prevent them from flaring out.
Adjust Curtain Width
When your curtains are too wide for the window, they are more likely to flare out at the bottom. Consider adjusting the width of the curtains to better fit the window size.
Regular Maintenance
Periodically check and adjust your curtains to ensure they are hanging properly. Over time, curtains can shift and may need repositioning or adjustments to maintain their appearance.
Consider Weighted Bottoms
Some curtains come with weighted bottoms built into the hem. If you’re purchasing new curtains, look for this feature as it can help prevent flaring.
Professional Tailoring
When you’ve tried various methods and your curtains continue to flare out, it’s advisable to consider taking them to a professional tailor. A tailor can make custom adjustments to ensure the curtains hang perfectly.
How to Stop Curtains Flaring?
To stop curtains from flaring out, you can take several steps to ensure they hang neatly and maintain their desired shape.
Here’s how to prevent curtain flare:
1. Use Curtain Weights
Curtain weights are small objects typically made of metal or plastic that can be discreetly inserted into the bottom hem of your curtains. They help to weigh down the curtains and prevent them from billowing.
You can sew curtain weights into the hem by folding the fabric over them and stitching securely. Alternatively, you can use curtain clips or adhesive strips to attach the weights to the hem.
Be sure to evenly distribute the weights along the entire width of the curtain for a balanced hang.
2. Proper Hemming
Properly hemming the bottom of your curtains is essential to prevent flaring. Fold the fabric up along the desired hemline, press it flat with an iron, and then secure it with a straight stitch or a blind hem stitch. Ensure that the hem is even and straight, as an uneven hem can contribute to flaring.
3. Choose Heavier Fabrics
Curtains made from heavier fabrics like velvet, heavy cotton, or those with lining have more inherent weight.
This added weight naturally helps curtains hang straight and prevents flaring. When choosing new curtains, consider these fabrics if you want to minimize the risk of flaring.
4. Use Curtain Tiebacks or Holdbacks
Curtain tiebacks or holdbacks are decorative or functional elements that can be used to hold the curtains open at the sides of the window.
When the curtains are not in use, secure them with tiebacks to prevent flaring. This also allows more light to enter the room and creates an elegant draping effect.
5. Adjust Curtain Width
If your curtains are excessively wide for the window, they are more likely to flare out. Consider altering the width to better match the window size.
Measure the window’s width and adjust your curtains accordingly by sewing a new seam along the width or folding and securing the excess fabric.
6. Regular Maintenance
Periodically inspect your curtains to ensure they are hanging correctly. Curtains can shift over time due to use or changes in humidity, which may lead to flaring. Re-adjust and reposition them as needed to maintain their appearance.
7. Consider Weighted Bottoms
When shopping for new curtains, look for those with weighted bottoms. These curtains come with built-in weights in the hem, which help to keep them hanging straight and prevent flaring. Weighted bottoms are particularly effective for lightweight curtain materials.
8. Professional Tailoring
If you’ve tried various methods and your curtains still flare out, consider consulting a professional tailor.
A tailor can provide customized solutions to ensure your curtains hang perfectly and maintain a tailored appearance. They can make precise adjustments to address any flaring issues.
FAQS
Can I add lining to tab top curtains for extra insulation?
Yes, you can add a lining to tab top curtains for insulation.
What’s the recommended tab spacing for tab top curtains?
A standard tab spacing is usually 4-6 inches apart, but you can adjust this spacing based on your preference and the curtain’s overall width for an even and balanced appearance.
Can I convert existing curtains into tab top curtains?
Yes, you can convert existing curtains into tab top curtains by removing the current header or rod pocket and sewing tab tops onto the curtain panels.
How do I determine the appropriate curtain length for my windows?
To determine the correct curtain length, measure from the curtain rod to where you want the curtains to end, considering factors like floor length, sill length, or apron length.
To Recap
Creating tab top curtains is a rewarding DIY project that adds a touch of elegance to your living space while offering functional light control and privacy.
By selecting the right fabric, sewing tabs evenly spaced along the curtain panel, and choosing suitable curtain rods, you can achieve a customized and polished look.
Proper care and maintenance, such as dusting, occasional washing, and rotating the curtains, ensure their longevity and continued beauty.
These curtains not only enhance the aesthetic appeal of your room but also provide a sense of accomplishment in crafting a practical and stylish window treatment tailored to your unique style and preferences.
Leave a Reply