Babies grow up in the blink of an eye, leaving behind a trail of adorable onesies that hold cherished memories. Instead of stashing these tiny garments away in a box, why not transform them into a heartwarming keepsake that will be treasured for years to come?
How to make a baby onesie quilt? In this comprehensive guide, we will show you how to create a delightful Baby Onesie Quilt, a labor of love that encapsulates the precious moments of your little one’s early years.
With each onesie square, you’ll stitch together a patchwork of love, joy, and nostalgia, resulting in a unique and personalized masterpiece.
Whether you’re a seasoned quilter or a beginner, our step-by-step instructions will walk you through the process, from selecting the perfect onesies to arranging them in a beautiful quilt design. Get ready to embark on exploring the art of making a Baby Onesie Quilt.

How to Make a Baby Onesie Quilt?
Making a Baby Onesie Quilt is a wonderful way to preserve memories of your baby’s early days. Here’s a step-by-step guide to help you create this sentimental keepsake:
Gather Onesies
Collect baby onesies with special memories attached to them. Wash and iron them if needed.
Plan Your Quilt
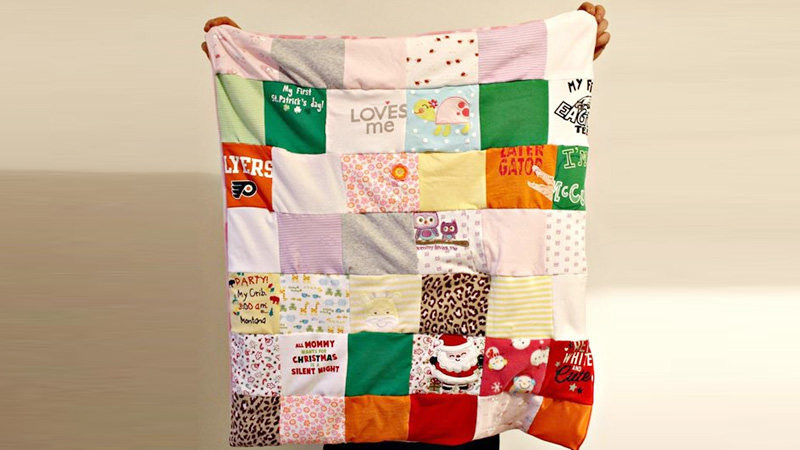
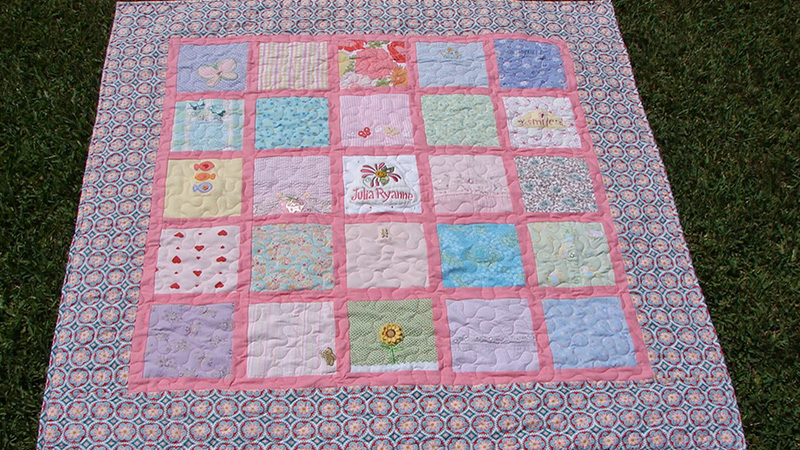
Decide on the quilt’s size and layout. You can arrange onesies in a grid pattern or create a more artistic design.
Cut Onesies
Cut the onesies into squares or rectangles, depending on your design. Leave a seam allowance (usually 1/4 inch) around each piece. Cut your backing fabric and quilt batting to match the size of your quilt top.
Arrange and Pin
Lay out your onesie pieces on the batting, arranging them in your chosen pattern. Pin them in place to keep them secure.
Sew the Onesies
Using a sewing machine, stitch around the edges of each onesie piece, leaving the seam allowance you’ve allowed. This will secure the onesies to the batting.
Create Rows and Columns
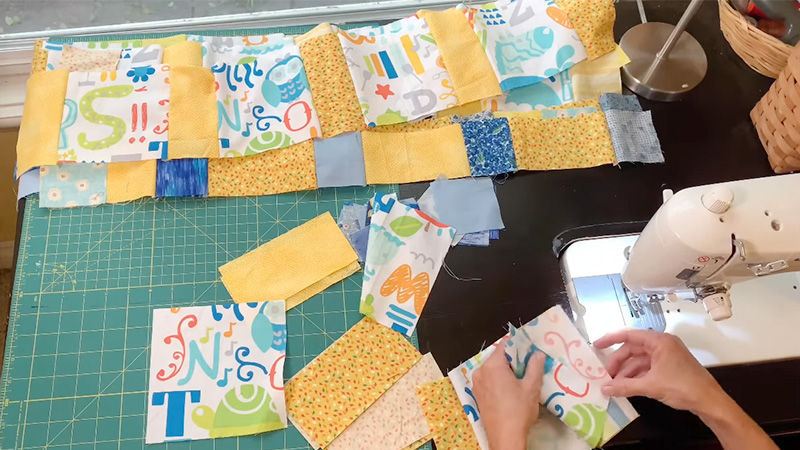
Sew the onesie pieces together in rows and columns, following your layout. Press the seams open with an iron for a smooth finish. If desired, add fabric borders around the quilt top to frame your onesies. Sew them in place.
Layer and Baste
Layer the quilt top, batting, and backing together. Baste them using quilting pins or safety pins to hold the layers in place.
Quilt the Layers
Quilt the layers together by sewing through all three layers. You can use straight lines, free-motion quilting, or a design of your choice.
Bind the Quilt
Trim the excess batting and backing fabric. Create binding strips from your chosen fabric and sew them around the quilt’s edges to finish it.
Finish and Wash
Clip any loose threads, and give your quilt a final press with the iron. Then, wash and dry it to give it a cozy, crinkled look.
Enjoy Your Keepsake
Your Baby Onesie Quilt is now ready to cherish. Use it as a cozy blanket, a wall hanging, or a keepsake to pass down through generations.
Creating a Baby Onesie Quilt is a labor of love, and the finished product will hold a lifetime of memories for you and your family. Enjoy the process of preserving those precious moments in a unique and meaningful way.
How Many Onesies Do I Need to Make a Quilt?

The number of onesies you’ll need to make a quilt depends on the size of the onesies, the desired quilt size, and your chosen quilt design. Here’s a rough estimate for various sizes of onesies:
Newborn Onesies (0-3 months)
For a small crib or wall-hanging quilt (around 36″ x 36″), you may need about 9-12 onesies. For a larger baby quilt (around 42″ x 42″), you may need 12-15 onesies.
3-6 Months Onesies
For a small crib or wall-hanging quilt, you might need 7-10 onesies. For a larger baby quilt, consider using 10-13 onesies.
6-12 Months Onesies
A small crib or wall-hanging quilt may require 5-8 onesies. A larger baby quilt might use 8-11 onesies.
Toddler Onesies (12-24 months)
For a small crib or wall-hanging quilt, you may need 4-6 onesies. A larger baby quilt might use 6-9 onesies.
Keep in mind that these estimates can vary depending on the quilt design and how you arrange the onesies. If you have specific onesies you want to include or if you have a particular quilt size in mind, you can adjust the numbers accordingly.
Additionally, consider using other fabrics or sashing strips to complement the onesies and achieve your desired quilt size.
What Are the Best Materials to Make a Baby Quilt?

Creating a baby quilt requires choosing materials that are safe, soft, and durable. Here are some of the best materials for making a baby quilt:
Cotton Fabric
Cotton is a popular choice for both the quilt top and backing. It’s breathable, soft against the baby’s skin, and easy to work with. Look for high-quality, 100% cotton fabric in various colors and prints.
Flannel
Flannel is an excellent option for the quilt backing or as part of the quilt top. It’s soft, warm, and cozy, making it perfect for baby quilts, especially in cooler weather.
Quilt Batting
Choose a quilt batting that is specifically designed for baby quilts. Cotton or cotton-blend batting is a safe and natural choice. It provides warmth without being too heavy.
Thread
Use a high-quality, 100% cotton thread for piecing and quilting. Ensure that the thread color complements your quilt’s design.
Baby-Safe Appliques
If you plan to add appliques or embellishments, make sure they are baby-safe. Avoid small parts that could come loose and pose a choking hazard.
Safety-Compliant Fabric Paints (if decorating)
If you intend to paint or embellish the quilt, use fabric paints that are non-toxic and safe for baby items. Always follow the manufacturer’s instructions for setting the paint.
Binding Fabric
Choose a coordinating fabric for the quilt’s binding. Double-fold bias tape or straight-grain binding are common choices.
Washable Fabric Marker or Pencil
If you need to mark your quilting lines or design on the fabric, use a washable fabric marker or pencil that can be easily removed with water.
Backing Fabric
The backing fabric should be soft and comfortable for the baby. Flannel, cotton, or minky fabric are good options.
Optional Embroidery Thread
If you plan to add embroidery to personalize the quilt, select embroidery floss or thread that is safe for baby items.
Rotary Cutter and Cutting Mat (optional)
These tools can make cutting fabric pieces more precise and efficient. Always wash and pre-shrink your fabrics before starting your project to prevent any unwanted shrinkage or distortion after quilting.
Additionally, ensure that your sewing machine is in good working condition, and follow safety guidelines when creating a quilt for a baby to ensure it’s safe and comfortable for them to use.
What Is the Most Popular Baby Quilt Pattern?

The popularity of baby quilt patterns can vary over time and may be influenced by trends and individual preferences. A few popular baby quilt patterns include:
Patchwork Quilts
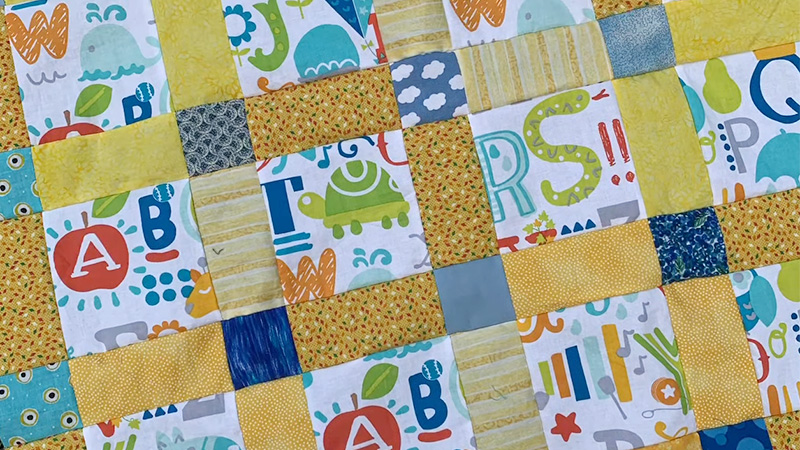
Simple square or rectangle patchwork quilts, often using charm squares (pre-cut 5″ squares) or jelly rolls (pre-cut 2.5″ strips), are perennial favorites. These quilts can be made in a variety of layouts and color schemes.
Chevron or Zigzag Quilts
Chevron patterns create a dynamic and visually appealing design. These quilts feature rows of V-shaped or zigzag stripes, often in a contrasting color.
Pinwheel Quilts
Pinwheel patterns create a playful and whimsical look. They consist of blocks with rotating triangles that resemble pinwheels when the quilt is assembled.
Star Quilts
Star patterns, like the traditional Lone Star or Ohio Star, are timeless and add a touch of elegance to a baby quilt.
Animal and Nature Themes
Baby quilts featuring cute animals or nature-themed appliques, such as owls, elephants, or forest animals, are always popular choices for nurseries.
Modern and Minimalist Quilts
In recent years, modern and minimalist quilt designs have gained popularity. These quilts often feature bold geometric shapes, solid colors, and negative space.
Strip Quilts
Strip quilts are made using fabric strips of various widths. They can create visually striking designs and are relatively easy for beginners.
Baby Panel Quilts
Fabric panels designed specifically for baby quilts make it easy to create a charming quilt quickly. These panels often feature cute illustrations or scenes that can be surrounded by coordinating fabrics.
FAQs
A standard baby quilt size is around 36 inches by 36 inches (91 cm by 91 cm) or 42 inches by 42 inches (107 cm by 107 cm). However, you can adjust the size to your preference.
To secure fabric appliques on a baby quilt, use fusible webbing or fabric glue designed for this purpose. You can also stitch around the edges of the applique with a tight zigzag or satin stitch for added durability.
Yes, quilt kits designed for baby quilts can be a convenient option. They often include pre-cut fabric pieces, instructions, and coordinating fabrics, making it easier for beginners to create a beautiful quilt.
When selecting colors and fabrics, consider the baby’s nursery decor and any specific themes. Soft pastels, gender-neutral colors, and cheerful prints are often popular choices for baby quilts.
To wash a baby quilt, use a gentle cycle with mild detergent. Avoid using bleach or harsh chemicals. Tumble dry on low heat or hang the quilt to air dry. Always check the care instructions for your specific fabrics to ensure proper care.
Conclusion
Creating a Baby Onesie Quilt is not just a craft; it’s a heartfelt journey through time and memory. As you finish stitching the last square and admire your finished masterpiece, you’ll realize that this quilt is a living tapestry of your baby’s early days.
This quilt will be a source of warmth and comfort for your child, a conversation starter, and a tangible reminder of the incredible journey of parenthood. It’s a symbol of the love, care, and attention.
So, whether you’re planning to pass it down through generations or simply wrap your little one in its soft embrace, know that you’ve created a keepsake that will forever hold a special place in your family’s heart.
May your Baby Onesie Quilt continue to bring warmth and treasured memories, just like the precious onesies it’s made from. Happy quilting, and may your family’s story continue to unfold in every lovingly sewn seam.
Leave a Reply