Paper piecing, also known as foundation paper piecing, is a popular technique in the world of sewing and quilting that allows you to create intricate and precise designs with ease.
Whether you’re a seasoned quilter or a beginner, paper piecing can be a valuable addition to your sewing repertoire. Unlike traditional piecing methods, where you sew fabric pieces together, paper piecing involves sewing fabric onto a paper or foundation template.
This technique provides accuracy and allows you to achieve intricate shapes and designs that might be challenging with other methods.
In this guide, we’ll delve into what is paper piecing in sewing, exploring its benefits, the essential tools you’ll need, and a step-by-step tutorial to get you started on your paper piecing journey.
Whether you’re looking to create stunning quilts, decorative blocks, or personalized fabric art, mastering paper piecing will open up a world of creative possibilities in your sewing projects.

What Is Paper Piecing in Sewing?
Paper piecing, also known as foundation paper piecing or simply paper foundation piecing, is a quilting and sewing technique that allows for precise and intricate designs to be created with fabric.
It’s particularly useful when you want to piece together small, irregularly shaped pieces of fabric to form a specific pattern or design. Here’s a detailed explanation of the process:
Materials Needed
A paper or printed foundation pattern of the design you want to create. Various fabric pieces that you’ll use to fill in the pattern. A sewing machine is generally used for stitching the fabric to the paper.
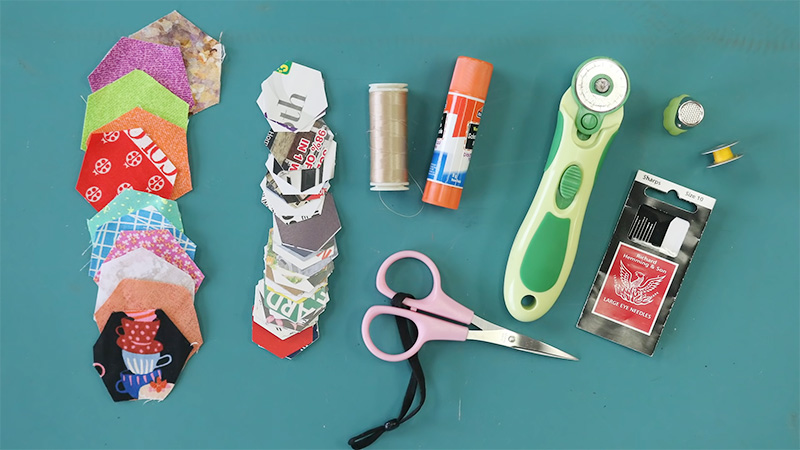
Matching thread for your fabric. To secure the fabric pieces in place. Scissors or rotary cutter for cutting fabric pieces accurately. Iron and ironing board to press seams and set the stitches.
Preparing the Pattern
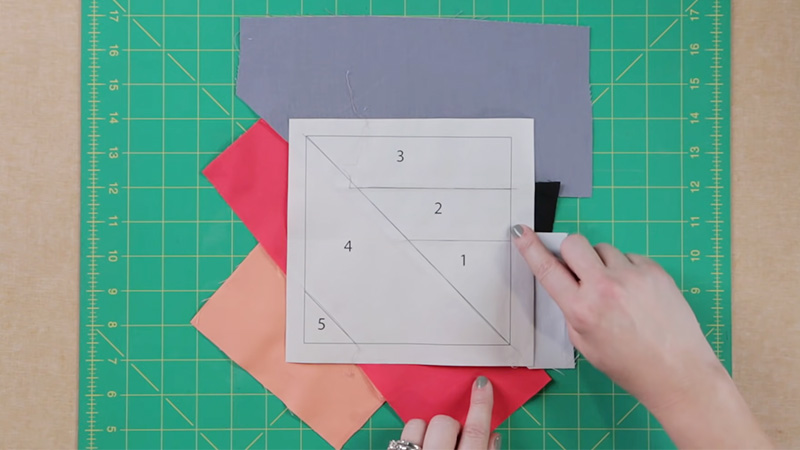
Start with a printed or photocopied paper pattern of your design. These patterns have lines and numbers indicating where to place each fabric piece. Ensure your pattern is reversed if necessary, especially if you have text or specific directional fabric.
Cutting Fabric
Cut your fabric pieces larger than the sections you’ll be covering on the pattern, ensuring there’s enough overlap. You can use scraps or precut fabric pieces for paper piecing, making it great for using up small amounts of fabric.
Starting the Piecing Process
Begin with the first section on your pattern, typically labeled as “1.” Place the fabric piece for section 1 on the back of the pattern paper, with the right side of the fabric facing away from the paper. Pin it in place so it covers the section completely.
Stitching
With the paper side up, stitch along the lines separating section 1 from section 2. You’ll be sewing through the paper and fabric. Use a shorter stitch length to make it easier to tear away the paper later. Backstitch at the beginning and end to secure the stitches.
Trimming and Pressing
Fold the paper back along the seam line you just stitched. Trim the excess fabric, leaving a 1/4-inch seam allowance. Press the seam open with an iron to set the stitches.
Move on to section 2 and repeat the process, adding fabric, stitching along the lines, trimming, and pressing until you’ve covered all the sections on the paper pattern.
Completing the Block
Once all sections are covered and the fabric is secured, you can remove the paper by carefully tearing it away along the stitching lines. Trim the block to your desired size, ensuring all edges are straight and even.
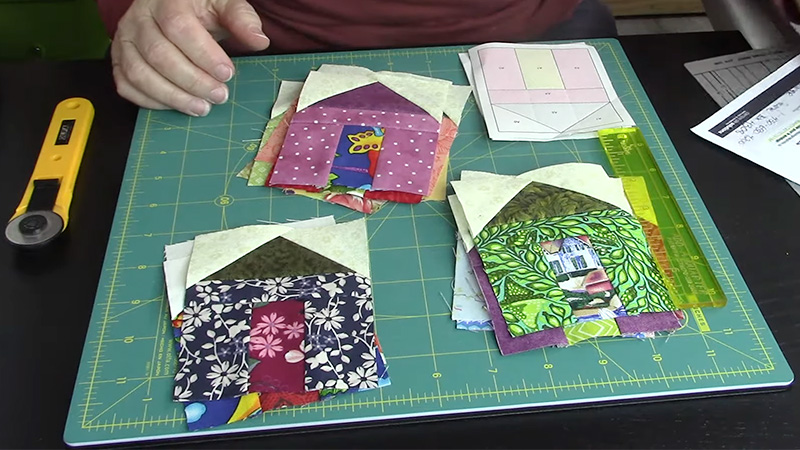
Incorporate the finished paper-pieced blocks into your quilt or project. Paper piecing is a precise and versatile technique that allows for intricate designs and sharp angles that can be challenging to achieve with traditional piecing methods.
Benefits of Paper Piecing in Sewing

Paper piecing offers several benefits in sewing, making it a valuable technique for quilters and sewers alike:
Precision and Complex Designs
Paper piecing allows for precise and accurate sewing. Since you sew directly on the printed lines of the pattern, there’s minimal room for error. This precision is especially helpful when working with intricate or small pieces.
It enables the creation of complex and detailed designs that would be challenging to achieve through traditional piecing methods. This makes it ideal for quilts with intricate geometric shapes, curves, or asymmetrical patterns.
Perfect Points and Angles
Paper piecing ensures that points, corners, and angles meet perfectly, resulting in sharp and crisp intersections. This is particularly important for quilt blocks with star patterns, diamonds, or other angular shapes.
It’s an efficient way to use fabric scraps, as you can cut precise pieces for each section of the pattern. This minimizes fabric waste and allows you to make the most of your materials.
Fabric Stability and Versatility
The paper foundation stabilizes the fabric as you sew, preventing it from stretching or distorting. This is especially beneficial when working with bias edges or delicate fabrics.
Paper piecing can be used for a wide range of projects beyond quilting, such as making intricate pouches, bags, or even clothing with unique designs.
Accurate Reproduction
If you want to replicate the same design multiple times, paper piecing ensures that each piece is identical in size and shape. This is advantageous for creating matching quilt blocks or other items in a set.
Improved Seam Allowances
Since you trim the fabric after each seam, you have precise 1/4-inch seam allowances, which are commonly used in quilting. This consistency in seam allowances is crucial for achieving uniformity in your projects.
Beginner-Friendly
While paper piecing may seem complex at first, it can be an excellent technique for beginners because it guides you through each step. Once you understand the basics, you can tackle more challenging projects.
Creative Freedom
Paper piecing allows for creativity and experimentation. You can play with color placement, mix and match fabrics, and explore unique color combinations to achieve stunning visual effects.
The paper foundation provides additional stability to the final piece, making it more durable and able to withstand frequent use or washing.
In summary, paper piecing is a versatile and valuable technique that offers precision, versatility, and the ability to create intricate designs with minimal fabric waste. Whether you’re a quilter or a sewer, it’s a technique worth exploring to add depth and complexity to your sewing projects.
What Tools Do I Need for Paper Piecing?

To get started with paper piecing, you’ll need a set of tools and materials. Here’s a list of essential items you’ll need for paper piecing:
Paper Piecing Patterns and Fabric
Choose a paper piecing pattern that suits your project. You can find patterns in quilting books, magazines, or online. Select various fabric pieces in the colors and prints you desire for your project.
Ensure your fabric pieces are large enough to cover the sections on the pattern with some extra for overlap.
Sewing Machine and Thread
A sewing machine is typically used for paper piecing. Make sure it’s in good working condition. Choose thread that matches the colors of your fabric for a seamless look. A polyester or cotton thread in a standard weight (50-60 wt) is suitable.
Pins or Clips and Scissors
Pins or fabric clips are used to secure the fabric in place on the pattern. You’ll need scissors or a rotary cutter and a cutting mat to accurately cut fabric pieces. Rotary cutters are especially handy for cutting precise angles and straight lines.
Iron, Ironing Board, and Seam Ripper
An iron and ironing board are essential for pressing seams and setting stitches. A dry iron without steam is preferred. Mistakes can happen, so having a seam ripper on hand is helpful for undoing stitches when needed.
Paper or Foundation Material
You can use various types of paper or foundation materials for paper piecing. Common options include: foundation paper designed specifically for paper piecing.
Tracing paper or lightweight vellum. Old phone book pages or newsprint (for a more eco-friendly and budget-conscious option).
Add-a-Quarter Ruler (Optional)
This specialized ruler has a built-in 1/4-inch seam allowance, which can be helpful for trimming excess fabric accurately.
If you’re working with downloadable or custom patterns, having access to a printer or photocopier to reproduce your pattern onto the chosen foundation material is useful.
Small Cutting Mat and Ruler (Optional)
If your pattern has complex angles or small sections, a small cutting mat and ruler can be handy for trimming fabric accurately. Some sewers prefer to use a thimble to protect their fingers when pushing needles through layers of fabric and paper.
Light Source (Optional)
A good light source, such as a task lamp, can help you see the printed lines on the pattern clearly, especially when working with dark fabrics. If you plan to reuse a paper piecing pattern multiple times, you can transfer the pattern to template plastic for increased durability.
Remember that while these are the core tools and materials needed for paper piecing, you may discover additional items that make the process more convenient or enjoyable for you as you gain experience with this technique.
FAQs
What types of projects are suitable for paper piecing?
Paper piecing is commonly used in quilting to create intricate quilt blocks with precise angles and points. However, it can also be used for other sewing projects like bags, pouches, and clothing items where detailed and complex designs are desired.
Can I reuse the paper foundation templates for paper piecing?
Yes, you can reuse paper foundation templates, but they may become worn or torn after multiple uses. To make templates more durable, consider transferring the pattern onto template plastic, which can be used repeatedly.
What’s the difference between foundation paper and regular printer paper for paper piecing?
Foundation paper used in paper piecing is designed to tear away easily and is thinner than regular printer paper. It’s specifically made for this technique, ensuring that it doesn’t add bulk to your finished project and can be removed cleanly.
Do I need special sewing machine settings for paper piecing?
You don’t necessarily need special sewing machine settings for paper piecing. However, using a smaller stitch length (around 1.5-2.0 mm) can make it easier to tear away the paper later. Additionally, consider using a regular or quilting needle suitable for your fabric.
How do I choose the right fabric for paper piecing?
When selecting fabric for paper piecing, choose fabrics that are color-coordinated for your design and have a crisp, smooth texture. Avoid stretchy or loosely woven fabrics, as they can be more challenging to work with. Fat quarters or fabric scraps are excellent choices for paper piecing.
Conclusion
Paper piecing is a valuable technique in sewing and quilting that empowers you to create stunning, intricate designs with precision. This method offers numerous benefits, including the ability to tackle complex patterns and achieve perfect seam allowances.
By using paper or foundation templates as your guide, you’ll find that even the most intricate shapes become manageable. To get started with paper piecing, you’ll need some basic tools and materials, including fabric, paper templates, a sewing machine, and patience.
Once you’ve gathered these supplies, following a step-by-step tutorial will help you grasp the technique and build your confidence.
As you explore the world of paper piecing, you’ll discover its versatility in creating quilts, decorative blocks, and unique fabric art. Whether you’re a seasoned quilter or a beginner, paper piecing offers a creative outlet.
Meta:
Leave a Reply