Running stitch, a fundamental embroidery technique, offers simplicity with endless creative possibilities.
Whether you’re a novice or an experienced embroiderer, understanding how to execute running stitches is essential for building a strong foundation in this craft.
This versatile stitch is characterized by its simplicity and efficiency, making it an excellent choice for outlining, filling, and adding texture to your designs. In this comprehensive guide, we will discuss how to do running stitches step by step.
You’ll learn the basics of creating even and consistent lines, how to make variations for different effects and discover innovative ways to incorporate this stitch into your embroidery projects.
Whether you’re working on a delicate floral pattern or a bold geometric design, mastering the running stitch will empower you to bring your creative visions to life with finesse and precision.
Let’s dive in and explore the world of running stitches in embroidery.
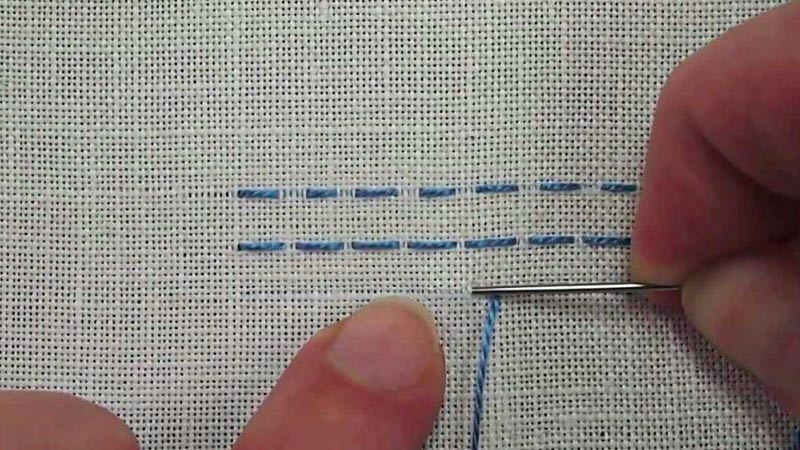
How to Do Running Stitches?
To perform running stitches in embroidery, follow these steps:
Materials You’ll Need
Embroidery fabric, embroidery thread or floss, embroidery hoop (optional), embroidery needle, and scissors.
Prepare Your Fabric
Begin by selecting your embroidery fabric, which can be cotton, linen, or any fabric of your choice. If you’re using a hoop, place your fabric in it and tighten it to keep the fabric taut.
Thread Your Needle
Thread your embroidery needle with the desired color of embroidery thread or floss. You can use a single strand of floss for a delicate line or multiple strands for a bolder look. Knot one end of the thread.
Start with a Basic Stitch

Bring your needle up from the backside of the fabric to the front at the starting point of your design.
Create the Running Stitches
Insert the needle back down into the fabric a short distance away from the starting point, keeping the thread above the fabric.
Continue Stitching
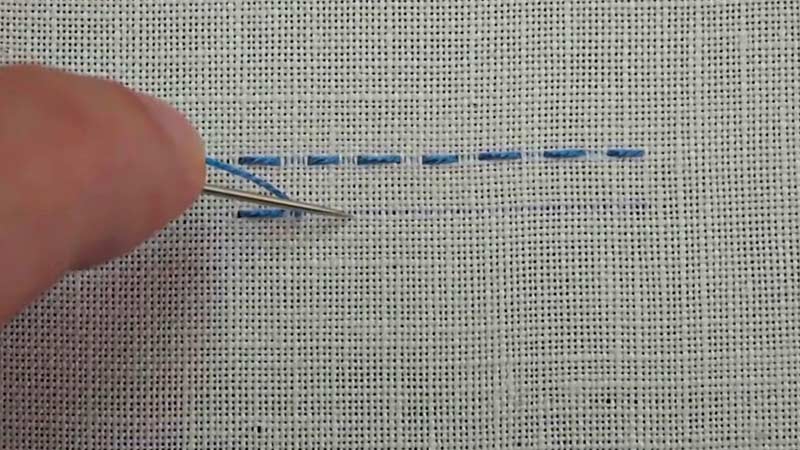
Repeat this process, creating evenly spaced stitches along your desired line or pattern. Make sure to keep the stitches of consistent length and spacing for a neat look.
Ending the Stitch
To secure your running stitches, bring the needle to the backside of the fabric and make a small knot or weave the thread through the back of the previous stitches. Trim any excess thread.
Experiment with Variations
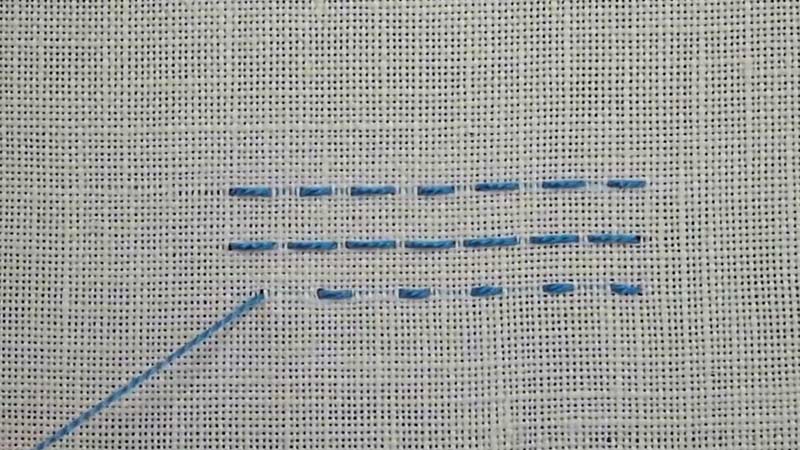
Running stitches can be modified in various ways. You can create dashed lines by leaving gaps between stitches, vary the stitch length for texture, or angle the stitches for decorative effects.
Practice and Creativity
Practice is key to mastering running stitches. Experiment with different thread colors, fabric types, and stitch patterns to create unique and beautiful designs.
Running stitches are the foundation of many embroidery projects, and once you’ve mastered this basic stitch, you can explore more complex techniques and designs.
So, grab your materials and start stitching your way to beautiful embroidered creations!
Variations of Running Stitches
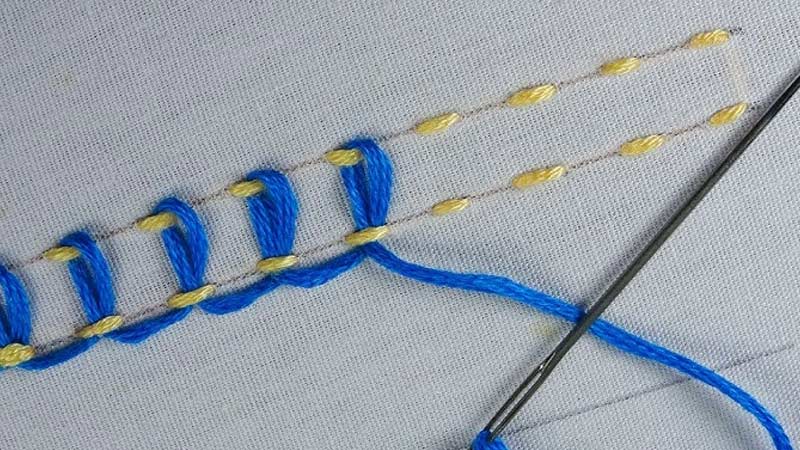
Running stitches are a basic embroidery technique with several variations. Here are a few:
Basic Running Stitch
This is the simplest form, consisting of evenly spaced straight stitches. It’s often used for outlines and borders.
Backstitch
Similar to the running stitch but with a backward stitch before each forward stitch. This creates a more solid line and is great for outlining or adding fine details.
Whipstitch
In this variation, the thread wraps around the fabric’s edge, creating a decorative border or sealing raw edges.
Double Running Stitch
Also known as Holbein stitch, this technique involves stitching a line of running stitches and then returning in the opposite direction to fill in the gaps, creating a reversible pattern.
Seed Stitch
This is a combination of small, evenly-spaced running stitches and backstitches. It creates a textured, speckled effect and is often used for filling areas or creating shading.
Laced Running Stitch
After creating a running stitch, you can weave a contrasting thread through the stitches to add texture and color variation.
Chain Stitch
Although it differs from the running stitch, it’s a common hand embroidery technique where each stitch forms a loop, creating a linked chain-like pattern.
These variations allow you to create different textures, patterns, and effects in your embroidery projects.
When to Use Running Stitches?
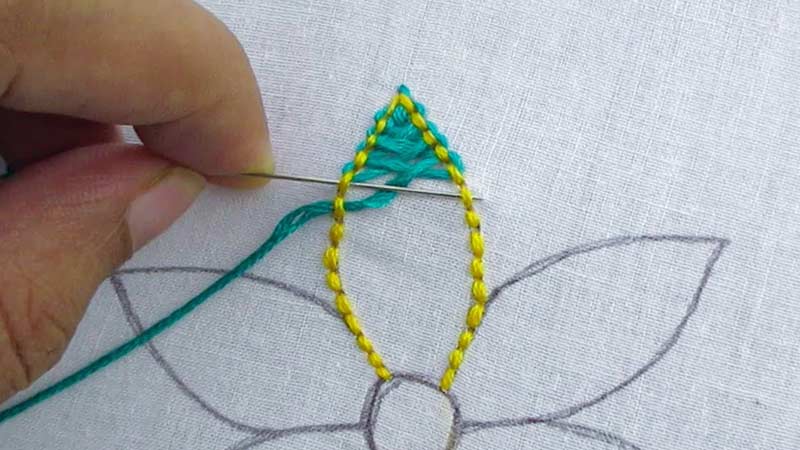
Running stitches are versatile and can be used in various embroidery and sewing applications. Here are some common situations when to use running stitches:
Outlines and Borders
Running stitches are excellent for creating clean, simple outlines and borders around shapes or designs.
Basting
Running stitches are often used as temporary stitches to hold fabric layers together for fitting or quilting before permanent stitching.
Hand Quilting
They are commonly used for hand quilting to secure the quilt layers and create decorative patterns. Running stitches can be used to embroider letters, words, or small text on fabric.
Mending and Repair
Running stitches are great for repairing small tears or holes in the fabric, as they can quickly and neatly close the gap.
Shading and Fill Stitches
By varying the length, spacing, or color of running stitches, you can create shading, texture, and filling effects in embroidery.
Simple Decorative Detail
Running stitches can add a delicate and minimalistic decorative touch to fabric, such as on garments, table linens, or handkerchiefs.
Embroidery Foundations
Running stitches are often used as the base for more complex embroidery techniques. They can provide guidelines or stability for more intricate stitches.
Quick Stitching
When you need to sew or embroider something quickly, running stitches are an efficient choice due to their simplicity and speed.
Overall, running stitches are a fundamental stitch in embroidery and sewing that can be adapted for various purposes, from functional to decorative, depending on your project’s needs.
How to Remove Running Stitches from Fabric?
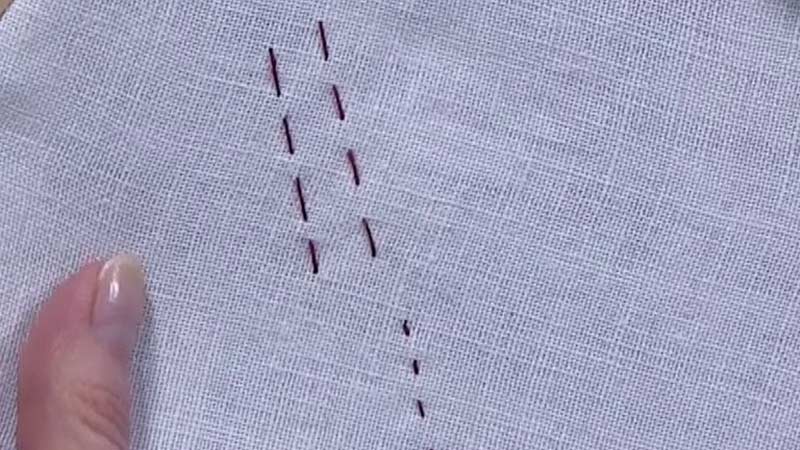
To remove running stitches (also known as straight stitches) from fabric, follow these steps:
Gather Your Tools
Small, sharp scissors or a seam ripper and good lighting to see the stitches clearly.
Position the Fabric
Start by choosing a clean, flat, and well-lit surface to work on. This surface should be free from any clutter or obstacles that might hinder your ability to work smoothly.
Stitches Facing Up
Identify the section of fabric that contains the running stitches you want to remove. Lay this part of the fabric with the stitched side facing upwards. This is important because it allows you to see the stitches clearly and work on them more effectively.
Identify the Starting Point
Locate the beginning of the running stitches you want to remove. This is typically where the thread was knotted or secured.
Cut the Thread
Carefully insert the tip of the scissors or seam ripper under one or two stitches at the starting point. Gently cut the thread without cutting the fabric. Be cautious not to snag the fabric.
Pull Out Stitches
After cutting the starting stitches, use your fingers or the seam ripper to gently pull out the thread along the line of stitches. Pull in the direction away from the fabric to avoid damaging it.
Work in Sections
Continue cutting and pulling out stitches in small sections. Go slowly and take care not to pull too hard, as this can damage the fabric or leave behind thread remnants.
Inspect and Trim
After you’ve removed all the stitches in the line, inspect the fabric to ensure there are no leftover bits of thread. Trim any loose threads with scissors.
Check for Damage
Examine the fabric closely to ensure there is no damage, such as holes or snags, caused by the removal process. If you notice any damage, you may need to repair it with a small patch or mend it.
Press and Finish
If the fabric is wrinkled from the removed stitches, press it with an iron at an appropriate temperature for the fabric type to smooth it out.
Remember to work patiently and gently while removing stitches to avoid any unintentional damage to your fabric.
It’s always a good practice to test the seam ripper or scissors on a scrap piece of fabric before working on your actual project to get a feel for the tools and the fabric.
FAQs
What is a Running Stitch?
A running stitch is a basic hand sewing technique in which a single thread is passed repeatedly through fabric in a straight line.
It creates a simple, unbroken line of stitches and is commonly used in embroidery, quilting, and general sewing.
What’s the Purpose of a Running Stitch?
Running stitches have various purposes, including sewing seams, basting fabric temporarily, creating outlines in embroidery, and adding texture or shading in decorative stitching. They are versatile and can serve both functional and decorative roles.
How Do You Make Running Stitches Even and Straight?
To make even and straight running stitches, start by anchoring your thread at the beginning point, then insert the needle at a designated endpoint.
Pull the thread through, keeping it taut but not overly tight. Space your stitches evenly, maintaining a consistent distance between them.
Can You Use Different Thread Colors for Running Stitches?
Yes, you can use different thread colors for running stitches to create colorful and decorative effects in embroidery.
By changing thread colors or blending shades, you can add depth, dimension, and visual interest to your stitching projects.
What’s the Difference Between Running Stitches and Backstitches?
While both are basic hand-sewing techniques, the main difference is that running stitches consist of evenly spaced, forward stitches, while backstitches involve a backward stitch before each forward stitch, resulting in a more solid line.
Conclusion
The running stitch is a fundamental and versatile embroidery technique that every embroidery enthusiast should have in their repertoire. Its simplicity belies its power to add depth, texture, and elegance to your creations.
By mastering the running stitch, you gain the skills to outline shapes with finesse, create intricate patterns, and bring your artistic visions to life.
Throughout this guide, we’ve covered the essential steps and variations of the running stitch, from basic outlines to decorative designs. With practice and creativity, you can elevate your embroidery projects to new heights.
As you continue your embroidery journey, remember that patience and persistence are key.
Experiment with different thread colors, lengths, and spacings to achieve various effects. The running stitch is your canvas, and the possibilities are limited only by your imagination.
So, pick up your needle and thread, and start stitching your way to beautifully embellished fabrics and cherished creations.
Leave a Reply