The Singer Featherweight sewing machine, cherished by sewing enthusiasts worldwide, has a legacy of durability and precision. However, like any mechanical device, it may encounter issues over time.
This comprehensive guide empowers you with the knowledge and techniques to troubleshoot and address common problems that may arise while using your Singer Featherweight.
Whether you’re facing tension challenges, stitching irregularities, or mechanical concerns, this guide will provide step-by-step instructions to help you diagnose and, in many cases, repair the issues at home.
From routine maintenance to more intricate fixes, you’ll discover valuable insights to keep your Singer Featherweight sewing smoothly for years.
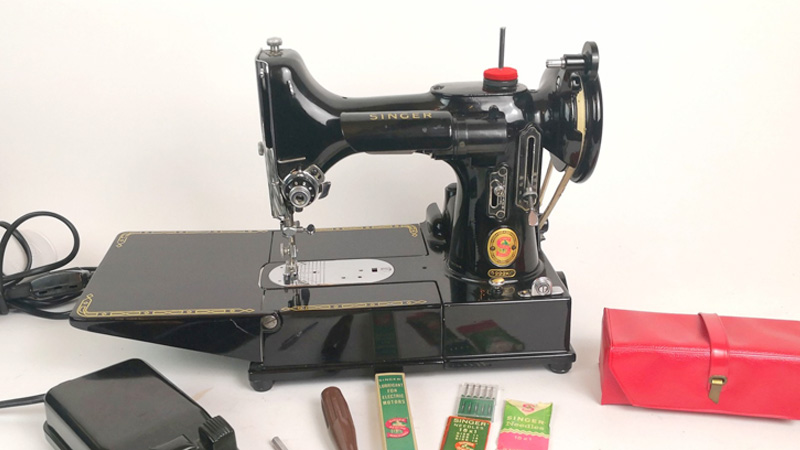
Singer Featherweight Troubleshooting (Fix & Repair Guide)
The Singer Featherweight sewing machine is a beloved classic among sewing enthusiasts. Known for its compact size, lightweight design, and impressive stitch quality, it has remained popular since its introduction in the 1930s. However, like any mechanical device, it may encounter issues over time.
Here are some common troubleshooting steps for Singer Featherweight sewing machines:
Uneven Stitches
If you’re noticing inconsistencies in your stitches, don’t worry. Here are steps to troubleshoot and fix the issue.
Problem: The stitches are uneven or inconsistent.
Solution: Begin by re-threading both the upper and lower threads. Ensure that the threads are properly seated in the tension disks and that there are no knots or tangles. This ensures a smooth flow of thread.
Check the needle for any damage or dullness. A worn-out needle can lead to uneven stitches. Replace it with a new, appropriate needle for your fabric. Remember, a sharp needle is crucial for clean, even stitches.
Test different fabric scraps to see if the issue persists. Sometimes, certain fabrics require slight tension adjustments. Experiment with different combinations until you find the right balance.
Gradually adjust the tension dial while observing the stitch quality. Small adjustments can make a significant difference. Keep testing on a scrap piece until you achieve the desired result.
Thread Jamming or Snagging
Thread jamming can be frustrating, but you can get your Singer Featherweight back on track with a few careful steps.
Problem: The thread keeps getting stuck or snagging while sewing.
Solution: Thoroughly clean the bobbin area, feed dogs, and under the throat plate. Use a small brush or compressed air to remove lint, dust, or stray thread. A clean machine ensures smooth thread flow.
Inspect the needle for any burrs, nicks, or bending. A damaged needle can cause thread snags. Replace it with a fresh one. Remember, a sharp, straight needle is vital for smooth sewing.
Ensure that you’re using high-quality thread that is appropriate for your project. Low-quality or old threads can lead to more snags. Consider switching to a fresh, good-quality thread.
Bobbin Winding Issues
When you’re having trouble with bobbin winding, it’s important to ensure everything is set up correctly. Let’s go through the steps.
Problem: The bobbin is not winding properly.
Solution: Check that the bobbin is placed on the winding spindle correctly. It should fit snugly and spin freely. Improper placement can lead to uneven winding.
Ensure the thread is properly threaded through the bobbin winding tension disc. It should provide slight resistance as you pull the thread. This ensures even tension during winding.
Make sure the bobbin winder is engaged. The Singer Featherweight has a lever or mechanism to engage the winder. If it’s not engaged, the bobbin won’t wind properly.
Machine Not Powering On
There might be a simple solution when your Singer Featherweight isn’t turning on. Let’s troubleshoot together.
Problem: The machine is not turning on when plugged in.
Solution: Examine the power cord for any visible damage or fraying. If you find any, it’s essential to replace it to avoid electrical hazards. A damaged cord can lead to power issues.
Check the connection between the power cord, foot pedal, and the machine. Ensure they’re securely plugged in. Loose connections can prevent power flow.
Test the machine with a different outlet to rule out potential issues with the power source. Sometimes, faulty outlets can be the cause of power problems.
Needle Threader Malfunction
When your automatic needle threader isn’t functioning, let’s troubleshoot the issue together.
Problem: The automatic needle threader is not working.
Solution: Ensure the needle threader is properly aligned with the needle eye. It should be positioned directly in front of the needle.
Check if there are any obstructions or lint in the needle threader mechanism. Clean it gently with a small brush or compressed air.
If the threader is still not working, it may need adjustment or repair by a professional technician. Refer to your machine’s manual for information on service centers.
Fabric Not Feeding Properly
It can be frustrating when the fabric isn’t moving smoothly under the presser foot. Let’s work through some steps to resolve this issue.
Problem: The fabric is not moving smoothly under the presser foot.
Solution: Check if the presser foot pressure is properly adjusted. You may need to increase the pressure for thicker fabrics to ensure even feeding. For lighter fabrics, reduce the pressure.
Ensure that the feed dogs are clean and free of any obstructions. Use a small brush to remove lint and debris.
Inspect the presser foot for any damage or uneven wear. A worn-out foot may not pressure the fabric enough, leading to feeding issues.
Thread Cutter Not Functioning
When your built-in thread cutter isn’t doing its job, let’s see what we can do to fix it.
Problem: The built-in thread cutter is not cutting the thread.
Solution: Check for any thread or lint buildup around the thread cutter. Use a small brush or compressed air to clean it thoroughly.
Needle Hits the Plate or Foot
When your needle strikes the throat plate or presser foot, we’ll go through some steps to address this issue.
Problem: The needle hits the plate or foot.
Solution: Double-check that you use the correct needle size and type for your fabric. Using the wrong needle can cause interference with the plate or foot.
Symptoms That Your Singer Featherweight Machine Needs to Be Repaired
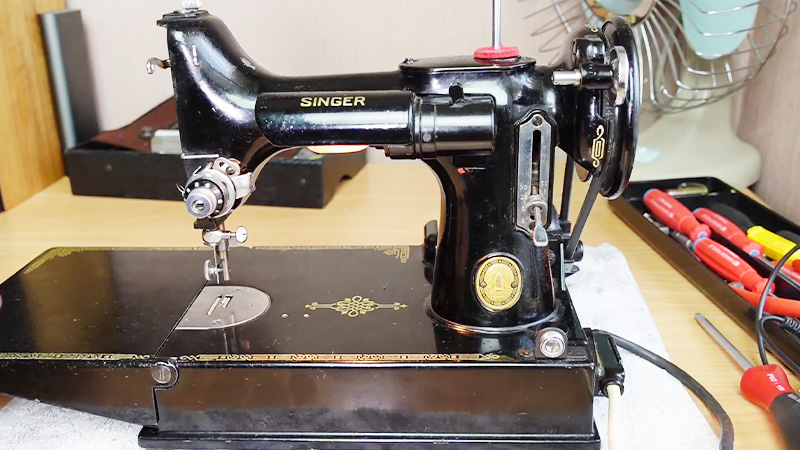
Singer Featherweight sewing machines are renowned for their durability and reliability, but like any mechanical device, they can develop issues over time.
Here are some common symptoms that may indicate your Singer Featherweight machine needs to be repaired:
Thread Tension Problems
In addition to adjusting the tension settings, try rethreading the machine and changing the needle. If the problem persists, it may indicate a deeper issue with the tension mechanism, such as a spring that needs adjustment or replacement.
Needle Breakage
Inspect the needle for any visible bends or damage. Ensure you’re using the correct needle type and size for your fabric. If the issue continues, it might be necessary to check the alignment of the needle bar and, if needed, have it realigned.
Skipped Stitches
Begin troubleshooting by changing the needle and rethreading the machine. If the problem persists, it could indicate a timing issue, where the needle and hook are not synchronized properly. This may require professional attention.
Unusual Noises
Investigate the noise source by removing the bobbin case and inspecting the internal components. Look for worn or damaged gears, belts, or other moving parts. If unsure, seek professional assistance.
Uneven Feed Dogs
Check the feed dog teeth for wear or damage. If they appear worn, they may need to be replaced. Additionally, ensure the feed dog mechanism is clean and well-lubricated for smooth operation.
The Mechanism might need adjustment.
Stitch Selector Problems
Examine the stitch selector dial for any visible damage. Try cleaning around the selector mechanism to ensure it moves freely. If the issue persists, a technician may need to inspect and potentially repair the selector mechanism.
Lighting Problems
Begin by checking the bulb for any visible signs of damage. If the bulb is intact, inspect the wiring and connections to ensure no loose or frayed wires. If necessary, consult a professional to address any electrical issues.
Lack of Stitch Control
Check for any obstructions around the stitch length and width controls. If the issue persists, worn or damaged components within the control mechanism may need to be addressed by a technician.
Preventive Measures for Future Issues of Singer Featherweight Machine
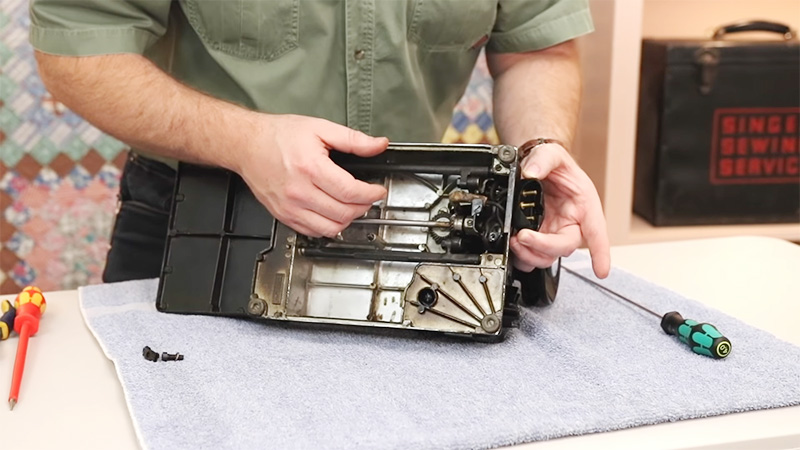
Preventive maintenance is essential to keep your Singer Featherweight sewing machine running smoothly and to minimize future issues.
Here are some preventive measures to help you maintain your machine and avoid problems:
Regular Cleaning
Regular cleaning is crucial to ensure your Singer Featherweight machine operates smoothly. In addition to visible parts, pay attention to the inside of the machine.
Remove the needle plate to clear any lint or debris obstructing the feed dogs. A small brush with soft bristles is useful for reaching tight spaces.
Oiling and Lubrication
Proper lubrication is vital to keep the moving parts of your machine running smoothly. Focus on the needle bar, presser foot lifter, and bobbin case.
Use high-quality sewing machine oil and wipe away any excess to prevent oil from transferring onto the fabric.
Thread Quality and Needle Choice
Examine the thread closely for any knots, tangles, or weak spots. Consider fabric type, thickness, and thread type when selecting a needle. Remember, a worn or incorrect needle can lead to skipped stitches or fabric damage.
Bobbin Care
Pay attention to bobbin tension. If you notice that the thread is not winding evenly, adjust the tension screw on the bobbin case. Ensure the bobbin is wound neatly to prevent thread jams.
Needle Replacement
Consider using a needle organizer to keep track of different needle types and sizes. It’s important to remember that bent or damaged needles can cause irregular stitches or damage your fabric.
Tension Adjustment
Practice adjusting the tension on scrap fabric before starting a new project. Familiarize yourself with how the tension dials or discs work and understand how they interact with different fabrics.
Storage and Cover
If your machine will be idle for an extended period, consider removing the needle and storing it separately to prevent accidental damage. A hard case or cover offers an added layer of protection against dust and potential bumps.
Regular Inspections
As part of your routine maintenance, set aside time to inspect the machine thoroughly. Pay attention to areas where vibrations might cause screws to loosen over time.
Professional Servicing
A professional technician has the expertise to identify and address potential issues that may not be immediately apparent. They can also perform tasks like recalibrating the timing, which can be challenging for non-experts.
Thread Tension Tests
Practice adjusting the thread tension for different fabrics and stitches. Keep a record of what settings work best for various materials for quick reference in the future.
Avoid Overloading the Machine
If you need to work with heavy fabrics or multiple layers, consider using a different machine better suited for heavy-duty work. Pushing your Featherweight beyond its capabilities may lead to strain and wear over time.
How to Fix Your Singer Featherweight Sewing Machine at Home?
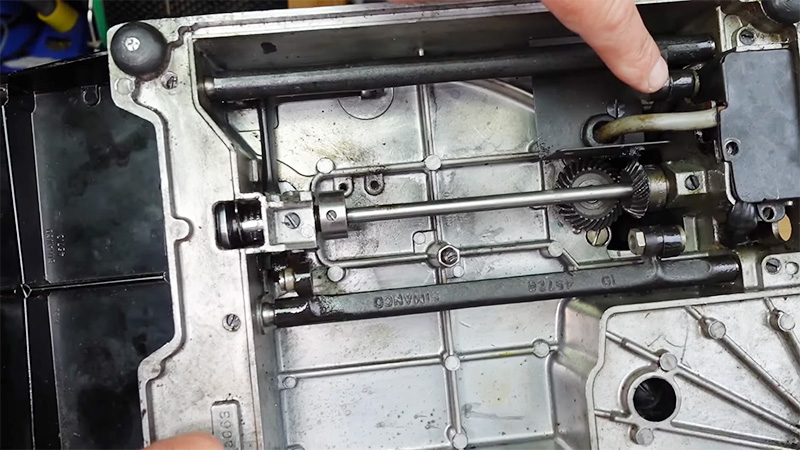
Fixing your Singer Featherweight sewing machine at home can be a rewarding endeavor.
Here are steps you can take to address common issues:
Gather Necessary Tools
Before making any repairs, ensure you have all the necessary tools within arm’s reach. You’ll need:
- screwdrivers (both flathead and Phillips),
- tweezers for precision work,
- a small brush with soft bristles,
- high-quality sewing machine oil, and
- a lint-free cloth
Identify the Problem
Thoroughly scrutinize your Singer Featherweight sewing machine. Look for any signs of irregularities, such as tension problems, thread snags, or inconsistent stitching.
Taking the time to pinpoint the issue carefully will guide your efforts to make appropriate adjustments.
Consult the Manual
The user manual for your Singer Featherweight is a valuable resource. It provides detailed information on your specific model, including troubleshooting tips and step-by-step instructions for common issues. Consulting the manual can often provide clear insights on approaching a repair.
Clean the Machine
Begin by delicately removing any dust and lint from both visible and less accessible areas of the machine.
Special attention should be given to the bobbin area, feed dogs, and tension discs, as lint buildup in these areas can significantly affect performance. Use a small brush with soft bristles and tweezers to clear away debris gently.
Check for Thread Tension Issues
Thread tension is critical for achieving even and consistent stitches. Ensure that the upper thread is correctly threaded through the tension discs. Take note of any signs of excessive tightness or looseness.
Adjust the tension dial as necessary to achieve the desired thread tension. Additionally, inspect the bobbin tension to ensure it complements the upper thread tension.
Inspect the Needle
A damaged or worn-out needle can lead to a range of stitching problems. Carefully examine the needle for any signs of bending, burrs, or bluntness. Even minor imperfections can cause stitching irregularities.
Replace the needle if needed, choosing the correct type and size for the fabric you’re working with.
Examine the Bobbin Case
Remove the bobbin case and inspect it for any signs of wear, rough edges, or damage. A smooth, well-maintained bobbin case is crucial for proper thread tension and smooth stitching.
Clean it thoroughly, ensuring no lint or debris might hinder its performance. Confirm that it’s securely and correctly seated in the machine.
Oil the Machine
Proper lubrication is essential to ensure that your sewing machine’s moving parts operate smoothly. Refer to the manufacturer’s instructions for specific oiling points on your Singer Featherweight.
Apply a small amount of high-quality sewing machine oil to these designated areas, and use a lint-free cloth to wipe away any excess. This process will help reduce friction and wear on crucial components.
Check for Loose Parts
Take a careful look at all parts of the machine, paying special attention to screws, bolts, and any other fasteners.
Over time, vibrations from sewing can cause these components to loosen. Tighten any that may have come undone to ensure the machine’s stability and proper operation.
Test on Scrap Fabric
Before resuming your regular sewing projects, test a scrap piece of fabric. This will allow you to observe how the machine performs after your adjustments. Look for even stitches, smooth fabric feeding, and consistent tension.
Address Electrical Issues
If your Singer Featherweight is electric, carefully inspect the power cord and foot pedal connections. Ensure they’re secure and free from any fraying or damage.
If you notice any exposed wires or other electrical issues, it’s advisable to consult a professional technician to avoid any potential safety hazards.
Adjust Bobbin Winding
If your bobbin winding is uneven, it’s important to address this issue. Adjust the tension screw on the bobbin case to achieve even winding. This ensures that the bobbin feeds smoothly during sewing, reducing the likelihood of thread jams.
Perform a Final Test
After making any adjustments or repairs, sew a test seam on a scrap of fabric. This final test will allow you to confirm that the machine is functioning optimally and producing the desired results.
When You Need Experts Help?
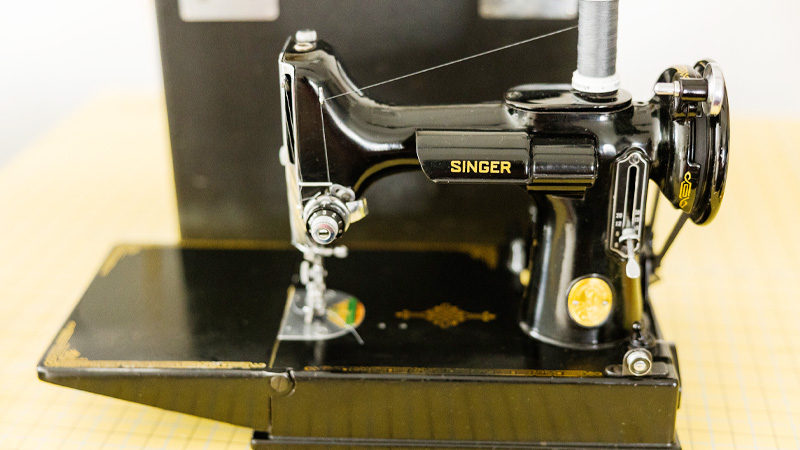
Seeking expert help for your Singer Featherweight sewing machine is crucial in certain situations. Here are scenarios when it’s advisable to consult a professional sewing machine technician:
Electrical Issues
When you’re experiencing problems with the electrical components of your sewing machine, such as a malfunctioning foot pedal, exposed wires, or power cord issues, consult an expert. Handling electrical repairs without the proper knowledge and tools can be dangerous.
Timing and Synchronization Problems
In cases where you suspect timing issues due to skipped stitches or unusual noises, it’s best to have a professional technician address them.
Adjusting a sewing machine’s timing, especially in older models like the Singer Featherweight, requires specialized knowledge and tools.
Motor or Drive System Troubles
When the motor is making unusual noises, not running smoothly, or the drive system is malfunctioning, these issues typically require professional expertise to diagnose and repair.
Complex Mechanical Repairs
Tasks like replacing gears, adjusting feed dogs, or addressing intricate internal mechanisms should be handled by a skilled technician. Attempting these repairs without the necessary knowledge and tools can lead to further damage.
Restoration and Vintage Machine Care
For restoring or maintaining vintage sewing machines, like the Singer Featherweight, experts often have specialized knowledge of older machine models and their unique components. They are equipped to handle the delicate restoration process.
Specific Parts Replacement
Consult an expert when your machine requires a specialized part that is not readily available or requires precise installation. They have access to a wider range of replacement parts and the expertise to install them correctly.
Overall Assessment and Maintenance
For routine maintenance and comprehensive assessments of your sewing machine’s condition, a professional technician can thoroughly evaluate and perform necessary adjustments to ensure optimal performance.
Warranty Considerations
When your sewing machine is still under warranty, attempting to perform repairs on your own may void the warranty. Consulting an authorized technician ensures that necessary repairs comply with the warranty terms.
Lack of Experience or Confidence
If you’re unsure how to approach a repair, lack the necessary tools, or feel uncomfortable working on your machine, it’s best to seek professional help. It’s better to have the job done correctly and safely by an expert.
FAQs
How do I troubleshoot tension issues on my Singer Featherweight?
Check the threading of both the upper thread and bobbin, and ensure they are correctly seated in the tension discs.
What should I do if my Singer Featherweight makes unusual noises during the operation?
Unusual noises may indicate a mechanical issue. It’s best to stop using the machine and consult a professional technician to diagnose and address the problem.
Why is my Singer Featherweight skipping stitches or having uneven stitching?
This could be due to several factors, including a bent or dull needle, incorrect threading, or timing issues.
What steps should I take if my Singer Featherweight is not picking up the bobbin thread?
Begin by ensuring the bobbin is wound correctly and inserted properly. Check for any obstructions or lint in the bobbin area.
How often should I oil my Singer Featherweight sewing machine, and what oil should I use?
Refer to your Singer Featherweight’s manual for specific guidelines on oiling. Generally, it’s recommended to oil the machine after every 8-10 hours of use.
Wrap Up
Troubleshooting and repairing your Singer Featherweight sewing machine can be rewarding with the right guidance.
By following the steps outlined in this guide and seeking professional help when necessary, you can effectively address common issues and ensure the longevity of your cherished machine.
Regular maintenance, proper cleaning, and attention to detail are key to keeping your Singer Featherweight in optimal working condition.
Remember that safety is paramount, and consulting a professional technician is a wise choice when in doubt or faced with complex problems.
With care and diligence, your Singer Featherweight will continue to be a reliable companion for your sewing projects for years.
Leave a Reply