In the realm of sewing, precision is paramount, and one technique that embodies this principle is to stay stitching. Learning how to stitch correctly is akin to laying a strong foundation before building a house—it’s essential for achieving accurate and well-fitting garments or projects.
Stay stitching is a vital step that stabilizes fabric edges, preventing distortion, fraying, and unsightly puckering, especially around curves and delicate areas.
By understanding the intricacies of this technique and following the right methods, you’ll ensure that your sewing projects maintain their intended shapes and sizes throughout the construction process.
This comprehensive guide on how to stay stitched correctly will provide you with clear, step-by-step instructions and valuable tips.
Whether you’re a novice or an experienced seamstress, honing your stay stitching skills is key to creating garments and items that are not only aesthetically pleasing but also comfortable and durable.

What Is A Stay Stitch?
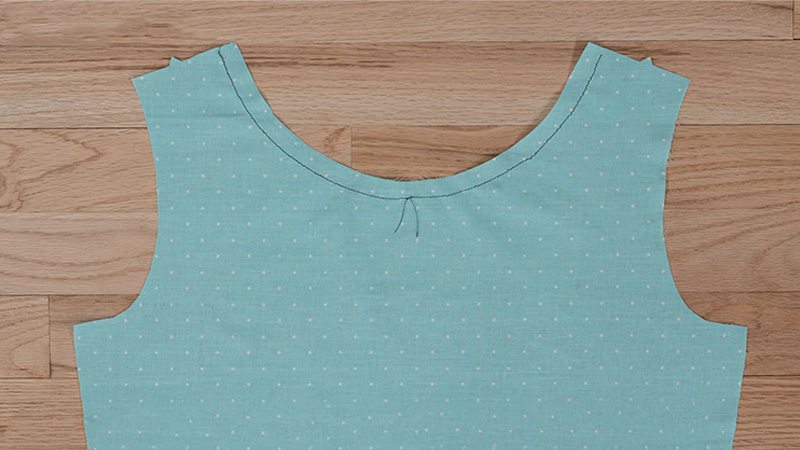
A stay stitch is a single line of stitching applied within the seam allowance of a fabric piece to stabilize and prevent stretching or distortion along its raw edge.
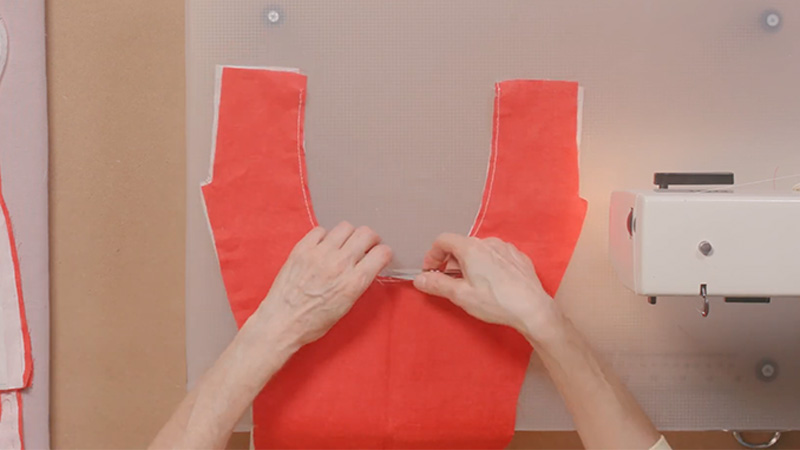
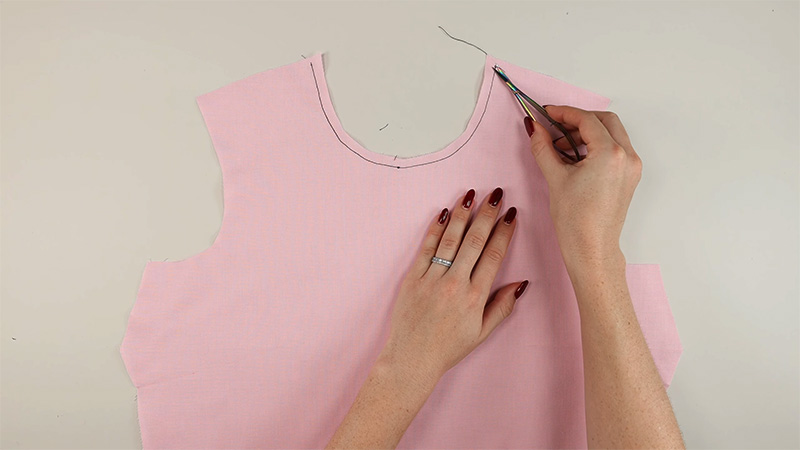
It is typically sewn just outside the seam line and is often used in garment construction, especially around curved or angled areas such as necklines, armholes, and corners.
Stay stitches help maintain the original shape of the fabric during the sewing process and prevent it from becoming distorted or stretched out. They are usually sewn with a shorter stitch length and are removed or incorporated into the final seam, depending on the sewing pattern’s instructions.
Stay stitches are a vital technique in achieving well-fitting and professional-looking garments by ensuring that the fabric maintains its intended shape throughout the construction process.
How To Stay Stitch Correctly?

Here are the simple methods for correctly stitching:
Understand the Pattern Instructions
Before starting, carefully read the sewing pattern’s instructions to determine where and how many stay stitches are required. Pattern markings and notations will guide you.
Select the Right Stitch Length and Tension
Adjust your sewing machine to a shorter stitch length, usually between 1.5mm and 2.5mm, and a standard tension setting. These settings provide stability without causing puckering.
Identify the Stitching Line
Locate the seam line on the fabric, typically marked on the pattern. Stay stitching is usually sewn just outside this line, within the seam allowance.
Start and Finish Securely
Begin your stay stitch by sewing a few backstitches to secure the thread. This prevents the stitching from coming undone when handling the fabric.
Stitch Carefully and Accurately
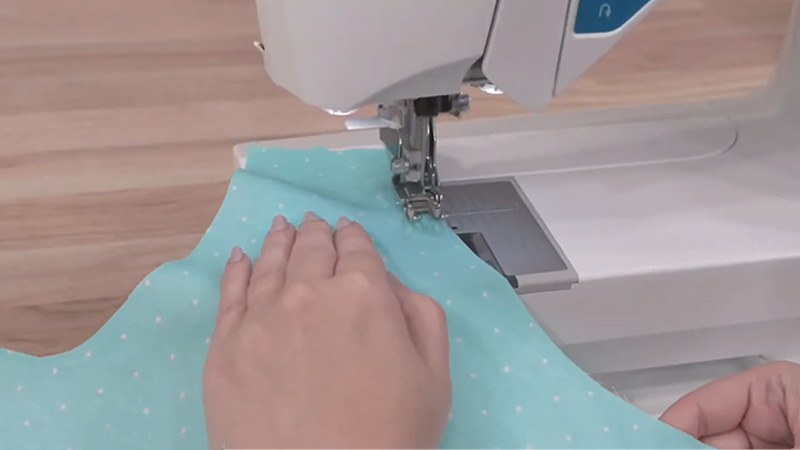
Sew the stay stitch slowly and accurately along the designated seam line, ensuring it remains just outside the seam allowance. Use the fabric edge or pattern markings as a guide.
Stay Stitch Direction
Stay stitched in the direction recommended by the pattern instructions. Typically, for curved areas, like necklines, sew from the outer edge toward the center. For straight edges, stitch from top to bottom.
Remove or Incorporate as Directed
Depending on the pattern, stay stitches may need to be removed after construction, or they may be incorporated into the final seam. Follow the pattern instructions to determine the appropriate course of action.
By following these seven simple steps, you can effectively apply stay stitches to stabilize fabric edges, prevent stretching, and ensure that your sewing project maintains its shape and fit throughout the construction process.
Stay stitching is a valuable technique that contributes to the overall quality and professionalism of your garment or item.
What Is The Best Stitch For Stay-Stitching?

The best stitch for stay stitching typically depends on the fabric you’re working with and the specific area of your sewing project. Here are the types of stitches commonly used for stay stitching:
Regular Straight Stitch
The standard straight stitch is the most common choice for stay stitching. It’s a simple, forward-stitching technique suitable for woven fabrics and is effective in preventing stretching along the seam line.
Narrow Zigzag Stitch
A narrow zigzag stitch provides additional flexibility and stability. It’s ideal for stretch fabrics, or areas where some give is required, like necklines or armholes.
Triple Stitch
The triple stitch is a reinforcement technique that involves sewing over the same area three times with closely spaced straight stitches. It’s excellent for securing areas prone to stress, like shoulder seams.
Double Straight Stitch
Similar to the triple stitch, the double straight stitch reinforces the stay stitch by sewing two parallel lines of regular straight stitches. It’s suitable for both woven and knit fabrics.
Backstitch or Reverse Stitch
Backstitching involves sewing backward and forward over the same spot to lock the stitches in place. It’s a strong choice for securing fabric edges and preventing unraveling.
Narrow Overlock or Serger Stitch
If you have a serger or overlocker machine, a narrow overlock stitch can be used for stay stitching. It trims and finishes the seam edge simultaneously, offering both stability and a clean finish.
Stretch Stitch
When working with knits or stretch fabrics, a stretch stitch is ideal. It accommodates the fabric’s stretch while providing reinforcement. Options include the lightning bolt stitch or the stretch triple straight stitch.
The best stitch for stay stitching depends on your specific fabric, sewing machine capabilities, and the area you’re working on. Always test your chosen stitch on a fabric scrap to ensure it achieves the desired results without causing puckering or distortion.
Why Is Stay Stitching Important?

Stay stitching plays a crucial role in sewing, particularly in garment construction. Here are the key reasons why stay stitching is important:
Preserving Fabric Shape
Stay stitching prevents the distortion and stretching of fabric edges, especially along curves like necklines and armholes. It helps maintain the fabric’s original shape throughout the sewing process.
Ensuring Accurate Fit
By stabilizing fabric edges, stay stitching ensures that pattern pieces retain their intended size and fit. This is particularly vital in garments where accurate fit is essential for comfort and aesthetics.
Preventing Fraying
Fabric edges, especially those cut on the bias or grain, are prone to fraying. Stay stitching secures these edges, preventing fraying during handling and sewing.
Enhancing Sewing Precision
Stay stitching provides a visual and tactile guide for aligning and matching fabric pieces during assembly. It helps maintain seam lines, grainlines, and other critical design elements.
Reducing Seam Puckering
Without stitching, curved seams like those around necklines or armholes can pucker or gather, resulting in an uneven finish. Stay stitching distributes tension evenly, reducing the risk of puckering.
Preventing Seam Misalignment
Stay stitching helps prevent misalignment of fabric edges, ensuring that they remain consistent with the sewing pattern’s markings. This is essential for achieving a polished and professional look.
Safeguarding Pattern Integrity
In multi-piece patterns, stay stitching helps maintain the integrity of the pattern’s shape. It prevents individual pieces from stretching or distorting before they are joined together.
Stay stitching is a fundamental sewing technique that contributes to the precision, durability, and overall quality of your sewing projects. It ensures that your fabrics and pattern pieces stay true to their intended shapes and sizes, ultimately leading to a well-fitted and professionally finished garment or item.
FAQs
What is the purpose of stay stitching?
Stay stitching stabilizes fabric edges, preventing stretching, distortion, and fraying. It ensures that pattern pieces maintain their original shape, enhancing the accuracy and fit of your sewing project.
When should I use stay stitching?
Use stay stitching in areas prone to stretching or distortion, such as curved edges like necklines, armholes, and corners, as well as bias-cut fabric edges.
What stitch type and length are best for stay-stitching?
A regular straight stitch with a shorter length (around 1.5mm to 2.5mm) is typically used for stay stitching. Adjust settings to avoid puckering and ensure stability.
Do I remove stay stitches after sewing the final seam?
It depends on the project. In most cases, stay stitches are incorporated into the final seam. Always follow your pattern instructions for guidance.
Can stitches be sewn by hand?
Yes, stay stitches can be hand-sewn, though it’s more commonly done with a sewing machine for efficiency and uniformity. Hand-stitched stay stitches can be used when a machine is not available or for delicate fabrics.
Conclusion
In the world of sewing, the small details often make the biggest difference, and stitching is a perfect example of this. As we conclude this guide on how to stay stitched correctly, it’s clear that mastering this fundamental technique is essential for achieving sewing success.
By diligently applying stay stitches, you safeguard the integrity of your fabric pieces, prevent distortion, and ensure a precise fit in your sewing projects.
Whether you’re working on a delicate neckline, a curved seam, or any area susceptible to stretching or fraying, stay stitching is your reliable ally. It empowers you to navigate the intricate world of garment construction with confidence, knowing that your fabric will remain true to its intended shape and size.
So, embrace the art of stay stitching, and watch your sewing projects come to life with precision, elegance, and durability.
Leave a Reply