Embroidery, a timeless art form, weaves intricate tales of creativity through needle and thread. Among its diverse stitches, the seed stitch emerges as a fundamental and versatile technique.
Known also as the rice or moss stitch, it brings forth a textured marvel of small, scattered dots across the fabric. This simple yet powerful stitch serves as a cornerstone for both beginners and seasoned embroiderers, offering a myriad of applications.
Whether filling spaces with botanical allure, creating modern geometric designs, or adding depth to realistic scenes, the seed stitch stands as a testament to the artistry and adaptability that embroidery affords.
Join the journey to discover the charm woven by the seed stitch.
What Is a Seed Stitch in Embroidery?
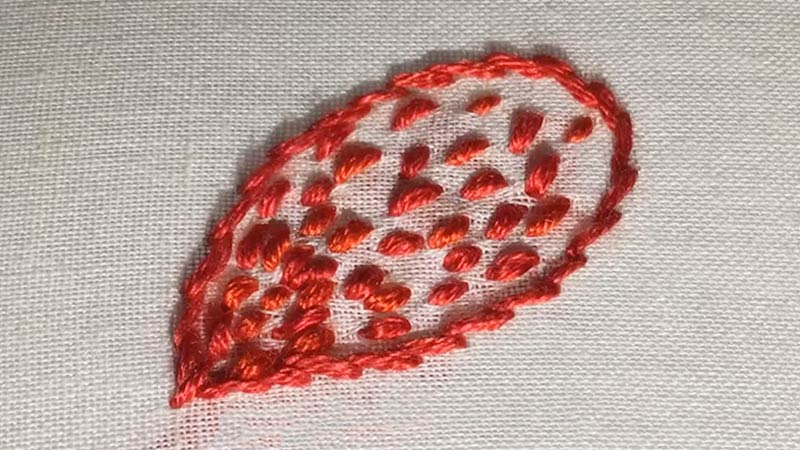
A seed stitch in embroidery is a basic yet versatile technique where small, scattered dots are created on fabric. Also known as the rice or moss stitch, it involves making random, tiny, straight stitches to form a textured surface.
Commonly used for filling areas in designs, the seed stitch adds dimension and visual interest. Its simplicity makes it accessible for beginners, while its adaptability allows for various applications, from botanical motifs to modern and abstract patterns.
This stitch is prized for its ability to enhance embroidery projects by introducing a charming and organic texture to the fabric.
How to Do a Seed Stitch in Embroidery? Step-By-Step Guide
Embarking on a seed stitch in embroidery is an exciting journey into the realm of creating texture and depth in your fabric masterpiece. This versatile and straightforward stitch adds a charming, scattered pattern of dots that can enhance various designs.
Here’s a step-by-step guide on how to execute a seed stitch in embroidery:
Materials Needed
- Fabric
- Embroidery hoop
- Needle
- Thread
- Pattern or design to follow
Step-by-Step Guide:
Secure the Fabric
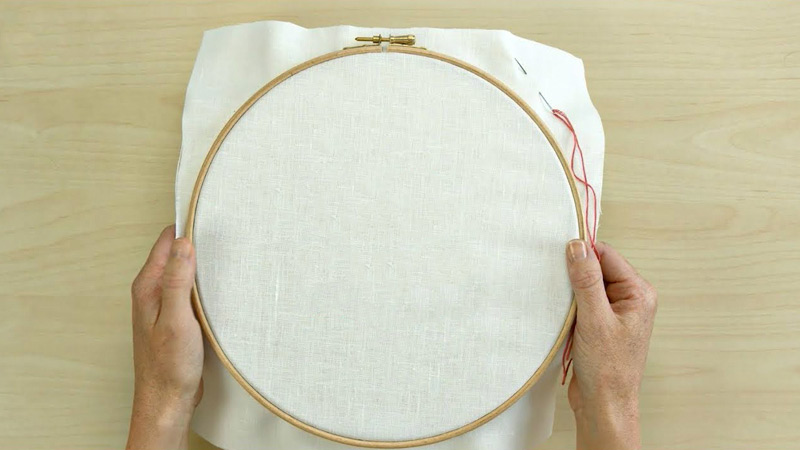
Begin by securing your fabric in the embroidery hoop. This ensures the fabric remains taut and stable during the stitching process.
Thread the Needle
Choose a thread color that complements your design. Thread the needle, and don’t forget to knot the end securely.
Bring Needle Up
Start at the back of the fabric and bring the needle up at the starting point of your design. This is where your first seed stitch will begin.
Make Small Straight Stitches
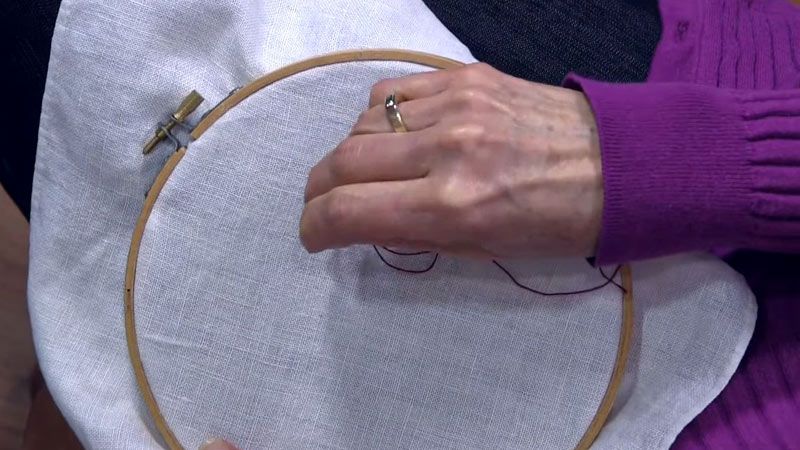
Insert the needle back into the fabric a short distance away from where it emerged, creating a small straight stitch. Keep the length of the stitch relatively short, preferably no longer than 3 mm (1/8 inch).
Randomly Fill the Area
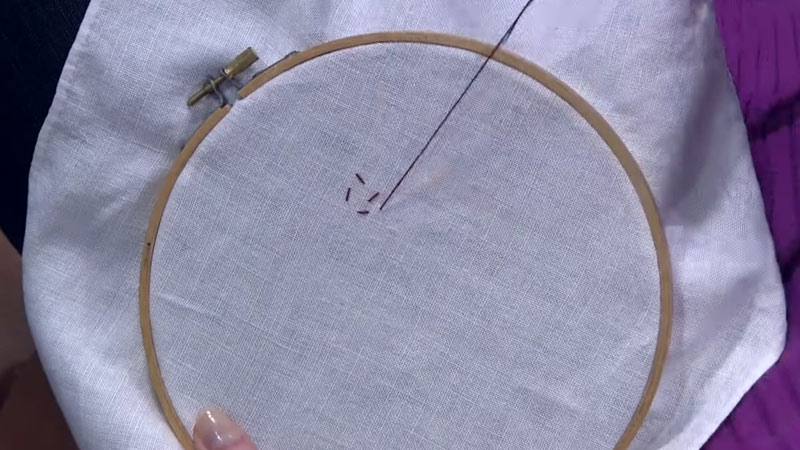
Bring the needle up from the back at a random point within the area you want to fill. Make another small straight stitch in any direction, ensuring it doesn’t cross or touch the previous stitch.
Continue Stitching
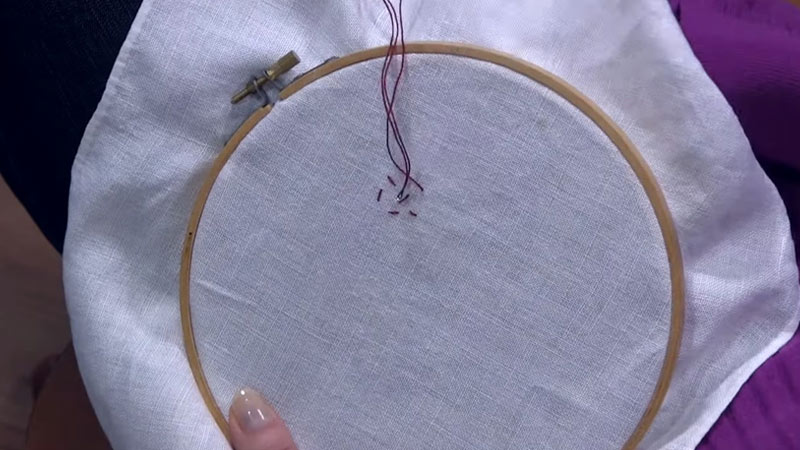
Repeat the process, bringing the needle up and creating tiny straight stitches until the entire designated area is filled with seed stitches. The key is to keep the stitches random and evenly spaced.
Finish the Stitching
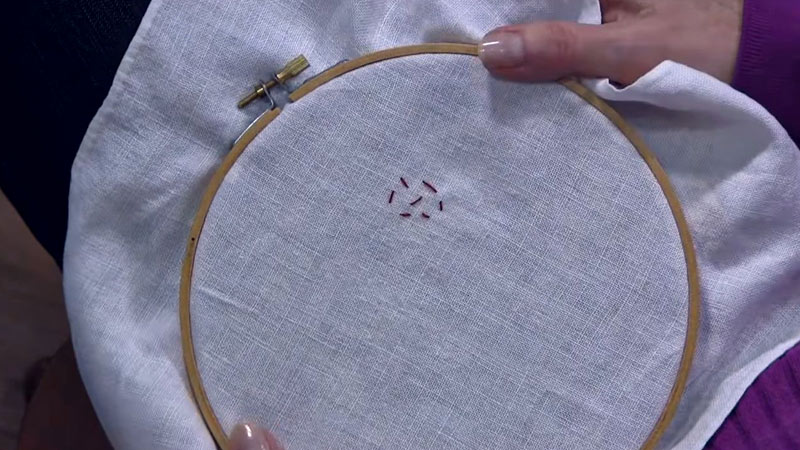
To conclude, knot the thread at the back of the fabric to secure it. Trim off any excess thread, leaving a neat and finished look.
What Are Some Variations of the Seed Stitch in Embroidery?
While the basic seed stitch creates a scattered pattern of tiny, straight stitches, several variations and modifications can be applied to achieve different effects in embroidery.
Here are some variations of the seed stitch:
Double Seed Stitch
It is similar to the basic seed stitch but involves making two tiny straight stitches in the same spot before moving on to the next area. This creates a denser texture.
Irregular Seed Stitch
Instead of maintaining an even spacing between stitches, vary the distance and length of the stitches for a more irregular and organic appearance.
Long Seed Stitch
Increase the length of the straight stitches, allowing for a bolder and more pronounced texture in the embroidered area.
Clustered Seed Stitch
Create groups or clusters of seed stitches in specific areas, leaving other parts of the design more open. This adds visual interest and variation.
Crossed Seed Stitch
Introduce diagonal or crossed stitches within the seed stitch pattern for a more intricate and complex look.
Seed Stitch Grid
Organize seed stitches into a grid pattern, providing a structured and organized texture. Vary the spacing for different effects.
Layered Seed Stitch
Work in layers by adding additional seed stitches on top of existing ones. This builds up the texture and gives a three-dimensional effect.
Seed Stitch Borders
Use the seed stitch to create decorative borders or frames around the edges of your embroidery, enhancing the overall design.
Seed Stitch Filling with Color Blending
Experiment with using multiple thread colors within the seed stitch area to create shading, blending, or gradient effects.
Seed Stitch in Circular Patterns
Arrange seed stitches in circular or spiral patterns, providing a dynamic and visually appealing element to the embroidery.
Seed Stitch as Outlines
Use the seed stitch to outline shapes or figures within your embroidery design, combining it with other stitches for added definition.
Randomized Seed Stitch
Embrace complete randomness by placing seed stitches without any predetermined pattern. This creates a more abstract and spontaneous appearance.
Benefits of Using a Seed Stitch in Embroidery
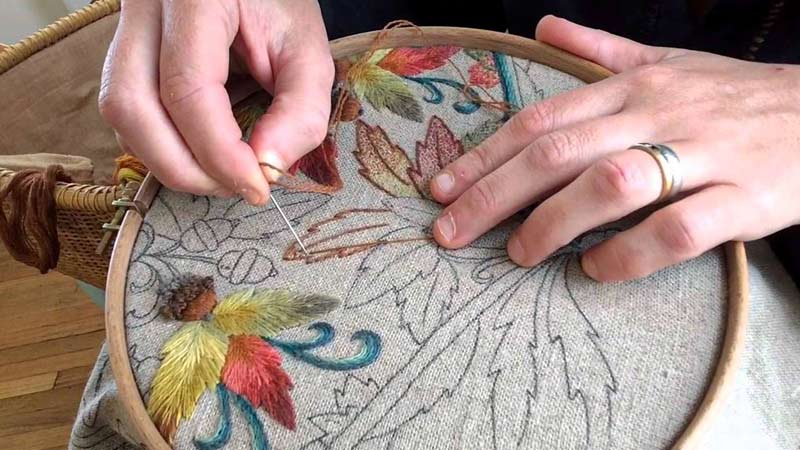
Using a seed stitch in embroidery offers several benefits, making it a popular and versatile choice for embellishing fabric.
Here are some advantages of incorporating the seed stitch into your embroidery projects:
Texture and Dimension
The seed stitch creates a textured surface with small, scattered dots, adding depth and dimension to your embroidery. This texture can mimic the appearance of various surfaces like foliage, fur, or skin.
Versatility
The seed stitch is incredibly versatile and can be applied to various designs, from realistic depictions of nature to abstract and modern patterns. It can fill both large and small areas, making it suitable for different embroidery projects.
Ease of Learning
The seed stitch is one of the simpler embroidery stitches, making it accessible for beginners. Its uncomplicated nature allows new embroiderers to grasp the technique and start creating textured designs quickly.
Quick Filling Technique
When you need to fill a space efficiently, the seed stitch is an excellent choice. Its scattered pattern covers areas more quickly than some other stitches, making it ideal for more significant sections or backgrounds.
Adaptability with Colors
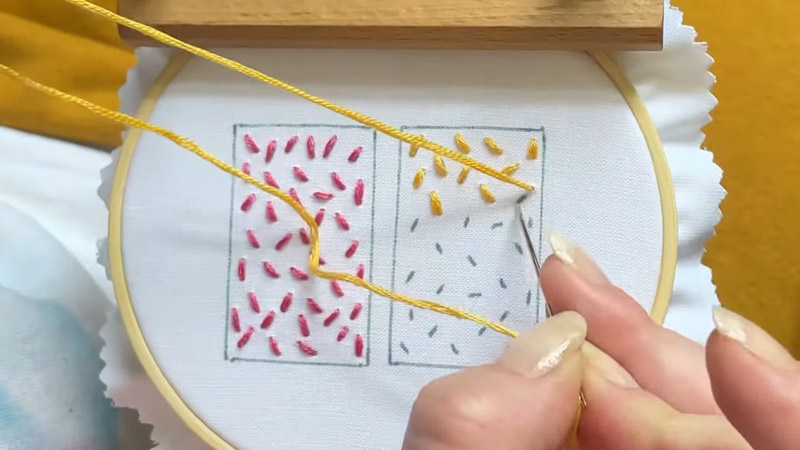
The seed stitch works well with different colors and shades. You can experiment with monochromatic schemes, gradients, or contrasting colors to achieve the desired visual effect and add interest to your embroidery.
Blendability
Because of its scattered nature, the seed stitch seamlessly blends with other embroidery stitches. This makes it easy to combine with various techniques, allowing you to create intricate and unique designs.
Personalization
Seed stitch embroidery provides a platform for personalization. Whether you’re adding initials, names, or small details, the scattered dots allow for creative and customized touches to your projects.
Ideal for Nature and Scenic Designs
The organic and random pattern of the seed stitch makes it particularly well-suited for nature-inspired designs. It can be used to depict grass, leaves, flowers, or other natural elements in a visually appealing way.
Enhanced Realism
When used strategically, the seed stitch can add a level of realism to your embroidery. For example, it can simulate the texture of animal fur or the irregular patterns on plant leaves.
Visual Interest
The randomness of the seed stitch creates visual interest within your embroidery, drawing attention and making the design more engaging for the viewer.
Stress-Free Repair
If you make a mistake in a seed stitch, it’s generally easy to fix without unraveling the entire design. This forgiving quality can reduce the stress associated with minor errors.
Some Popular Embroidery Projects That Use the Seed Stitch
The seed stitch is a versatile embroidery technique that can be applied to various projects, adding texture and visual interest to your creations.
Here are some popular embroidery projects that often feature the use of the seed stitch:
1. Botanical Embroidery
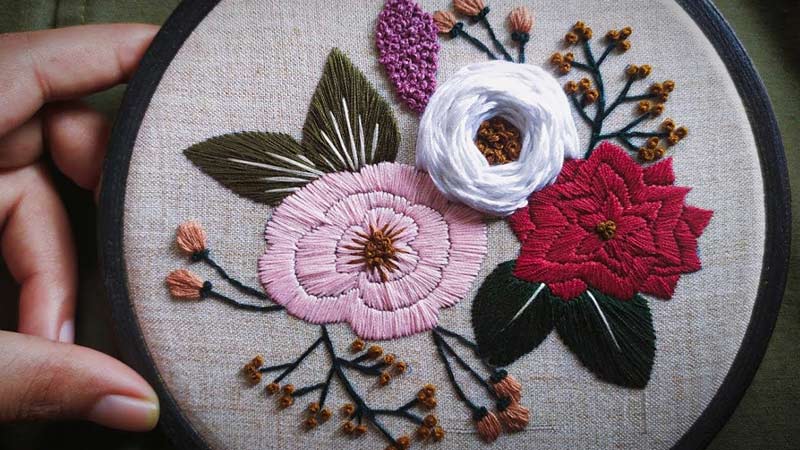
Use the seed stitch to create textured leaves, flowers, or fruits in botanical embroidery. The scattered dots mimic the natural patterns found in plants.
2. Scenic Landscapes
Apply the seed stitch to depict landscapes, especially when creating elements like grass, bushes, or fields. The randomness of the stitch contributes to a realistic and organic appearance.
3. Animal Fur and Texture
Utilize the seed stitch to simulate the texture of animal fur in realistic animal embroidery. This can add a lifelike quality to your embroidered creatures.
4. Abstract Designs
Incorporate seed stitches into abstract embroidery projects. The scattered dots can contribute to dynamic and visually exciting patterns without adhering to a specific form or structure.
4. Modern Geometric Designs
Introduce the seed stitch into modern embroidery featuring geometric shapes or patterns. Its randomness can break up clean lines and add a touch of playfulness to contemporary designs.
5. Personalized Monograms and Initials
Use the seed stitch to add personalized details like monograms, initials, or small decorative elements to various items such as handkerchiefs, pillowcases, or clothing.
6. Nature-inspired Scenes
Create nature-inspired scenes, such as forests, meadows, or oceans, using the seed stitch to fill in the background or add details like waves, clouds, or rocks.
7. Home Decor Projects
Embroider seed stitch patterns on home decor items such as throw pillows, table runners, or wall hangings. The texture adds a tactile and visually appealing element to these pieces.
8. Children’s Embroidery
Incorporate seed stitches into whimsical and playful designs for children’s clothing, blankets, or accessories. The scattered pattern can complement cheerful and imaginative themes.
9. Holiday and Seasonal Embroidery
Apply the seed stitch to seasonal projects, like snowflakes for winter, flowers for spring, or leaves for fall. The versatility of the stitch makes it adaptable to various holiday themes.
10. Embroidered Accessories
Use the seed stitch to embellish accessories like scarves, hats, or bags. It adds a touch of uniqueness and handmade charm to these items.
11. Quilting Embellishments
Enhance quilting projects by incorporating seed stitch embroidery to fill in blocks or add details to quilted designs.
FAQs
Can beginners try the seed stitch in embroidery?
Yes, the seed stitch is beginner-friendly, offering simplicity while allowing for creative exploration.
What are some tips for seed stitch embroidery?
Tips include experimenting with thread thickness, using contrasting colors for visual impact, and combining seed stitches with other embroidery techniques.
Can I combine seed stitch with machine embroidery?
While seed stitch is typically done by hand, some machine embroidery patterns simulate a similar effect. Experiment with your machine to achieve the desired results.
How can I prevent fabric puckering with seed stitch embroidery?
Use an appropriate stabilizer, hoop the fabric correctly, and avoid pulling the stitches too tightly to reduce the risk of fabric puckering.
Can I wash and iron fabric with seed stitch embroidery?
Yes, but use a gentle cycle and avoid excessive agitation. Iron on the reverse side or with a pressing cloth to preserve the texture.
To Recap
The seed stitch in embroidery unveils itself as an artistic cornerstone, offering a canvas for creative expression. With its simplicity, adaptability, and versatility, this stitch has become a cherished tool in the embroiderer’s repertoire.
From breathing life into botanical motifs to adorning modern designs with texture, the seed stitch invites artists to explore and innovate. As needles and threads dance, the scattered dots form a tapestry of dimension and charm.
Embracing both beginners and seasoned artisans, the seed stitch remains a testament to the enduring allure of embroidery, a craft that beautifully stitches together tradition, imagination, and the boundless possibilities that unfold through the delicate interplay of thread and fabric.
Leave a Reply