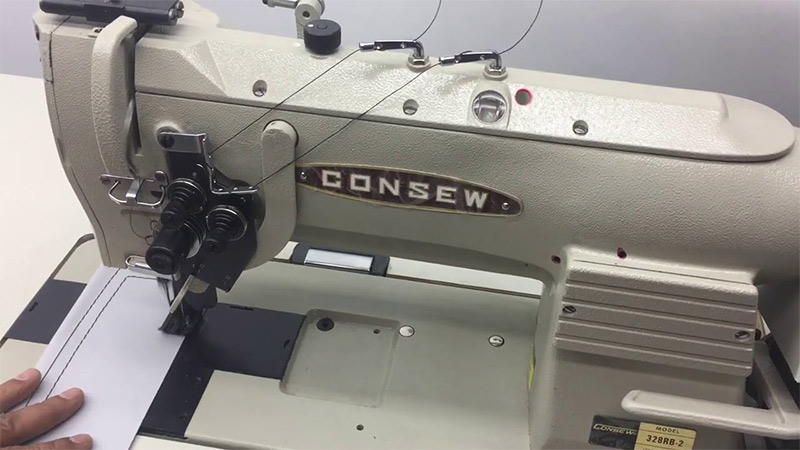
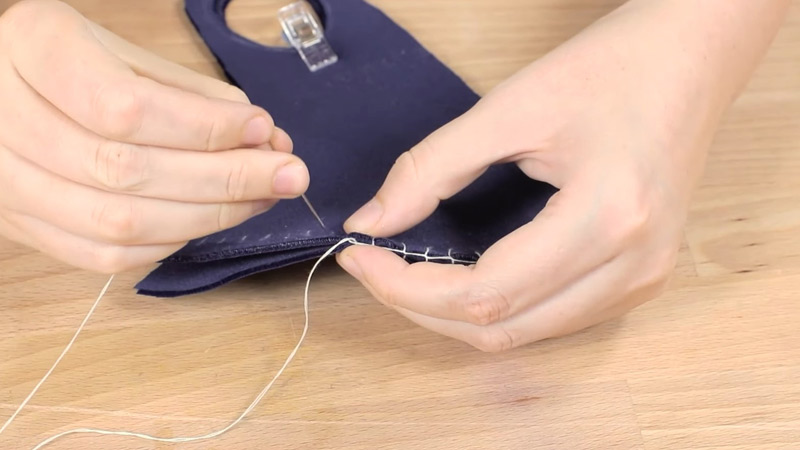
Angular stitch sewing, a meticulous and specialized sewing technique, brings together the worlds of craftsmanship and durability.
This method, often referred to as corner stitch sewing, is centered on reinforcing and enhancing the corners and angles of materials.
It is especially prized in the realms of leatherworking, upholstery, and high-end textile crafts.
Angular stitch sewing stands out for its dual purpose: fortifying the structural integrity of stitched items while simultaneously elevating their aesthetic appeal.
Whether in the creation of leather accessories, upholstered furniture, or tailored garments, this technique plays a pivotal role in crafting items that are both visually striking and built to withstand the test of time.

What Is Angular Stitch Sewing? -Definition and Characteristics
Angular stitch sewing, also known as corner stitch sewing, is a specialized sewing technique used in various textile and leatherworking applications.
This method involves sewing along the corners or angles of a fabric or material to create a strong and visually appealing seam.
Angular stitch sewing is commonly employed in the production of leather goods, upholstery, and other projects where both durability and aesthetics are important.
Here are some key aspects and characteristics of angular stitch sewing:
Corner Emphasis
Angular stitch sewing is particularly effective in reinforcing corners and angles, which are often the weakest points of any stitched material. When force or tension is applied to a material, it tends to concentrate at these points.
By sewing along the corners, the risk of the material tearing or coming apart is significantly reduced, increasing the overall durability and longevity of the item.
Strength and Durability
The robustness of angular stitch sewing makes it ideal for items subjected to wear and tear, such as leather accessories like belts, wallets, and bags.
This technique provides added structural integrity, ensuring that these items can withstand the stresses of daily use without compromising their appearance or functionality.
Aesthetics
The decorative aspect of angular stitch sewing is highly prized in the world of craftsmanship and design. It adds a distinctive touch to the finished product, making it stand out and often conveying a sense of quality and attention to detail.
The choice of thread color, stitch pattern, and spacing can all be customized to achieve the desired visual effect, further elevating the item’s aesthetics.
Variations
Different variations of angular stitch sewing offer versatility for various applications.
Saddle stitching, for instance, is commonly used for leatherwork and involves two needles and thread passed through the same holes to create a sturdy, diagonal stitch.
In contrast, box stitching is characterized by a square pattern and is often used for decorative purposes, creating a distinctive border around the corners.
Materials and Tools
Angular stitch sewing can be applied to a wide range of materials, including not only leather but also heavy fabrics, canvas, and even some plastics. The choice of materials may dictate the specific tools and techniques required.
For example, stitching awls and pricking irons are used to create evenly spaced holes for stitching, while strong and durable threads like waxed nylon or linen are chosen for their ability to withstand tension.
Skill and Precision
Achieving expert-level angular stitch sewing demands a high degree of skill and precision. Craftsmen and artisans must develop an acute eye for detail and an understanding of the materials they work with.
They need to maintain consistent stitch spacing and tension throughout the project to ensure the seams are not only strong but also aesthetically pleasing.
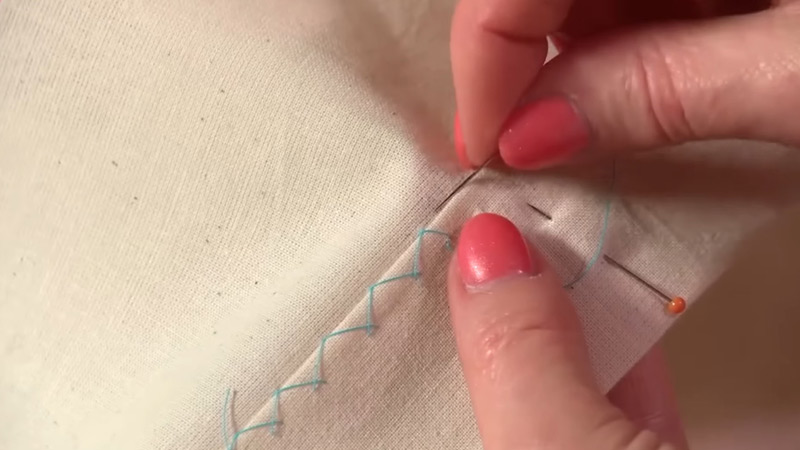
Overlocking Stitch by Hand

Hand overlocking, also known as hand overcasting, is a sewing technique used to finish raw fabric edges to prevent fraying.
It’s a useful skill to have, especially when you don’t have access to a sewing machine or want to create a decorative edge on your project.
Here’s how to hand overlock stitch:
Materials you’ll need:
- Fabric
- Thread
- Hand sewing needle
- Scissors
- Pins
- Thimble
Steps to hand overlock stitch:
Step 1: Cut Your Fabric
Before you begin, ensure that your fabric pieces are cut to the desired shape and size for your project. It’s important to leave the edges raw and prone to fraying, as the purpose of hand overlocking is to prevent fraying and create a neat finish.
Step 2: Thread Your Needle
Choose a hand sewing needle that is suitable for the weight of your fabric. Thread the needle with a length of thread, typically around 18-24 inches, and knot the end. The knot will prevent the thread from pulling through the fabric as you start stitching.
Step 3: Prepare the Fabric
To create a small hem along the edge of the fabric, fold the raw edge over by about 1/4 inch (6mm) to the wrong side of the fabric.
Pinning this fold in place with sewing pins can help keep it secure while you work, but it’s optional.
Step 4: Start Stitching
Begin your stitching from one end of the folded edge. Insert your needle from the wrong side of the fabric to the right side, positioning it about 1/8 inch (3mm) from the edge.
Gently pull the thread through until the knot catches on the wrong side. This initial stitch secures the thread in place.
Step 5: Overcasting Stitch
The overcasting stitch is the heart of hand overlocking, and it’s what prevents fraying.
Here’s a more detailed explanation of how to create these stitches:
- Insert your needle from the right side to the wrong side of the fabric, angling it slightly to the left.
- Bring the needle back up to the right side, creating a diagonal stitch that catches a small amount of fabric. Ensure that the diagonal stitches are close together, approximately 1/8 inch (3mm) apart.
- Continue making these diagonal stitches along the folded edge, working your way from one end to the other. Make sure each stitch catches both the folded fabric and a small bit of the raw edge.
Step 6: Continue Stitching
- Keep stitching until you’ve covered the entire folded edge. Maintaining consistent spacing between the diagonal stitches will ensure a secure finish that prevents fraying. Take your time to ensure your stitches are neat and evenly spaced.
Step 7: Finish Off
When you reach the end of the fabric edge, make a small knot on the wrong side to secure the thread. Trim any excess thread with scissors, leaving a clean and tidy finish.
Step 8: Press
As desired, you can lightly press the overlocked edge with an iron to create a smoother and more professional look. Be cautious not to overheat or scorch the fabric, especially if it’s delicate or synthetic.
Step 9: Repeat for Other Edges
When your project has more than one raw edge, repeat the hand overlocking process for each edge, ensuring that all edges are neatly finished.
How to Finish a Stitch Sewing

Finishing a stitch in sewing means securing the thread at the end of your sewing line to prevent it from unraveling.
There are several methods to finish a stitch, and the choice depends on the type of stitch you’re using and your preference.
Here are three common ways to finish a stitch in sewing:
1. Backstitch
When you reach the end of your sewing line, stop with the needle in the down position (inserted through the fabric). Then, reverse the sewing machine’s direction and sew a few stitches backward over the same line.
Finally, sew forward again to the end of the line. This creates a secure lock at the beginning and end of your stitching.
2. Knotting (Hand Sewing)
Hand sewing often involves knotting to secure the thread. When you’re near the end of your stitching line, pass the needle through the loop of the last stitch.
Pull the thread tight to create a small knot close to the fabric. You can do this once or several times for added security, depending on your preference.
3. Lockstitch (Machine Sewing)
Many sewing machines have a lockstitch feature that automatically secures the thread at the beginning and end of a line of stitching. When you reach the end of your sewing line, use the machine’s lockstitch button or lever (if available).
This will create a few small back-and-forth stitches, effectively locking the thread in place. If your sewing machine doesn’t have a lockstitch feature, you can use the backstitch method described above for hand sewing.
15 Types of Stitches -Sewing Machine
Sewing machines offer a variety of stitches to cater to different sewing needs.
Here are 15 common types of stitches that can be found on sewing machines:
1. Straight Stitch
As the foundation of sewing, the straight stitch is vital for sewing seams, whether in garment construction or quilting. It creates a neat and strong line of stitches.
For precision, it’s often used with a seam guide to maintain consistent seam allowances. Adjusting the stitch length allows for customization, with shorter stitches for delicate fabrics and longer ones for heavy-duty projects.
2. Zigzag Stitch
The zigzag stitch is highly versatile. Its width and length can be adjusted, making it suitable for a wide range of tasks. A narrower zigzag can be used for finishing fabric edges, preventing fraying.
Wider zigzag settings are ideal for appliqué, as they secure fabric pieces while providing a decorative edge. Additionally, zigzag stitches are essential for sewing stretchy fabrics, as they allow the seam to stretch without breaking.
3. Overlock Stitch (Serger Stitch)
Overlock stitches are crucial for neatly finishing raw fabric edges. They prevent fraying, providing a professional-looking edge to garments and other projects.
While dedicated serger machines specialize in this type of stitch, many standard sewing machines offer an overlock stitch option, making it more accessible for home sewers.
4. Buttonhole Stitch
Creating buttonholes manually can be challenging, but modern sewing machines simplify the process with built-in buttonhole stitches.
These stitches automatically create buttonholes of various sizes, eliminating the need for precise measurements and time-consuming manual stitching.
It’s a time-saving feature commonly used for adding buttons and closures to garments and accessories.
5. Blind Hem Stitch
When creating hems that are nearly invisible from the outside, the blind hem stitch is invaluable. It combines straight stitching with intermittent zigzag stitches that catch a small portion of the folded hem.
This results in a secure hemline with a discreet finish, commonly used in dressmaking and tailored garments.
6. Decorative Stitches
Sewing machines offer an extensive selection of decorative stitches, ranging from intricate floral patterns to stars, hearts, and other decorative designs.
These stitches allow for creative embellishments on garments, home decor items, and crafts. Depending on the machine, you can often adjust the stitch length and width to customize the decorative effect.
7. Triple Stitch
The triple stitch is a reinforced straight stitch designed for areas that require extra strength and durability. It involves sewing over the same spot multiple times, creating a sturdy and robust seam.
This stitch is often used for attaching heavy-duty straps on bags, sewing patches onto uniforms, or reinforcing seams that may undergo significant stress.
8. Stretch Stitch
When working with stretchy fabrics such as knits or spandex, a standard straight stitch may break when the fabric stretches.
The stretch stitch, characterized by a slight zigzag pattern, accommodates the fabric’s stretch without causing stitches to snap.
This ensures that seams remain flexible and durable, making it ideal for activewear, swimwear, and other stretchy garments.
9. Quilting Stitches
Sewing machines designed for quilting typically come equipped with specialized quilting stitches. These stitches include stippling, which creates a meandering pattern used for quilt fill, and various quilting motifs for decorative effects.
Quilters can use these stitches to add both structural integrity and artistic flair to their quilted projects.
10. Tacking Stitch
The tacking stitch, also known as the basting stitch, is a temporary, long straight stitch used to hold layers of fabric together temporarily.
It’s particularly useful for fitting adjustments during garment construction or for securing quilt layers before the final quilting.
Basting stitches are easily removed because they are intended as placeholders until permanent stitching is applied.
11. Locking Stitch
The locking stitch, sometimes referred to as a backtack or reverse stitch, is used to secure the beginning and end of a seam to prevent it from unraveling.
Instead of backstitching, which can sometimes leave a noticeable bulk of thread, the locking stitch creates a clean and secure finish. It’s particularly useful when you want a neat appearance on the surface of your fabric.
12. Elastic Stitch
Elastic stitches are specifically designed for sewing elastic materials. This stitch has a unique pattern that allows the fabric to stretch without causing the stitches to break or snap.
It ensures a strong and flexible seam, making it ideal for swimwear, lingerie, sportswear, and any garments that require elasticity.
13. Triple Zigzag Stitch
Building upon the standard zigzag stitch, the triple zigzag stitch adds even more strength and stability to seams.
It involves three parallel rows of zigzag stitches, creating a reinforced and highly durable seam.
This stitch is often used in heavy-duty sewing applications and for attaching patches or appliqués securely.
14. Feather Stitch
The feather stitch is a decorative embroidery stitch characterized by a series of open “V” shapes. It is often used for embellishing fabric surfaces with delicate, flowing patterns.
This stitch adds a touch of elegance and is frequently seen on items like table linens, garments, and home decor projects.
15. Couching Stitch
The couching stitch is employed for attaching decorative cords, threads, or yarn to the surface of fabric. It involves sewing over the decorative material, effectively “couching” it onto the fabric’s surface.
This stitch allows for the creative use of various textures and colors, making it a popular choice for adding intricate designs and textures to quilts, clothing, and upholstery.
FAQS
Is angular stitch sewing suitable for lightweight fabrics?
Angular stitch sewing is most commonly associated with leather and heavy materials.
Can angular stitch sewing be done by hand or only with machines?
Angular stitch sewing can be done by both hand and machine.
Is angular stitch sewing time-consuming compared to other sewing techniques?
Angular stitch sewing can be more time-consuming than basic sewing methods due to the precision required for aligning stitches along corners and angles.
Are there any specific maintenance requirements for items crafted using angular stitch sewing?
To ensure the longevity of items crafted with angular stitch sewing, it’s advisable to periodically inspect the seams and re-stitch any loose or damaged sections.
Are there any alternatives to angular stitch sewing for reinforcing corners and angles in sewing projects?
While angular stitch sewing is highly effective, alternatives like reinforcing with additional layers of fabric or using corner reinforcements (such as metal grommets) can be considered for certain projects.
What is Angle Stitch?
Angle stitch, also known as angular stitch sewing or corner stitch sewing, is a specialized sewing technique that involves sewing along the corners or angles of a fabric or material.
To Recap
Angular stitch sewing represents the convergence of artistry and resilience in the world of craftsmanship.
This meticulous technique, also known as corner stitch sewing, prioritizes the reinforcement of corners and angles, making it indispensable in fields like leatherworking, upholstery, and bespoke tailoring.
Angular stitch sewing not only bolsters the strength and longevity of the crafted items but also serves as a canvas for creativity, adding a distinctive, eye-catching element.
Whether creating durable leather goods, impeccably upholstered furniture, or meticulously tailored garments, this method transforms the ordinary into the extraordinary.
It embodies the essence of marrying function with aesthetics, ensuring that the products not only endure but also inspire admiration for their beauty and craftsmanship.
Leave a Reply