The backstitch is a fundamental sewing technique that serves a crucial role in creating durable and secure seams in various sewing projects. It’s used to prevent the unraveling of stitches by anchoring them securely at the beginning and end of a seam.
This versatile stitch finds its application in both hand-sewing and machine-sewing processes.
Whether you’re a novice or an experienced seamstress, understanding what backstitch is used for is essential to achieving professional-quality results in your sewing endeavors.
In this guide, we will delve into what is back stitch used for, exploring its role in securing seams, reinforcing stress points, and ensuring the longevity of your garments and textile creations.
By mastering the art of the backstitch, you’ll unlock a fundamental sewing skill that contributes to the strength and durability of your projects.

What Is Back Stitch Used For?
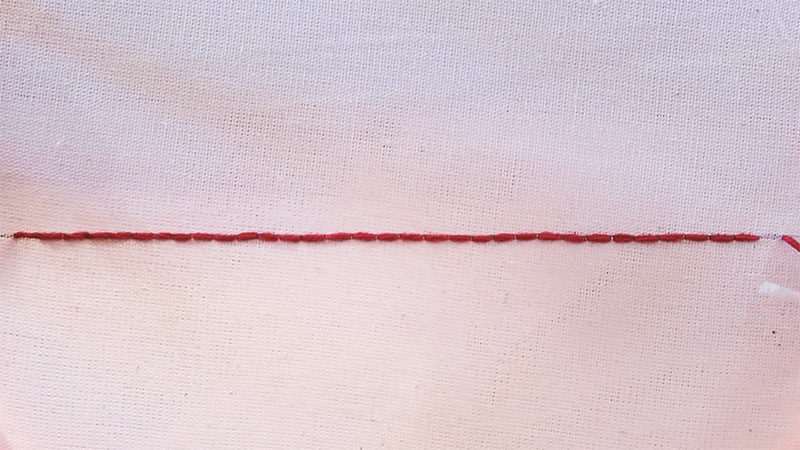
Back stitch is a type of embroidery and sewing stitch that is made backward to the general direction of sewing. It creates a strong and neat line of stitching that can be used for various purposes.
Here are some uses of back stitch and how to do them:
Outlining Shapes
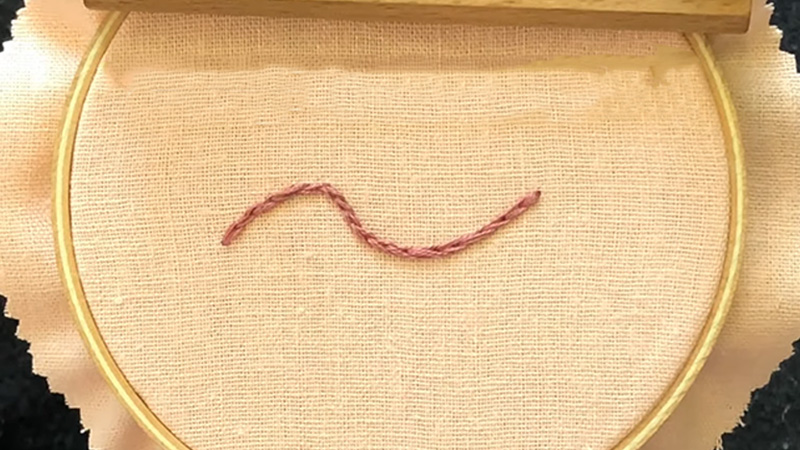
The back stitch is often used for outlining shapes or adding fine details to an embroidered picture. It can be used to follow both simple and intricate outlines, such as letters, flowers, animals, or geometric patterns.
To do a back stitch outline, you need to draw a pencil line on your fabric to mark your back stitch line, then poke the needle up from beneath the fabric at one end of the line and push the needle back down through the fabric about 0.25 in (6.4 mm) further along the line.
Repeat this process until you reach the end of the line.
Making Straight Lines
The back stitch is also great for making straight lines, such as borders, grids, or stripes. It can be used to create contrast or texture in your embroidery design.
To do a back stitch straight line, you need to measure and mark your fabric with a ruler and a pencil to create a straight line, then follow the same steps as above to sew along the line.
Adding Details
Backstitch can be used to add details or embellishments to your embroidery design, such as eyes, noses, mouths, whiskers, veins, or dots. It can also be used to fill in small gaps or spaces in your design.
To do a back stitch detail, you need to decide where you want to add the detail on your fabric, then use a small stitch length (about 0.125 in (3.2 mm) or less) to sew along the shape or area you want to fill.
Holding Two Pieces Of Fabric Together
The back stitch can also be used as a hand-sewing utility stitch to attach two pieces of fabric together. It creates a tight and strong seam that can withstand wear and tear.
To do a back stitch seam, you need to place the two pieces of fabric on the right sides together and pin or baste them along the edge you want to sew, then use a regular stitch length (about 0.25 in (6.4 mm) or more) to sew along the edge from one end to another.
Reinforcing Seams
Back stitches can also be used to reinforce seams that are prone to stress or stretching, such as crotch seams, shoulder seams, or armhole seams. It can also be used to reinforce seams that are made with delicate or slippery fabrics, such as silk or satin.
To do a back stitch reinforcement, you need to sew along the seam with a regular stitch length (about 0.25 in (6.4 mm) or more), then go back over the seam with a back stitch using a smaller stitch length (about 0.125 in (3.2 mm) or less).
Making Decorative Stitches
Back stitch can also be used as a foundation row for more complex embroidery stitches, such as herringbone ladder filling stitch, whipped back stitch, Pekinese stitch, split stitch, stem stitch, or outline stitch.
These stitches are variations of back stitches that create different effects and textures on the fabric.
To do a decorative back stitch, you need to first sew a basic back stitch along the line you want to embellish, then use another thread of a different color or thickness to pass under or over the stitches without piercing the fabric.
Knitting
Back stitch can also be used in knitting to join two pieces of knitted fabric together. It creates a neat and flexible seam that blends in with the knitted stitches.
To do a back stitch in knitting, you need to hold the two pieces of knitted fabric’s right sides together and align their edges, then use a tapestry needle and yarn to sew through both layers of fabric from one end to another.
Making Buttonholes
Back stitch can also be used to make buttonholes by hand. It creates a sturdy and durable edge around the hole that prevents fraying or tearing.
To do a back stitch buttonhole, you need to mark the size and position of the buttonhole on your fabric with a pencil, then cut a small slit along the mark with scissors or a seam ripper.
Then use a small stitch length (about 0.125 in (3.2 mm) or less) to sew around the slit with back stitches.
Making Loops
Backstitch can also be used to make loops for buttons, hooks, or cords by hand. It creates a strong and flexible loop that can hold things securely.
To make a back stitch loop, you need to mark the size and position of the loop on your fabric with a pencil, then use a regular stitch length (about 0.25 in (6.4 mm) or more) to sew a straight line with back stitches from one end of the mark to the other.
Then, fold the fabric along the line and sew another line of back stitches on top of the first one.
When Do You Need To Do A Backstitch?

A backstitch is a fundamental sewing technique used to secure the beginning and end of a seam, preventing it from unraveling.
Here are some useful tips, to help you understand when and how to use a backstitch effectively:
Starting a Seam
When beginning a seam, use a backstitch to secure the thread in place. After threading your needle and making a knot at the end of the thread, take your first stitch forward and then back into the same hole before proceeding with the regular stitches.
This anchors the thread and prevents it from slipping out.
Ending a Seam
At the end of a seam, reverse your sewing machine or hand-sewing direction to sew a few stitches backward over the seam you just created. This backstitch secures the seam’s end, preventing it from unraveling over time.
Reinforcing Stress Points
In areas that experience extra stress, such as pocket corners, collars, and cuffs, it’s a good practice to reinforce with a backstitch.
Sewing a few backstitches at these points adds strength and durability to the seam.
Sewing Buttons
When sewing buttons onto fabric, use a backstitch to secure the thread on the wrong side of the fabric. This ensures that the buttons remain securely attached, even with frequent use.
Sewing Zippers
When attaching a zipper, use a backstitch at both ends of the zipper tape to prevent it from coming loose or separating from the fabric.
Quilting
In quilting, backstitching at the beginning and end of each line of quilting stitching helps secure the layers together, preventing shifting or unraveling over time.
Attaching Trims and Appliqués
When adding trims, lace, or appliqués to fabric, use a backstitch to anchor them securely in place. This ensures that decorative elements remain securely attached.
Hemming
While hemming garments, backstitch at the beginning and end of the hem to secure it and prevent fraying. This provides a clean and durable finish to the hem.
Sewing Seams in Reversible Garments
In reversible garments, where seams are visible on both sides, use a backstitch to secure the seam allowances together neatly. This prevents one side of the fabric from peeking out of the seam.
By incorporating these tips into your sewing projects, you’ll use backstitches strategically to reinforce seams, secure fabric, and ensure the longevity of your creations.
Mastering the art of the backstitch is a fundamental skill that adds strength and durability to your sewing projects.
What is the Difference Between a Running Stitch and a Back Stitch?

A running stitch and a back stitch are two types of embroidery and sewing stitches that have different purposes and appearances.
Here are some differences between them and how to do them:
Direction
A running stitch is made forward to the general direction of sewing, while a back stitch is made backward to the general direction of sewing.
To do a running stitch, you need to poke the needle up and down through the fabric at regular intervals, leaving gaps between the stitches.
To do a back stitch, you need to poke the needle up from beneath the fabric at one end of the line and push the needle back down through the fabric about 0.25 in (6.4 mm) further along the line.
Then, poke the needle up again at the end of the previous stitch and push it back down at the end of the current stitch. Repeat this process until you reach the end of the line.
Strength
A running stitch is weaker than a back stitch, as it can easily be pulled apart or undone. A back stitch is stronger than a running stitch, as it creates a tight and secure line of stitching that can withstand wear and tear.
Appearance
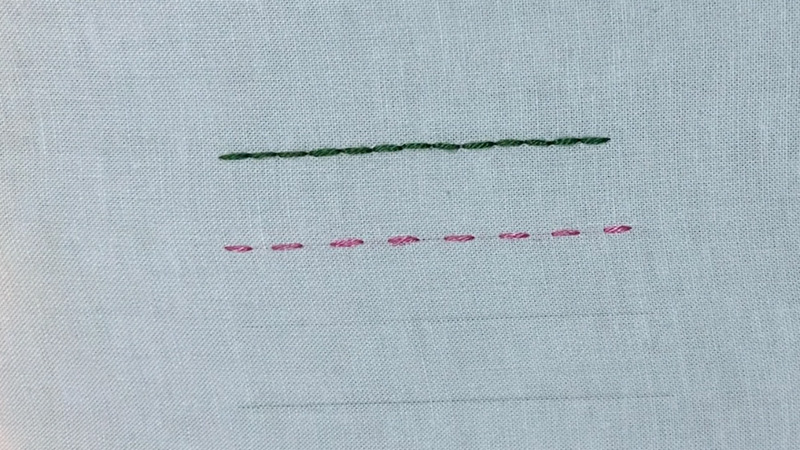
A running stitch looks like a dashed line on both sides of the fabric, while a back stitch looks like a solid line on one side of the fabric and a dashed line on the other side of the fabric.
A running stitch can create a light and airy effect on your embroidery design, while a back stitch can create a bold and defined effect on your embroidery design.
Speed
A running stitch is faster than a back stitch, as it requires fewer needle movements and less thread consumption. A back stitch is slower than a running stitch, as it requires more needle movements and more thread consumption.
Uses
A running stitch is mainly used for basting, gathering, quilting, or making decorative stitches, such as whipped running stitch or Pekinese stitch.
A back stitch is mainly used for outlining shapes, adding details, holding two pieces of fabric together, reinforcing seams, making buttonholes, or making decorative stitches, such as whipped back stitches or split stitches.
Variations
A running stitch has several variations, such as spaced running stitch, double running stitch, laced running stitch or couching.
A back stitch has fewer variations, such as curved back stitch, double-pointed back stitch, or fish-eye back stitch.
Difficulty
A running stitch is easier than a back stitch, as it requires less precision and skill. A back stitch is harder than a running stitch, as it requires more precision and skill.
FAQ
A backstitch is a sewing technique used to secure the beginning and end of a seam. It prevents stitches from unraveling, adds strength to seams, and ensures the longevity of sewing projects.
Yes, a backstitch is a versatile technique used in both hand-sewing and machine-sewing to secure seams and prevent unraveling.
Use a backstitch at the beginning and end of seams for stress points like pocket corners or button attachments and when attaching zippers, trims, and appliqués.
No, a backstitch is different from a reverse stitch. A backstitch is manually created by sewing forward and backward over the same spot, while a reverse stitch is a built-in feature on many sewing machines that automatically sew backward.
To achieve neat and secure backstitches, practice stitching in a straight line while maintaining even tension.
Remember to backstitch over the same stitching line to ensure a strong and reliable seam.
Conclusion
The backstitch is an invaluable tool in the world of sewing. Its versatile applications range from securing seams in clothing to reinforcing stress points in various projects.
Whether you’re quilting, attaching buttons, or sewing zippers, the backstitch ensures that your stitches remain intact and your creations withstand the test of time.
By understanding what backstitch is used for and incorporating it into your sewing techniques, you’ll elevate the quality and longevity of your work.
This simple yet powerful stitch provides the reliability and durability that every sewist desires in their projects, making it an indispensable skill in the art of sewing.
So, embrace the backstitch as a trusted ally in your sewing journey, and watch as your creations become stronger, more secure, and built to last.
Leave a Reply