In the world of sewing, precision is often the key to transforming ordinary fabric into beautifully crafted garments, accessories, and home decor. One such precision technique that holds significant importance is the art of edge stitching.
Edge stitching, as the name suggests, involves sewing a straight line very close to the edge of a piece of fabric or seam.
This seemingly simple but highly versatile technique serves both functional and aesthetic purposes. It reinforces seams, prevents fraying, and adds a professional finish to projects.
In this exploration of edge stitching, we will uncover its nuances, techniques, and the indispensable role it plays in elevating sewing endeavors.
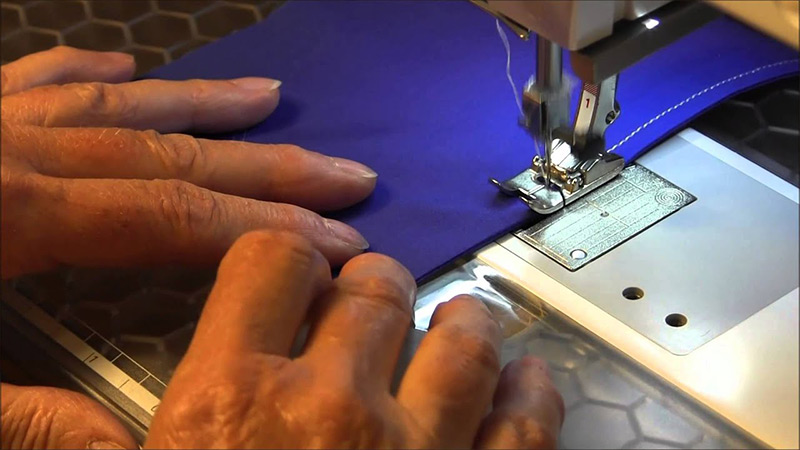
What Is an Edge Stitch in Sewing?
Edge stitching is a fundamental sewing technique that involves stitching a straight line very close to the edge of a fabric or seam.
It serves both functional and decorative purposes in sewing projects. Functionally, edge stitching helps secure seams and hems, preventing fabric from fraying and adding durability to your creations.
A neatly executed edge stitch can also enhance the overall appearance of your work, giving it a polished and professional finish.
To achieve a successful edge stitch, it’s crucial to align the fabric accurately and maintain a consistent distance from the edge.
This requires careful control of your sewing machine and a steady hand. Edge stitching is commonly used in a wide range of sewing projects, including garment construction, quilting, and home decor.
Whether you’re reinforcing seams or adding a decorative touch, mastering this technique is a valuable skill that every sewing enthusiast should have in their repertoire.
Characteristics of a Well-Executed Edge Stitch
A well-executed edge stitch in sewing is characterized by several key features that contribute to its neatness and effectiveness.
These characteristics are essential for achieving a professional and polished finish in your sewing projects:
Even Stitch Length
Achieving an even stitch length is essential for a neat and professional appearance. Inconsistent stitch length can create a bumpy or irregular texture along the fabric’s edge, which may affect the seam’s strength and overall aesthetics.
To maintain even stitch length, ensure your sewing machine is set to a consistent stitch setting, and feed the fabric evenly through the machine.
Consistent Distance from the Edge
The key to successful edge stitching is positioning the stitching uniformly and very close to the fabric’s edge. This close proximity secures the edge and minimizes fraying.
It’s often advisable to use an edge stitching foot or guide to help you maintain a consistent distance. Pay close attention to the edge as you sew to avoid veering off course.
Straight Line
A straight edge stitch is visually appealing and reflects the precision of your sewing skills. To achieve a straight line, guide the fabric evenly and steadily through the machine, keeping an eye on the alignment with the presser foot or guide.
Parallel to the Edge
Ensuring that the edge stitch runs perfectly parallel to the fabric’s edge is crucial for maintaining the fabric’s structure and appearance.
Any deviation from parallel can result in an uneven seam or hem, which may not look professional.
Clean Start and Finish: Begin your edge stitch with a few backstitches or lockstitches to secure the threads in place. This prevents unraveling and adds durability to the seam. At the end of the stitch, do the same to ensure the stitch won’t come undone over time.
Appropriate Thread Tension
Adjust your sewing machine’s thread tension to ensure that the top and bottom threads are evenly balanced. Incorrect tension can lead to loose, uneven stitches or even thread breakage. Test your tension settings on a scrap piece of fabric before starting your edge stitch.
No Puckering
Puckering occurs when the fabric bunches up or distorts during sewing. To prevent this, use the correct needle and thread for your fabric type, and maintain even pressure on the fabric as it passes through the machine. Puckering can compromise the seam’s strength and overall appearance.
Matching Thread Color
Choosing a thread color that blends seamlessly with the fabric ensures that the edge stitch complements the project’s overall aesthetic.
When in doubt, opt for a thread color that closely matches the dominant color of the fabric.
Precision at Corners and Curves
When sewing corners or curves, take your time to maintain an even distance from the edge. For corners, pivot the fabric with the needle down to maintain the uniformity of the stitch. For curves, guide the fabric smoothly, adjusting your stitching speed as needed.
Neat and Clean Backside
The underside of the fabric should show tidy, evenly spaced stitches without any loose threads or tangles.
Make sure your bobbin is properly wound and inserted, as issues with the bobbin thread tension can affect the backside of the stitch.
Purposes of Edge Stitching
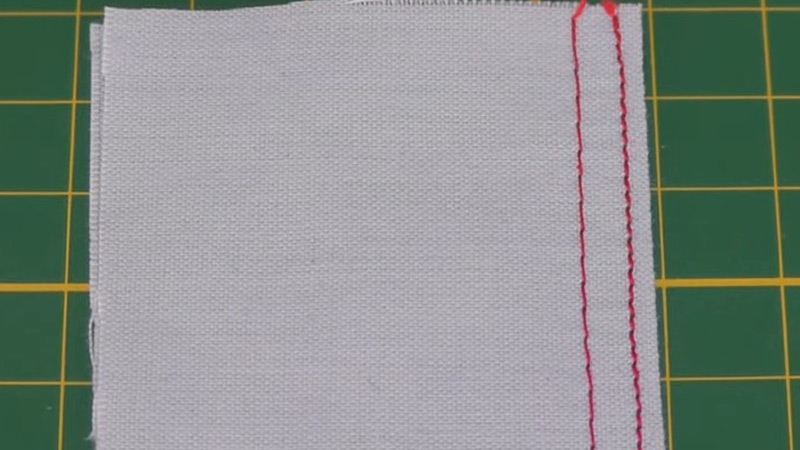
Edge stitching in sewing serves several important purposes, making it a fundamental technique for achieving both functional and decorative outcomes in various sewing projects.
Here are the primary purposes of edge stitching:
Securing Seams
One of the fundamental functions of edge stitching is to reinforce seams. By sewing close to the fabric’s edge, it provides extra strength and durability to the seam, preventing it from unraveling or fraying over time.
This is particularly important in garments and accessories that undergo regular wear and tear.
Preventing Fraying
Edge stitching helps prevent the raw edges of fabric from fraying. It locks the fabric fibers in place, preserving the fabric’s integrity and ensuring that it maintains its shape and structure.
Creating Neat Hems
When folding and stitching the raw edge of fabric to create hems in garments or home decor items, edge stitching ensures that the hem lays flat and stays in place. This contributes to a clean, professional look.
Adding Decorative Detail
Edge stitching can be used decoratively to enhance the visual appeal of a project. By selecting a contrasting thread color or using decorative stitches, you can create eye-catching edges that draw attention and elevate the overall design.
Defining Seams and Edges
In some sewing projects, especially those with multiple layers or complex designs, edge stitching helps define the edges and seams clearly. This can aid in construction and assembly, ensuring that pieces align accurately.
Guiding Fabric Layers
When working with multiple layers of fabric or quilted projects, edge stitching helps hold the layers together and prevents shifting or bunching during sewing. It maintains the alignment of quilt blocks and keeps fabric layers flat.
Securing Zippers and Fasteners
Edge stitching is often used to secure zippers, snaps, or other fasteners in place, ensuring they remain stable and functional. It adds an extra layer of security to these crucial components.
Highlighting Design Elements
In creative sewing projects, edge stitching can be used to accentuate design elements, such as pockets, appliqués, or seams. It draws attention to these features and adds a tailored finished look.
Creating Professional Finishes
Edge stitching is a hallmark of well-constructed and professionally finished sewing projects. It signifies attention to detail and a commitment to quality craftsmanship.
Preventing Rolling
In projects where fabric tends to roll or curl at the edges, like some types of knit fabrics, edge stitching can help keep the edges flat and in place
How to Edge Stitch? 9 Steps
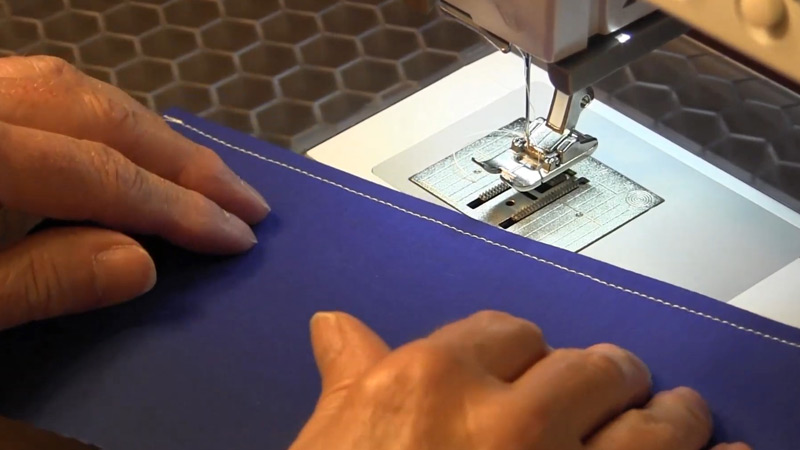
Edge stitching is a fundamental sewing technique used to sew a straight line very close to the edge of a piece of fabric or seam. It’s important for both functional reinforcement and decorative purposes.
Here’s a step-by-step guide on how to edge stitch:
Materials You’ll Need:
- Fabric to be edge stitched
- Sewing machine with a straight stitch setting
- Matching or contrasting thread
- Sewing machine needle appropriate for your fabric
- Ruler or seam gauge
- Optional: Edge stitching foot or quilting guide
Step-by-Step Instructions:
Step 1: Prepare Your Sewing Machine
Begin by setting up your sewing machine for edge stitching. Choose a thread color that matches or complements your fabric.
Insert the appropriate sewing machine needle for your fabric type; lighter fabrics require smaller needles, while heavier fabrics need larger ones.
Set your sewing machine to the straight stitch setting, usually represented by a single-line icon.
Step 2: Position Your Fabric
Place the fabric you intend to edge stitch under the presser foot of your sewing machine.
Ensure that the fabric’s edge aligns precisely with your desired seam allowance or the location where you want the edge stitching.
Flatten the fabric, removing any wrinkles or folds to maintain a smooth surface for sewing.
Step 3: Optional Guide Attachment
Consider using an edge stitching foot or quilting guide attachment if you have one. These attachments help maintain a consistent distance from the fabric’s edge, making the process easier and more precise, especially for beginners.
Step 4: Lower the Presser Foot
Lower the presser foot to hold the fabric in place securely. This ensures that the fabric remains flat and smooth as you sew, preventing wrinkles or puckers.
Step 5: Start Sewing
Begin sewing by gently pressing on the foot pedal. Sew slowly and steadily, keeping your focus on the edge of the fabric.
Use the edge of the fabric or the guide on your sewing foot (if attached) as a reference point to maintain a consistent distance from the edge.
Step 6: Maintain Straight Stitching
As you sew, keep the fabric feeding evenly through the machine. If you’re working on a long seam, periodically stop and check that the stitching remains straight and consistent.
Step 7: Secure the End
When you reach the end of your edge stitching, it’s essential to secure the thread. You can do this by either backstitching (sewing a few stitches in reverse) or using a locking stitch feature if your sewing machine has one. This prevents the stitching from unraveling over time.
Step 8: Trim Excess Thread
After securing the thread, trim any excess thread tails close to the fabric using scissors. This step gives your edge stitching a tidy appearance.
Step 9: Press Your Work
Finally, use an iron to press the stitched edge. Pressing sets the stitches and creates a crisp, finished look for your sewing project. Ensure that you follow the fabric’s care instructions to avoid damaging it while ironing.
Tips for Perfect Edge Stitching
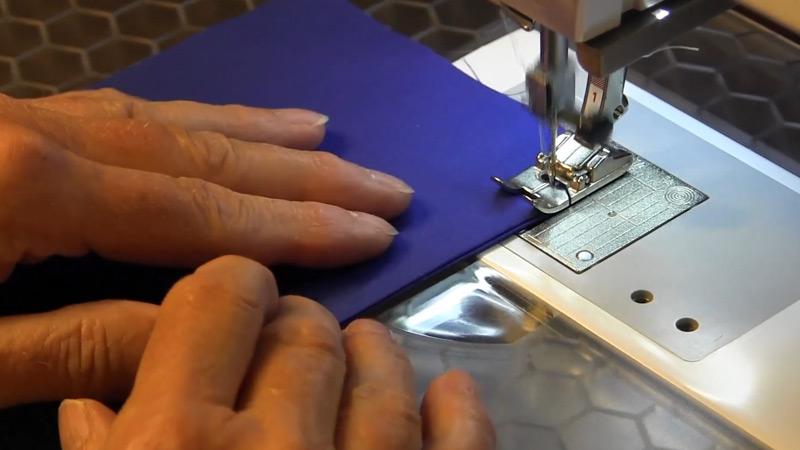
Edge stitching, while a seemingly straightforward sewing technique, can greatly benefit from attention to detail and practice. To achieve perfect edge stitching results, consider the following tips:
Mark Your Stitching Line
Before you begin stitching, mark your desired stitching line with the tailor’s chalk or fabric markers. This guideline will help you maintain a consistent distance from the fabric’s edge.
Use an Edge Stitching Foot
If your sewing machine has an edge stitching foot, use it. These specialized presser feet have a guide that helps you sew evenly and maintain the desired distance from the edge.
Practice on Scrap Fabric
Before working on your main project, practice edge stitching on a scrap piece of fabric. This allows you to get a feel for the fabric and adjust your machine settings if needed.
Adjust Stitch Length and Tension
Experiment with different stitch lengths and thread tensions to find the settings that work best for your fabric. Generally, a shorter stitch length and balanced thread tension create a neat edge stitch.
Stitch Slowly and Steadily
Edge stitching requires precision. Sew slowly and steadily to maintain control over the fabric. This helps you avoid veering off course and creating uneven stitches.
Keep Your Eye on the Edge
Focus your attention on the edge of the fabric as you sew. This helps you maintain a consistent distance and stitch straighter lines.
Pivot at Corners and Curves
When sewing corners or curves, stop with the needle down in the fabric, lift the presser foot, and pivot the fabric. This technique ensures that your edge stitching remains uniform around curves and corners.
Match Thread Color
Choose a thread color that matches or complements your fabric. A well-matched thread color blends seamlessly with the fabric and hides any minor stitching imperfections.
Control Thread Tails
At the beginning and end of your stitching, use backstitching or a locking stitch to secure the threads. Trim any excess thread tails close to the fabric to maintain a clean finish.
Press Your Work
After completing your edge stitching, press the stitched edge with an iron. This sets the stitches and creates a crisp finish. Be sure to follow the fabric’s care instructions to avoid damaging it during ironing.
Practice on Various Fabrics
Edge stitching techniques may vary depending on the type of fabric you’re working with. Practice on a variety of fabric types to become comfortable and proficient in edge stitching different materials.
Maintain Consistency
Consistency is key to perfect edge stitching. Try to maintain the same seam allowance or edge distance throughout your project for a cohesive look.
Be Patient
Achieving perfect edge stitching may take time and practice. Don’t be discouraged by initial imperfections. With patience and persistence, your skills will improve.
Edge Stitch vs Topstitch
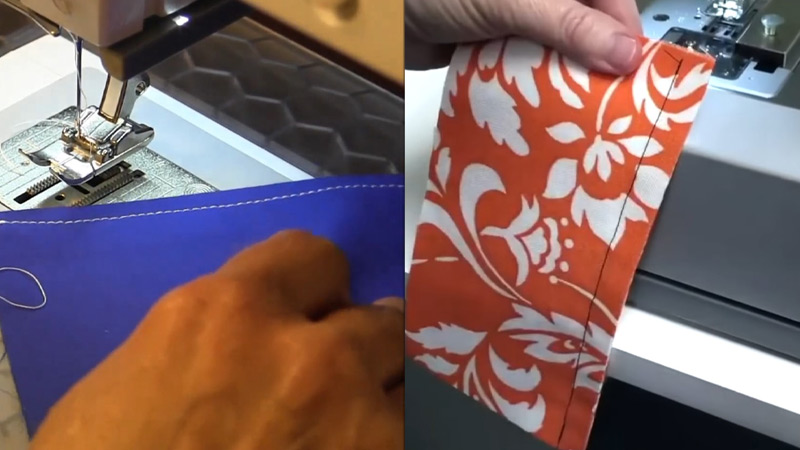
In the realm of sewing, precision and attention to detail are essential for creating beautifully crafted projects.
Two common stitching techniques that play a significant role in achieving both functional and decorative outcomes are edge stitching and topstitching.
While they may sound similar, these techniques serve distinct purposes and are applied in different ways to enhance the quality and aesthetics of sewing projects.
In this comparison, we will explore the key differences between edge stitching and topstitching, helping you understand when and how to use each technique effectively.
Let’s examine these two techniques in more detail with a comparative table:
| Characteristic | Edge Stitching | Topstitching |
| Purpose | Reinforce edges and create a finished | Decorative stitching on the top |
| look; secure seam allowances. | May vary but is generally moderate. | |
| Location | Typically stitched near the edge of the | Stitched on the right side of the |
| fabric or seam, about 1/8 to 1/4 inch | fabric, usually farther from the | |
| (3-6 mm) from the edge. | edge, often 1/4 inch (6 mm) or more. | |
| Stitch Length | Short to medium-length stitches, | Medium to long stitches, often with |
| depending on the fabric and purpose. | longer stitch length. | |
| Thread Tension | Moderate tension to secure edges. | May vary but generally moderate. |
| Thread Color | Typically matches the fabric or seam | Can match or contrast with the |
| color for a discreet finish. | fabric for decorative effect. | |
| Foot Type | Regular sewing machine foot. | Regular sewing machine foot or |
| specialty topstitching foot. | ||
| Function | Provides a neat and clean finish to | Adds a decorative element to the |
| seams and hems; prevents fabric from | fabric; enhances the appearance of | |
| fraying. | clothing or projects. | |
| Examples | Hemming a garment, sewing along the | Topstitching along the edges of |
| edge of a pocket, reinforcing a seam. | jeans, creating decorative lines on | |
| bags or quilts. |
FAQS
What is edge stitching in sewing?
Edge stitching is a sewing technique that involves sewing a straight line very close to the edge of a piece of fabric or seam.
What are the essential tools for edge stitching?
Essential tools for edge stitching include a sewing machine with a straight stitch setting, matching or contrasting thread, the appropriate sewing machine needle for your fabric, and optional accessories like an edge stitching foot or quilting guide.
What types of projects benefit from edge stitching?
Edge stitching is used in a wide range of sewing projects, including garment construction, quilting, home decor items like curtains and table linens, and accessories like bags and pouches.
Is edge stitching the same as understitching?
No, edge stitching and understitching are different techniques.
Can I edge stitch by hand instead of using a sewing machine?
Yes, edge stitching can be done by hand using a hand sewing needle and thread.
Can edge stitching be used for mending or repairing clothing?
Yes, edge stitching can be a useful technique for mending clothing, especially to reinforce seams or repair frayed edges.
To Recap
In sewing, mastering the art of edge stitching emerges as a fundamental skill, bridging the realms of both functionality and aesthetics.
As we conclude our exploration of edge stitching, it becomes evident that this seemingly simple technique carries profound significance.
It stands as the sentinel guarding the integrity of seams, the protector against fraying, and the herald of meticulous craftsmanship.
Yet, it is also the canvas upon which creativity can flourish, adding embellishments and flourishes to sewing projects.
Whether reinforcing seams in everyday garments, meticulously binding quilt layers, or adding a touch of elegance to home decor, edge stitching epitomizes the marriage of precision and artistry in the world of sewing.
Leave a Reply