Embroidery knots are essential techniques in needlecraft, imparting texture, detail, and dimension to fabric creations.
These knots involve skillfully manipulating embroidery thread to form various intricate designs, adding a touch of artistry to plain fabric surfaces.
One of the most renowned examples is the French knot, a classic and widely used stitch for creating small, raised dots or textured centers in floral motifs.
Other knots, such as the bullion knot, lazy daisy stitch, and many more, offer diverse options for embellishing fabric with unique patterns and visual interest.
Mastery of these knots allows artisans to unleash their creativity and produce stunning, personalized embroidery pieces.
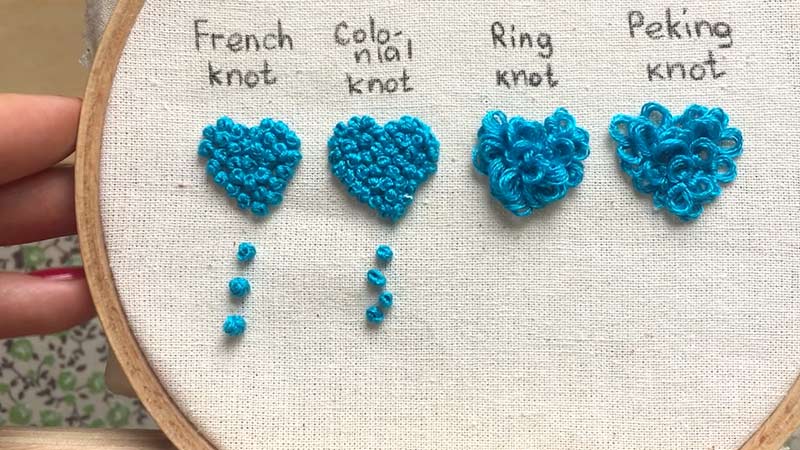
What Is Embroidery Knot in Embroidery?
An embroidery knot, or French knot, is a fundamental embroidered stitch that adds texture and dimension to designs.
It is characterized by a small, raised knot created by wrapping thread around the needle before inserting it back into the fabric.
To execute a French knot, the needle is brought up through the fabric, and the thread is tightly wound around the needle a specific number of times, depending on the desired size of the knot.
Care is taken to hold the wraps in place while inserting the needle back into the fabric near the starting point. This results in a snug, rounded knot on the surface.
French knots are commonly used for creating details such as eyes, flower centers, or other intricate elements, contributing to the overall visual appeal of the embroidered piece.
Mastering the technique allows for versatile and creative applications in embroidery projects.
Types of Embroidery Knots
Embroidery knots are essential elements in creating intricate and beautiful designs on fabric. They add texture, dimension, and detail to embroidered pieces.
There are various types of embroidery knots, each serving a specific purpose and contributing to the overall aesthetic of the design.
Here are some commonly used embroidery knots:
French Knot
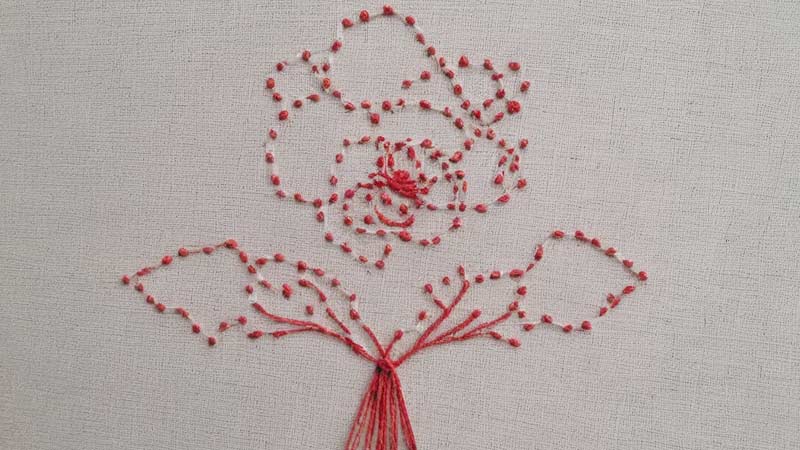
With its simple yet elegant technique, the French knot is a staple in embroidery. To create this knot, wrap the embroidery floss around the needle once or several times, depending on the desired size, and then carefully pull it through the fabric.
The result is a small, raised knot perfect for adding intricate details. French knots are frequently employed to depict small dots in a design, highlight flower centers, or introduce subtle texture to various embroidered pieces.
Bullion Knot
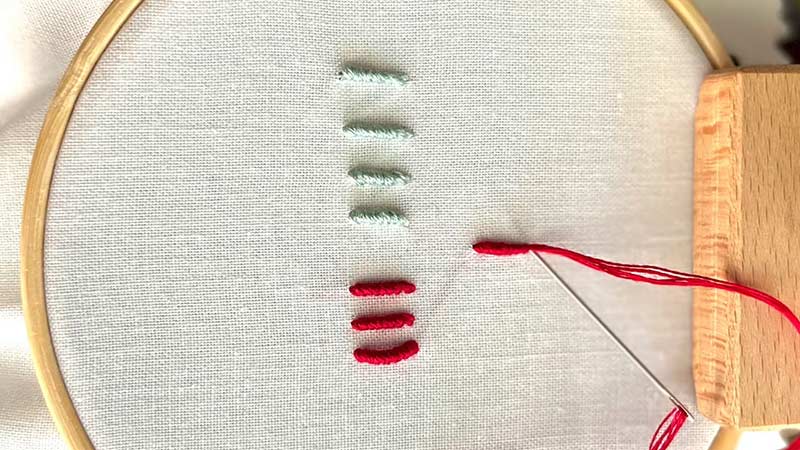
The bullion knot is a more elaborate embroidery knot known for its ability to create a twisted or coiled effect.
This knot is formed by wrapping the embroidery thread around the needle multiple times before pulling it through the fabric.
Bullion knots are versatile and find application in creating textured lines, intricate fillings, or even as standalone decorative elements in embroidery designs.
Lazy Daisy Stitch (Detached Chain Stitch)
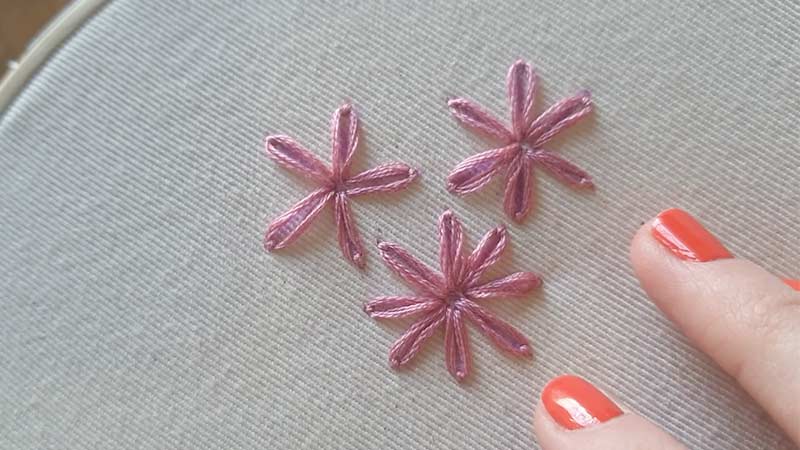
The lazy daisy stitch also called the detached chain stitch, adds a whimsical touch to embroidery. This simple looped stitch resembles small petals or leaves.
To create a lazy daisy stitch, a loop is formed with the embroidery thread and secured to the fabric with a small straight stitch at the base.
These stitches are commonly employed to craft flower petals, delicate foliage, or any design that requires a charming, naturalistic touch.
Chain Stitch
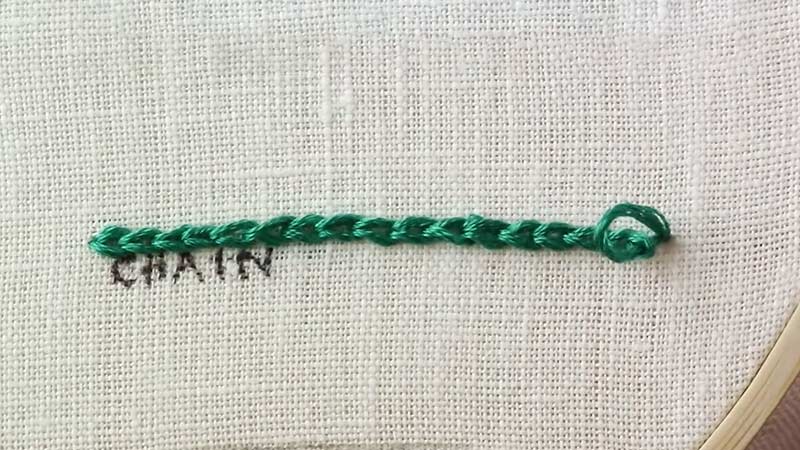
The chain stitch is a fundamental and versatile embroidery stitch that can be adapted to various design elements.
Whether worked in a straight line or curved, each stitch in the chain is connected, forming a continuous line.
This stitch is widely used for outlining, creating decorative borders, or filling spaces, offering embroidered pieces a classic and timeless look.
Seed Stitch
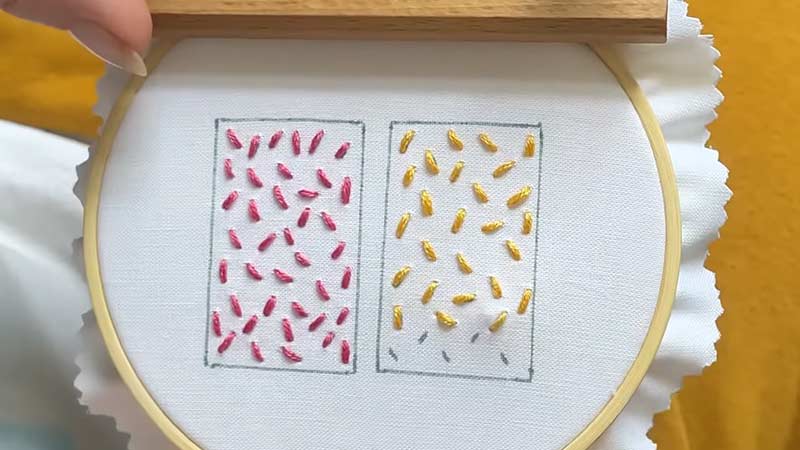
Known by the alternate name of the rice stitch, the seed stitch is a simple yet effective way to add texture to a design.
This scattered stitch creates a speckled effect resembling scattered seeds by making tiny, random stitches across the fabric.
Seed stitches are often chosen for background fillings or to introduce subtle texture to different parts of an embroidery project.
Spider Web Stitch
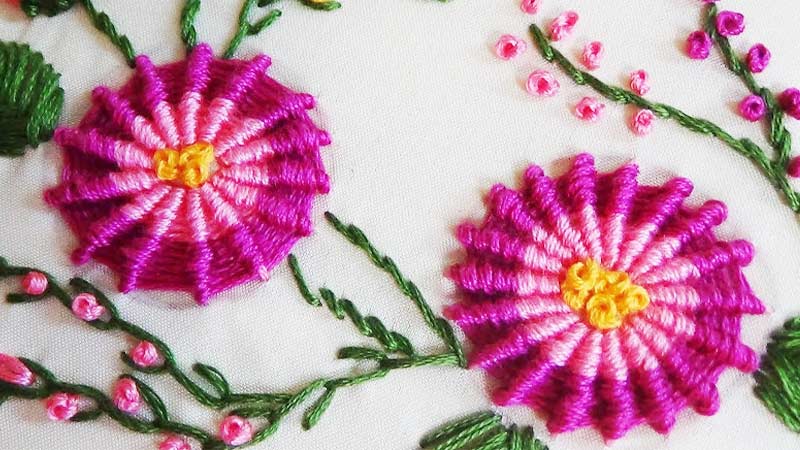
The spider web stitch is an intricate embroidery technique that produces a delicate, web-like pattern on the fabric.
This stitch involves creating a series of straight stitches radiating from a central point, then wrapping the thread around them circularly to form a web.
The spider web stitch is favored for creating decorative motifs or as a striking focal point in embroidery.
Satin Stitch
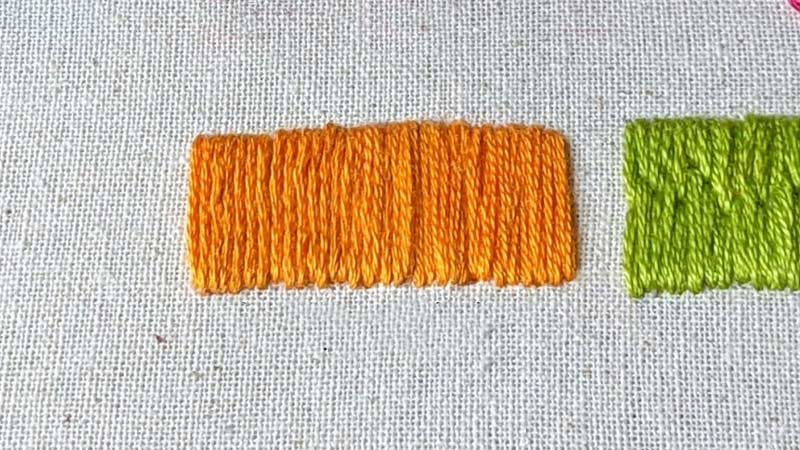
The satin stitch is a smooth and solid filling that excels at covering defined areas with thread.
Commonly used for creating bold and colorful shapes or filling in larger spaces, satin stitches can be worked in parallel rows for a neat finish or in a random pattern for a more artistic effect.
Coral Stitch
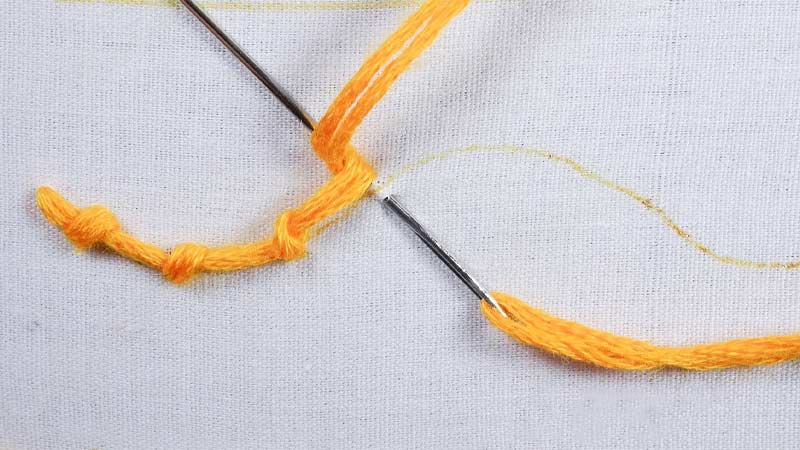
Also known as the knotted stitch, the coral stitch is a looped embroidery stitch that adds a textured line to your design.
This stitch looks like a twisted or knotted rope by making small, consecutive loops along a line.
Coral stitches are often chosen for creating decorative borders, outlining shapes, or introducing a unique textured element to embroidered pieces.
Fly Stitch
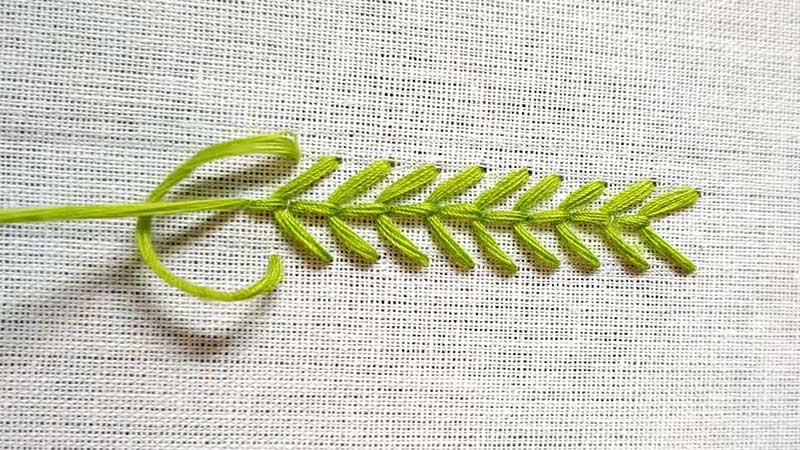
The fly stitch is a versatile and decorative embroidery stitch that resembles an open V or Y shape. To create a fly stitch, a single straight stitch is made.
Then, the needle is brought back up through the fabric, catching the thread of the first stitch to form the wings of the V.
Fly stitches are often used to create leaves and floral elements or as a decorative border, offering the embroidery design a playful and airy appearance.
Feather Stitch
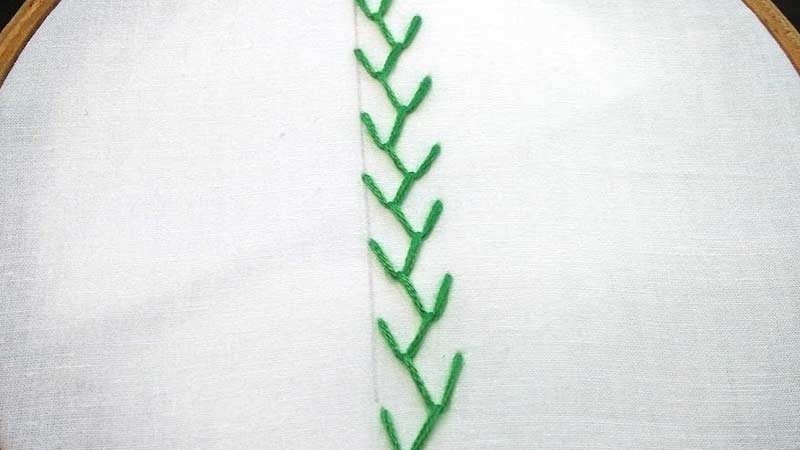
The feather stitch is a linear embroidery stitch that consists of a series of open, V-shaped stitches arranged along a line.
This stitch creates a delicate, feathery effect and is commonly used for embellishing seams, creating borders, or adding a decorative touch to various fabric projects.
The feather stitch can be adapted to different angles and lengths, providing flexibility for diverse design applications.
How Do You Embroider a Knot? Step-By-Step Guide
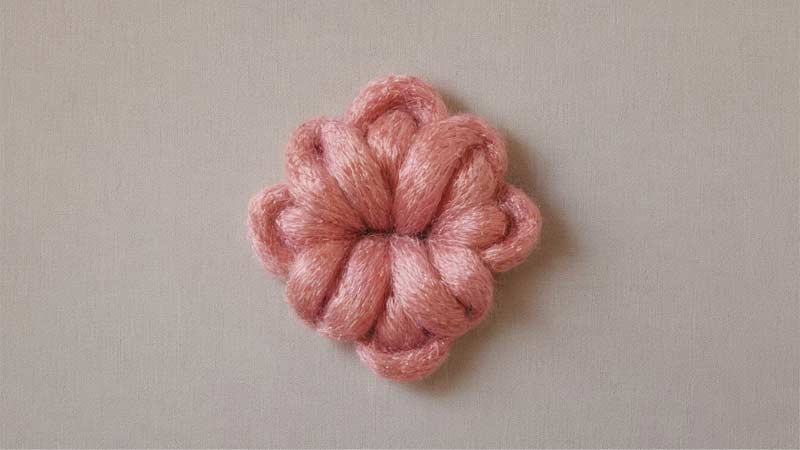
Embroidering a knot, such as the French knot, is a fundamental skill in embroidery that requires precision and practice.
Here’s a step-by-step guide on how to embroider a knot:
Materials Needed:
- Embroidery fabric
- Embroidery hoop
- Embroidery needle
- Embroidery floss (thread)
Procedure for Embroidering a Knot:
Prepare Your Fabric
Securing your fabric in the embroidery hoop is a crucial first step in achieving clean and precise work.
When placing the fabric in the hoop, ensure it is taut but not overly stretched. This balanced tension provides a stable surface for your embroidery, preventing the fabric from warping or distorting as you work.
Take the time to center your fabric within the hoop, aligning it with its edges to allow for easy maneuvering while embroidering.
Thread the Needle
Selecting the appropriate length of embroidery floss is essential for a smooth stitching process. Cut a length of floss between 18 to 24 inches, considering the size of your design and the ease of stitching.
Thread the floss through the eye of the embroidery needle, making sure to pull it through until you have equal lengths on either side.
Depending on the desired thickness of your knot, you can use all six strands of the floss or separate and use fewer strands for a finer and more delicate knot.
Anchor the Thread
To ensure your thread remains securely in place, bring the threaded needle up through the back of the fabric to the front.
Begin the stitch from the underside of the fabric, allowing the knot to form on the surface. If necessary, secure the loose end of the thread on the back of the fabric.
This can be achieved by creating a small knot or weaving the thread through nearby stitches, providing a stable foundation for the subsequent embroidery work.
Position the Needle
Hold the needle in your dominant hand and the fabric in the other. This allows for better control and precision as you position the needle over the spot where you intend to create the knot.
Take a moment to evaluate your design and identify the areas that require raised knots, such as the center of a flower or specific points in your embroidery pattern.
Wrap the Thread
With the needle positioned over the chosen spot, hold it at a slight angle to the fabric. Using your free hand, carefully wrap the embroidery floss around the needle.
The number of wraps plays a crucial role in determining the size and density of the knot. For a standard French knot, 2-3 wraps are typically used but feel free to experiment and adjust based on your design preferences.
Ensure the wraps are snug but not overly tight, allowing for a well-formed and visually appealing knot.
Hold the Wraps
As you wrap the embroidery floss around the needle to create the knot, maintaining consistent tension on the wraps is crucial for achieving a well-formed and aesthetically pleasing knot. Use your non-dominant hand to hold the wraps in place while you work on the knot.
This helps prevent any unevenness or slippage in the wraps, ensuring they stay tightly wound around the needle until the knot is secured.
Insert the Needle
After completing the wraps, carefully insert the needle back into the fabric. The insertion point should be close to where the needle initially emerged.
Keep the wraps in place as you guide the needle through the fabric. This step is essential to maintain the integrity of the wraps and position the needle for the subsequent stages of knot formation.
Secure the Knot
Once the needle is through the fabric, gently pull the thread tight. This action causes the wraps to compact and knot on the fabric’s surface.
Exercise caution not to pull too tightly, as excessive tension can distort the fabric or cause the knot to sink into it.
Strive for a balanced pull that ensures a snug knot while preserving your embroidery’s integrity and appearance.
Complete the Stitch
If you are creating a single knot and concluding your stitch, secure the thread on the back of the fabric. This can be achieved by weaving the needle through nearby stitches, creating a neat and secure finish.
However, if you intend to continue with more knots or other stitches, bring the needle back up to the front of the fabric at the desired location to proceed with your embroidery pattern.
Practice and Experiment
Practice on a scrap piece of fabric to hone your skills in creating French knots or any knotted stitches.
Experiment with different numbers of wraps and tensions to observe the variations in knot size and texture.
This experimentation helps you become comfortable with the technique and allows for a deeper understanding of how these variables can impact the overall effect of your embroidery project.
Mastery comes with practice, so take the time to familiarize yourself with the nuances of creating knots before applying them to your final embroidery piece.
FAQs
What Is the Meaning of Knot Stitch?
The knot stitch in embroidery refers to a technique where the embroidery thread is manipulated to create a raised, textured knot on the fabric, adding dimension and detail to the overall design.
What is the purpose of embroidery knots?
Embroidery knots add texture, detail, and dimension to fabric creations, enhancing the visual appeal of embroidered designs and allowing for creative expression.
Which is a widely used embroidery knot?
The French knot is a classic and widely used embroidery knot for creating small, raised dots or textured centers in various designs.
What are some variations of embroidery knots?
Variations of embroidery knots include the bullion knot, lazy daisy stitch, and more, each offering different techniques to achieve unique textures and patterns in embroidery.
To Recap
Embroidery knots serve as the intricate language of needlework, weaving artistry and craftsmanship into fabric.
From the timeless elegance of French knots to the elaborate twists of bullion knots, these techniques elevate embroidery from mere stitching to a nuanced expression.
Each knot, whether forming delicate petals or crafting textured lines, contributes to the rich tapestry of embroidered creations. As artisans perfect the art of knotting, they unlock the door to endless creative possibilities.
In the world of embroidery, knots are not just stitches; they are carefully crafted keys that unlock the beauty, depth, and personal touch woven into every meticulously embroidered piece.
Leave a Reply