Steeking is a fascinating and advanced technique in the world of knitting that may seem counterintuitive at first glance.
It involves deliberately cutting through your knitted fabric to create openings, typically for sleeves, necklines, or cardigan fronts.
While this might sound like a recipe for disaster, steeking is a well-established method that allows knitters to work more efficiently on intricate colorwork or avoid the hassle of knitting sleeves in the round.
It’s a skill that combines precision, courage, and careful planning, as one wrong snip can unravel hours of hard work. In this exploration of steeking, we will delve into its history, methods, and the creative possibilities it unlocks in the realm of knitting.

What Is Steeking in Knitting?
Steeking in knitting is an ingenious technique that allows knitters to create openings in their work, such as armholes, necklines, or cardigan fronts, by cutting through their knitted fabric.
While this may sound counterintuitive and even frightening to some, steeking is a well-established method used primarily in colorwork projects, particularly Fair Isle and stranded knitting.
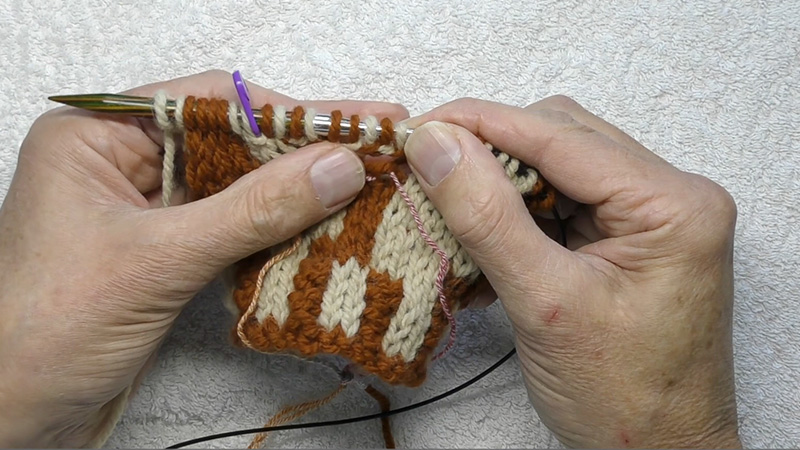
The process begins with the careful planning of where the steek will be located, often achieved by knitting extra stitches in a contrasting color to create a secure “bridge.” Once the knitting is complete, the steek stitches are reinforced with a line of hand or machine stitching.
Then, the knitter bravely cuts through the center of the steek, confident in the security of the reinforced stitches.
This cut transforms what was once a continuous tube of knitting into an opening, revealing the desired design.
Steeking offers numerous advantages, such as simplifying the knitting process for complex color patterns, eliminating the need to purl in the round, and allowing for more intricate colorwork designs.
It is a technique that combines knitting skills with a touch of nerve, as precision and confidence are essential to its successful execution. While it may seem intimidating, mastering the art of steeking can open up a world of creative possibilities for knitters looking to take their craft to the next level.
How to Add a Steek to a Pattern

Adding a steek to a knitting pattern is a technique used in colorwork or stranded knitting, particularly in projects like Fair Isle or Norwegian-style sweaters.
A steek is a bridge of extra stitches that you create in your knitting, allowing you to cut your work to create openings (e.g., for cardigan fronts or armholes).
Here’s a step-by-step guide on how to add a steek to a knitting pattern:
Materials You’ll Need:
- 1. Knitting needles and yarn appropriate for your project.
- 2. Scissors or a rotary cutter.
- 3. Sewing machine (optional, for reinforcing the steek).
Steps:
Choose Your Steek Width
Determine how wide you want your steak to be. Common steek widths are 3 to 6 stitches, depending on the project. Make sure to account for the steek width when calculating your pattern’s stitch count.
Knit the Steek Stitches
When you come to the section of your pattern where you want to add the steek, instead of knitting the pattern in the regular colorwork pattern, you’ll knit the designated number of steek stitches in a plain background color (usually a contrasting color).
For example, if you’re adding a 5-stitch steek, you would knit these 5 stitches in a contrasting color.
Continue with the Pattern
After knitting the steek stitches, continue with your colorwork pattern as instructed in your pattern. Make sure to keep your tension even and consistent.
Secure the Steek Stitches
Once you’ve completed your colorwork section, knit the same number of plain background stitches in the contrasting color as you did at the beginning of the steek. This helps secure the steek stitches.
Cut the Steek
Carefully cut the contrasting color yarn in the center of the steek, making sure you don’t cut any of the surrounding pattern stitches. You’ll be cutting between the two rows of contrasting color stitches.
Reinforce the Steek
To add extra stability to your steek, you can reinforce it with a sewing machine. Sew a straight stitch on either side of the cut edge, about 1/8 to 1/4 inch from the cut line. This creates a fabric barrier that prevents unraveling.
Fold the Steek
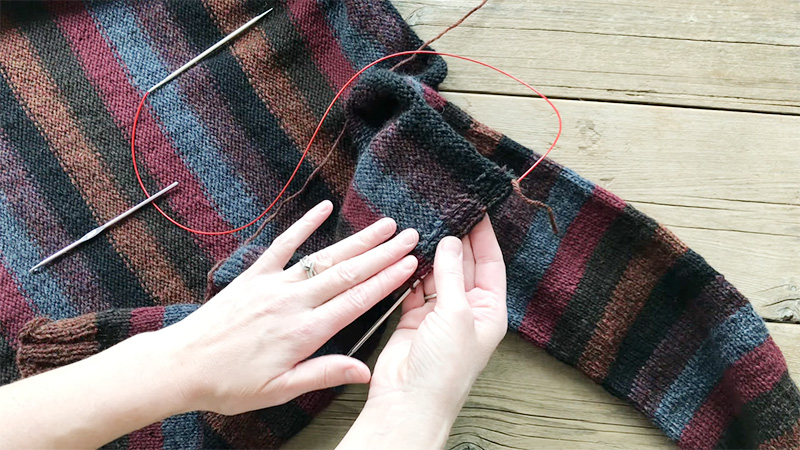
Fold the steek edges to the inside of your garment, covering the cut edges. This can be done along with other finishing techniques like adding a button band for a cardigan or sewing armhole seams for a sleeveless garment.
Secure the Folded Steek
You can secure the folded steek by sewing it down using a whipstitch or a mattress stitch. This creates a neat, finished edge on the inside of your garment.
Block Your Work
Blocking your knitting or crochet project is essential for a polished, professional look. It evens out stitches, corrects irregularities, and enhances drape.
Soak, shape, and dry your piece, transforming it from raw work into a beautifully finished creation.
Can You Cut a Knit Sweater Without It Unraveling?

Cutting a knit sweater without it unraveling is possible, but it requires a technique called “steeking.” Steeking is a method used to create openings in knit fabric, such as armholes, necklines, or cardigan fronts, by cutting through the fabric.
To successfully cut a knit sweater without it unraveling, follow these steps:
Plan Your Steek
Before you start knitting, plan where you want to create the opening (steek). Typically, you’ll knit extra stitches in a contrasting color to create a secure bridge for cutting.
Reinforce the Steek
Once your knitting is complete, reinforce the steek stitches. This is usually done with a line of hand or machine stitching on either side of the center of the steek. The stitching helps to secure the yarn fibers and prevent unraveling.
Cut the Steek
Carefully and confidently, use sharp scissors to cut through the center of the steek, following the line of stitching. Ensure you’re cutting only the designated steek stitches.
Secure the Edges
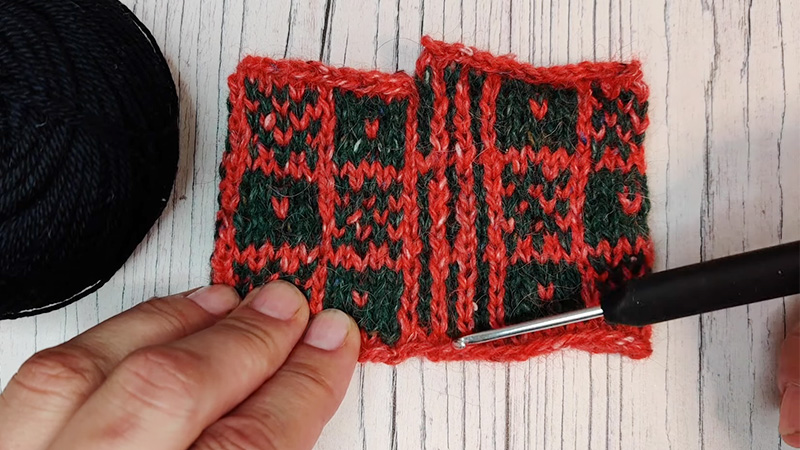
After cutting, you can secure the edges further by adding a crocheted or hand-sewn edging. This not only adds durability but also a decorative touch.
Block and Finish
Finally, block your sweater to even out the stitches and make any necessary adjustments or finishing touches.
Steeking Mistakes and TroubleShooting

Steeking in knitting can be a bit nerve-wracking, and mistakes can happen.
Here are some common steeking mistakes and troubleshooting tips to help you navigate the process:
Uneven or Loose Stitches
If your steek stitches are uneven or loose, it can lead to a messy cut. To avoid this, make sure you maintain even tension when knitting the steek stitches. You can use smaller needles for the steek section to ensure tighter stitches.
Cutting Too Close to the Edge
Cutting too close to the edge of the steek can risk unraveling. Always leave a bit of room between the stitching and the cut edge to prevent this.
If you’ve already cut too close, you can reinforce the edges with a crocheted or hand-sewn edge for added security.
Uneven Cutting
Cutting the steek unevenly can result in a jagged or messy edge. Use sharp scissors and cut carefully along the line of stitching to ensure a clean and straight cut.
Weak Reinforcement
If the reinforcement stitching isn’t strong enough, it can lead to unraveling. Use a sturdy, well-matched thread for reinforcement, and make sure you sew through each stitch at least once to secure them properly.
Yarn Snags
While cutting, be cautious of any yarn snags or knots in the steek section. These can lead to issues when you try to secure the cut edges. Smooth out the yarn as you go and address any snags before continuing.
Misaligned Stitches
If your reinforcement stitches are not aligned properly with the steek, it can weaken the edge. Ensure that the stitching runs parallel to the steek and that it catches all the steek stitches.
Inadequate Finishing
After cutting, don’t skip the finishing steps. Blocking is crucial to even out the stitches, and adding a crochet or hand-sewn edging can further secure the edges and enhance the appearance.
Not Practicing First
If you’re new to steeking, it’s a good idea to practice on a swatch or a small project before attempting it on a larger, more complex piece. This will help you gain confidence and refine your technique.
FAQS
Is seeking suitable for all types of knitting projects?
Steeking is most commonly used in colorwork knitting projects, like Fair Isle or stranded knitting, where it simplifies the process.
Can you steek with any type of yarn?
Steeking is typically done with wool or other animal fibers, as they have a natural “stickiness” that helps hold the cut edges together.
Can you machine-sew the steek reinforcement stitches?
Yes, you can use a sewing machine to create the reinforcement stitches for steeking.
Are there alternatives to steeking for creating openings in knitting?
Yes, you can knit pieces separately and seam them together to create openings, but this can be less efficient for colorwork projects.
Wrap Up
In knitting, steeking is a daring technique that enables the creation of openings in colorwork garments or accessories, such as cardigans, without the need for complex shaping during the initial knitting.
It involves adding a bridge of extra stitches in a contrasting color, which are later cut open, resulting in a clean, secure edge.
Steeking requires careful planning, precision, and courage, as it involves snipping through your painstakingly crafted stitches.
This process, however, empowers knitters to explore intricate colorwork patterns with ease, as well as customize and tailor their creations.
Steeking, while challenging, is a testament to the versatility and creativity inherent in the art of knitting, producing stunning, heirloom-quality pieces.
Leave a Reply