Vagonite embroidery, also known as Vagonite simples, is a captivating needlework tradition that traces its origins to Eastern Europe.
Characterized by geometric patterns, textured stitches, and a harmonious blend of simplicity and sophistication, Vagonite embroidery has enchanted crafters for generations.
The technique involves creating intricate designs through a combination of openwork and filling stitches, offering the fabric a unique and tactile quality.
As crafters delve into the artistry of Vagonite, they discover a rich tapestry of possibilities to elevate their needlework projects.
Whether crafting borders, linens, or garments, Vagonite embroidery is a testament to the enduring beauty of handcrafted textile art.
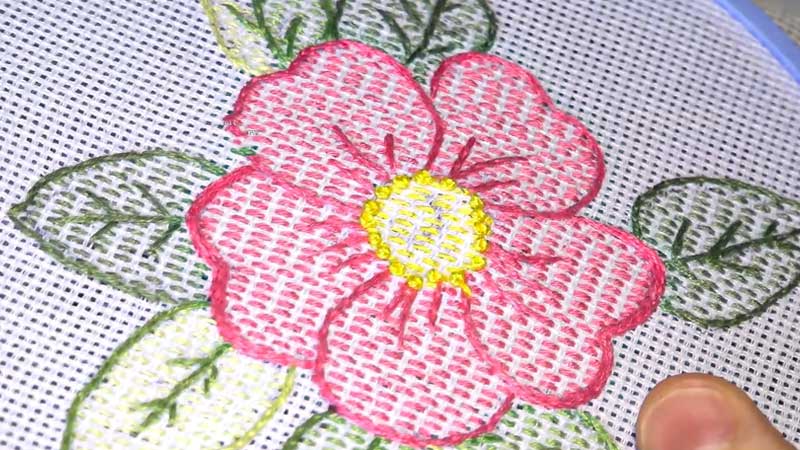
What Is Vagonite Embroidery?
Vagonite embroidery, also known simply as Vagonite, is a unique and intricate form of needlework that originated in Eastern Europe.
This embroidery style is characterized by its geometric patterns and repetitive stitches to create textured designs.
Vagonite often employs a combination of openwork and filling stitches, resulting in a fabric surface that is not only visually captivating but also has a distinct tactile quality.
Crafters use various threads and colors to enhance the complexity of the designs, and the technique is commonly applied to create borders, tablecloths, and other decorative elements.
Vagonite embroidery showcases a harmonious blend of precision and creativity, making it a captivating and cherished needlecraft tradition.
How To Do Vagonite Embroidery?
Embarking on the artistic journey of Vagonite embroidery involves mastering several simple yet intricate methods. These seven techniques will guide you through the process, unlocking the secrets of this captivating needlecraft.
Basic Vagonite Stitch
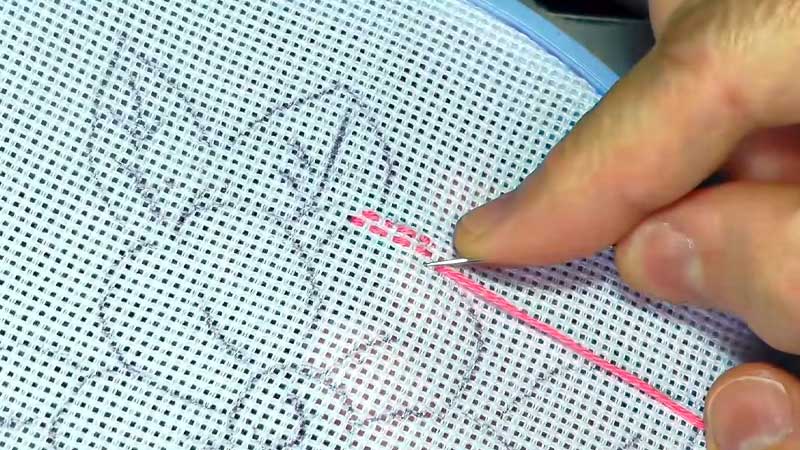
Begin with the fundamental Vagonite stitch, a combination of openwork and filling stitches. Create a foundation by forming straight or curved lines with parallel stitches, forming the basis for more intricate patterns in your embroidery.
Twisted Bars for Texture
Add texture to your Vagonite embroidery using twisted bars. This method involves twisting threads around a foundation thread, creating a textured effect.
Experiment with different tensions and thread combinations to achieve unique design textures.
Woven Bars for Dimension
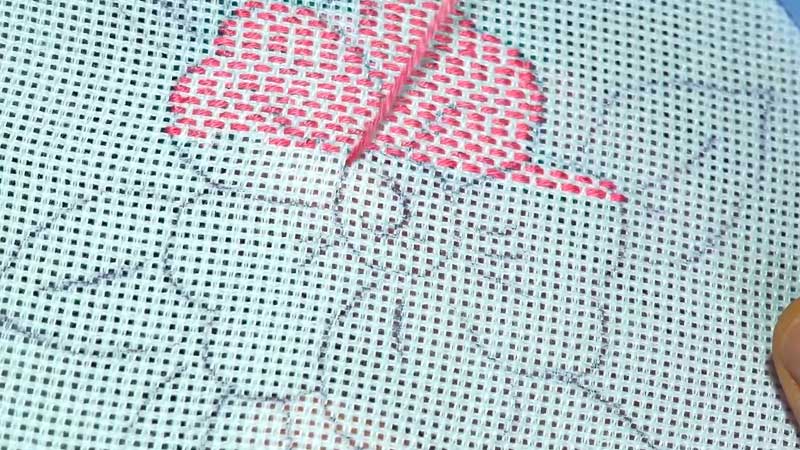
Explore dimensionality in Vagonite by incorporating woven bars. Interlace threads over the foundation stitches, creating a woven texture that adds depth to your embroidery. This method is perfect for enhancing the visual appeal of geometric patterns.
Cross-Stitch Variations
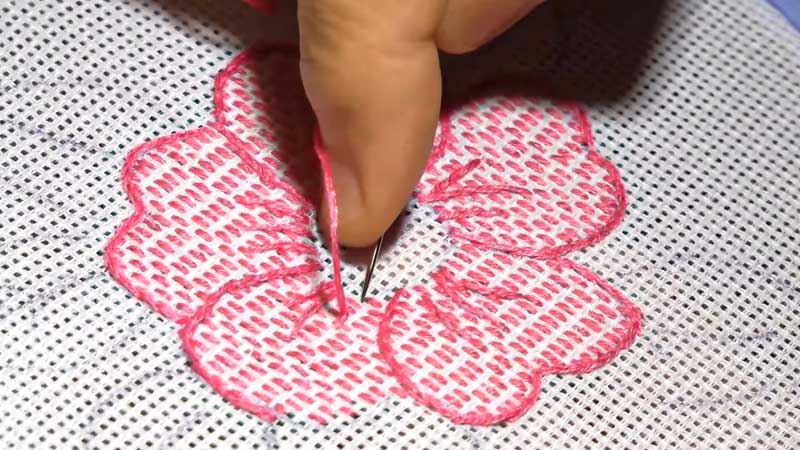
Introduce variety to your Vagonite patterns with cross-stitch variations. Experiment with different angles and spacing, creating intricate crosses within the framework of your basic stitches. This adds complexity and visual interest to your embroidery.
Lace-Like Fillings
Elevate your Vagonite designs by incorporating lace-like fillings. Use openwork stitches to create delicate and intricate patterns within the filled areas, adding an ethereal and sophisticated touch to your embroidery.
Combining Colors Creatively
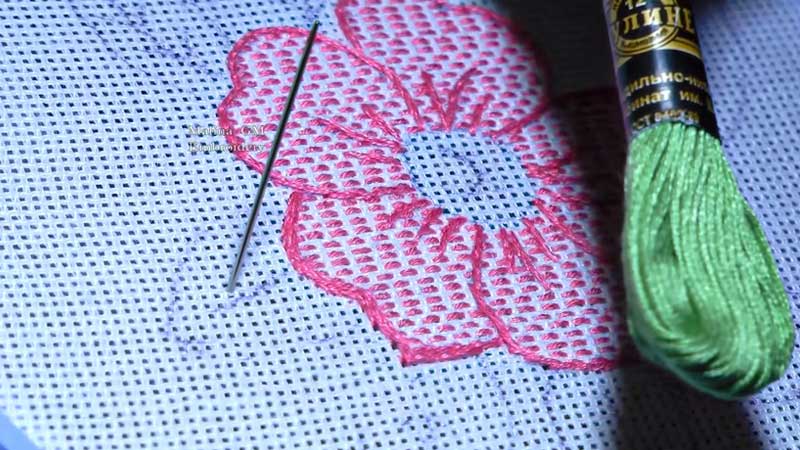
Infuse vibrancy into your Vagonite embroidery by creatively combining colors. Experiment with contrasting or complementary hues to highlight specific elements of your design, allowing for endless possibilities in crafting visually striking pieces.
Creating 3D Effects with Raised Stitches
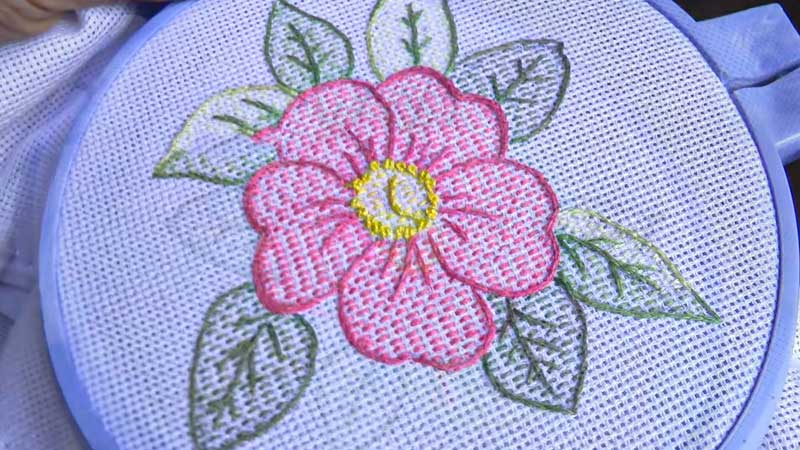
Explore the world of three-dimensional effects in Vagonite by incorporating raised stitches. By varying the height of your stitches, you can create a textured surface that adds depth and visual intrigue to your embroidered patterns, bringing them to life dynamically.
As you delve into these seven simple methods for Vagonite embroidery, remember that practice and experimentation are key to mastering this unique needlecraft.
Each technique opens doors to new creative possibilities, allowing you to craft intricate and visually stunning designs with the timeless artistry of Vagonite.
7 Huck Embroidery Patterns Free
Embarking on the creative journey of Huck embroidery, also known as Vagonite simples, opens a realm of possibilities for crafting intricate and visually appealing designs.
These seven free patterns will guide you through the art of Huck embroidery, allowing you to explore the beauty of geometric motifs and textured stitches.
1. Diamond Delight
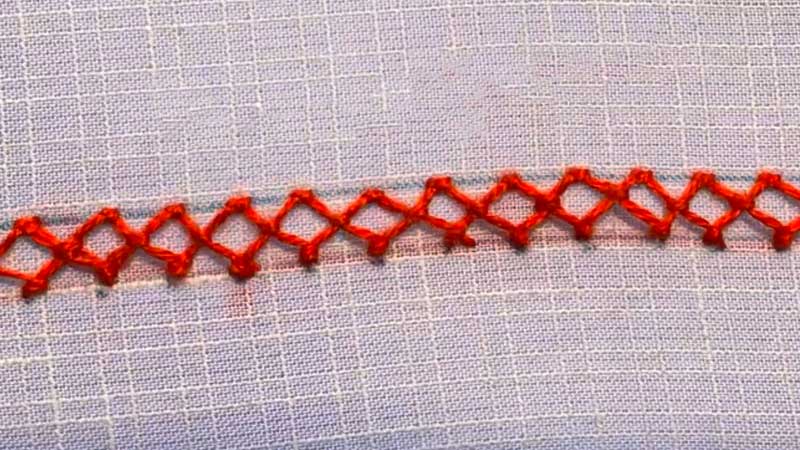
Begin your Huck embroidery adventure with a diamond pattern. This simple yet elegant design involves creating interconnected diamond shapes using the basic Vagonite simple stitch. Perfect for adding a touch of sophistication to your needlework.
2. Floral Fusion
Explore the versatility of Huck embroidery by incorporating floral elements. Create delicate flowers and vines using the Vagonite simple technique, adding a touch of nature-inspired charm to your embroidery projects.
3. Wave Wonders
Dive into the rhythmic beauty of wave patterns in Huck embroidery. This free pattern guides you through forming gentle waves using the Vagonite simple stitch, allowing you to create a soothing and visually dynamic design.
4. Butterfly Ballet
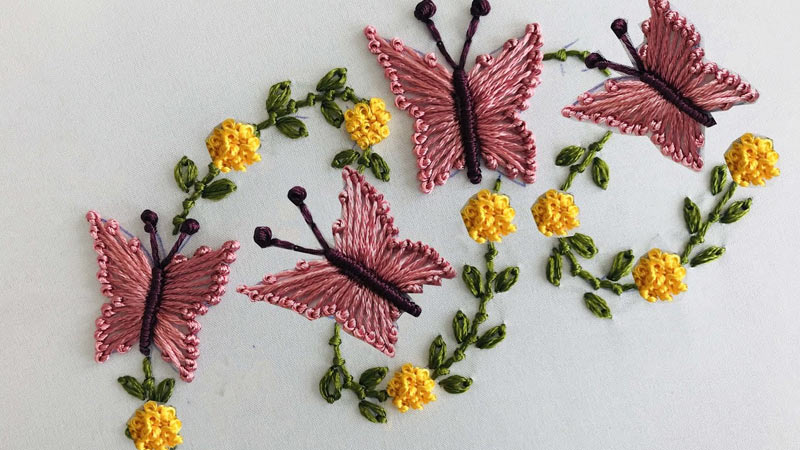
Add a whimsical touch to your Huck embroidery with a butterfly pattern. Craft fluttering butterflies using Vagonite simple stitches, creating a delightful and playful motif that is perfect for embellishing linens, garments, or accessories.
5. Classic Checkerboard
Embrace a timeless look with a classic checkerboard pattern in Huck embroidery. Alternating squares create a visually appealing design using the Vagonite simple stitch, offering a versatile and stylish option for various embroidery projects.
6. Interlocking Circles
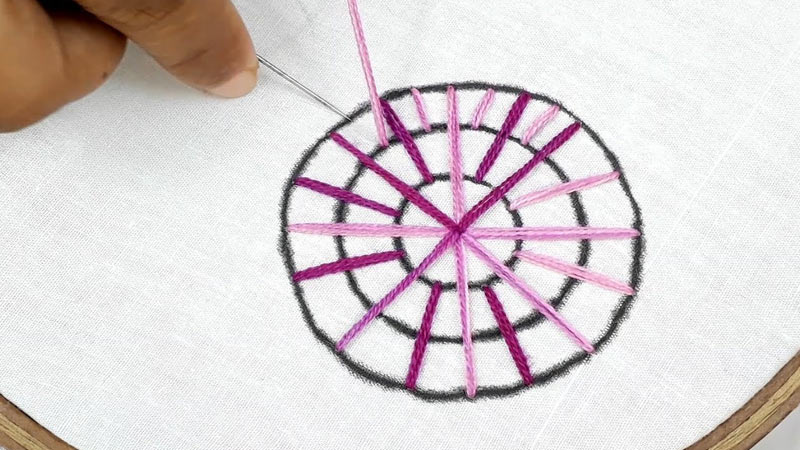
Explore the art of interlocking circles in Huck embroidery, creating a captivating geometric pattern. This free pattern guides you through forming interconnected circles using the Vagonite simple stitch, allowing for a modern, eye-catching design.
7. Heartfelt Elegance
Express your emotions through Huck embroidery with a heartfelt heart pattern. Craft intricate heart shapes using the Vagonite simple technique, adding a touch of elegance and sentiment to your embroidered creations.
As you delve into these seven free Huck embroidery patterns, remember that each design serves as a canvas for your creativity. Experiment with colors, thread types, and scale to personalize these patterns and bring your unique artistic vision to life.
Difference Between Weaving And Embroidery
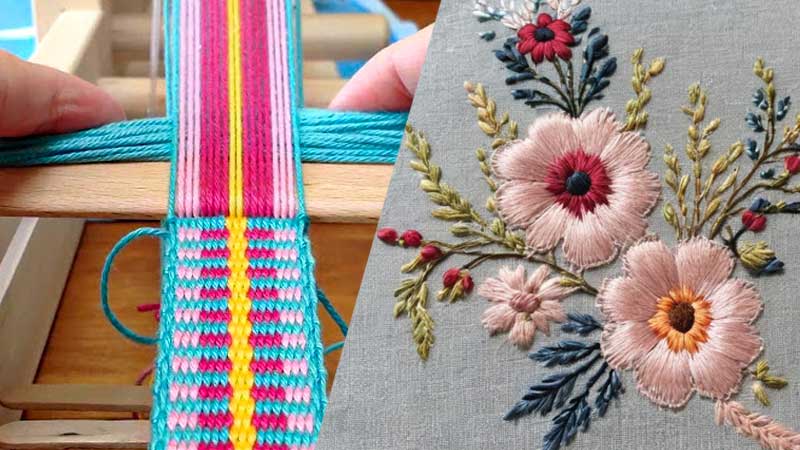
Here’s an explanation of the difference between weaving and embroidery:
| Aspect | Weaving | Embroidery |
| Technique | Interlacing threads in a systematic manner | Decorating fabric by adding stitches and designs |
| Process | Involves the creation of fabric by | Enhances existing fabric with decorative |
| intertwining vertical and horizontal | stitches, patterns, and motifs | |
| threads | ||
| Tools | Looms or weaving machines | Embroidery hoop, needle, and various threads |
| Fabric Use | Creates fabric from scratch | Embellishes pre-existing fabric or garments |
| Texture | structure of the woven fabric | Adds texture and dimension through varied |
| structured texture | stitches and patterns | |
| Flexibility | Limited flexibility due to the rigid | Highly flexible, adaptable to various fabric |
| structure of woven fabric | types and styles | |
| Examples | Plain weaves, twills, and satin weaves | Cross-stitch, satin stitch, and French knot |
Description
Weaving and embroidery are distinct textile techniques that manipulate threads to create fabric or enhance its aesthetic appeal. Weaving employs looms or machines to interlace vertical and horizontal threads, creating fabric from scratch.
On the other hand, embroidery enhances pre-existing fabric by adding decorative stitches, patterns, and motifs using tools like embroidery hoops and needles.
Weaving produces a structured, uniform texture, while embroidery introduces varied textures and dimensions through diverse stitches. Weaving is rigid, limiting flexibility, while embroidery adapts easily to different fabrics and styles.
Examples of weaving include plain weaves and twills, while embroidery techniques encompass cross-stitch, satin stitch, and French knots.
How To Do Embroidery Without Visible Ground?
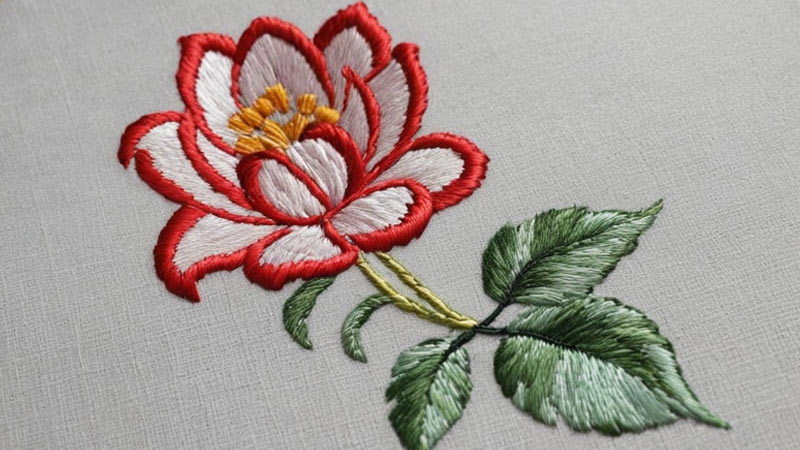
Embarking on the embroidery journey without a visible ground offers a unique opportunity to create ethereal and floating designs. These seven methods guide you through the art of embroidery, ensuring your stitches seamlessly blend into the fabric, leaving no visible ground behind.
Shadow Work Technique
Employ the shadow work technique by stitching on the reverse side of the fabric. This creates a subtle shadow effect on the front, making your embroidery appear as if it’s floating without a discernible ground.
Tone-on-Tone Embroidery
Choose a thread color that closely matches the fabric, creating a tone-on-tone effect. This method camouflages the stitches, allowing your embroidery to meld seamlessly with the background, making the ground nearly invisible.
Invisible Thread Magic
Use invisible or monofilament thread to execute your embroidery. This transparent thread minimizes the visibility of stitches, giving the impression that the design is magically suspended on the fabric without any noticeable ground.
Subtle Satin Stitch
Opt for a subtle satin stitch, where the stitches are strategically placed close together, leaving minimal gaps. This technique minimizes the visible ground between stitches, creating a smooth and continuous appearance on the fabric.
Openwork Embroidery
Embrace openwork or cutwork embroidery techniques, where portions of the fabric are cut away after stitching. This creates voids in the design, offering a delicate and airy aesthetic that appears to float without a prominent ground.
Stitching on Sheer Fabric
Choose sheer or translucent fabrics for your embroidery base. By stitching on sheer ground, your design will naturally appear to float as the stitches seamlessly blend into the transparency of the fabric.
Blending with Fabric Patterns
Select fabrics with intricate patterns or textures that complement your embroidery design. By aligning your stitches with the fabric’s patterns, you can create an illusion where the embroidery seamlessly integrates into the overall texture, making the ground less conspicuous.
Embarking on these seven embroidery methods without a visible ground allows you to explore the magical world of ethereal designs.
Whether through subtle stitching techniques or strategic fabric choices, these approaches enable your embroidery to exist harmoniously with the fabric, creating a captivating and seamless visual impact.
FAQs
Can beginners learn Vagonite embroidery?
Absolutely! Vagonite embroidery is accessible to beginners. Start with simple geometric patterns and gradually progress to more intricate designs, mastering the technique step by step.
What materials and tools are needed for Vagonite embroidery?
Basic materials include fabric and embroidery thread. Tools include needles, an embroidery hoop, and scissors. Choose a fabric with a weave suitable for your desired project.
Is Vagonite suitable for modern embroidery projects?
Yes, Vagonite is versatile and adapts well to modern projects. Crafters can use this technique to embellish various items, from home decor to contemporary fashion pieces.
Can Vagonite embroidery be done on different fabrics?
Yes, Vagonite can be done on various fabrics. Choose fabrics with suitable weaves, such as Aida or even-weave fabrics, to achieve the best results for your specific project.
Are there specific stitches associated with Vagonite embroidery?
Vagonite primarily involves a combination of openwork and filling stitches. Straight stitches, satin stitches, and weaving techniques are commonly used to create geometric patterns and textures.
Conclusion
In concluding our exploration of Vagonite embroidery, we find a timeless craft that beautifully marries precision and creativity. The geometric motifs and textured stitches unique to Vagonite create a visual language that resonates with elegance and simplicity.
This needlework tradition invites both novices and experienced crafters to embark on a journey where every stitch weaves a story of tradition and artistic expression.
As Vagonite continues to captivate contemporary artisans, it reaffirms the enduring allure of hand embroidery, reminding us that in the world of needlework, the beauty lies not just in the finished piece but in the meditative and artistic process itself.
Leave a Reply