Have you ever marvelled at the intricate borders adorning your favourite fabric creations and wondered about the stitches that bring them to life? Delving into embroidery and sewing, this exploration will unravel what stitch is used for borders.
Whether you’re a seasoned crafter or a novice enthusiast, understanding the artistry behind these stitches adds depth to your creative journey.
Embarking on this stitching adventure, we’ll navigate through various techniques, each with its unique charm.
From the timeless elegance of blanket stitches to the delicate intricacy of feather stitching, discover how these stitches serve functional purposes and contribute to the visual appeal of your projects.
Join us as we weave through the stitches that stand as silent heroes, framing and accentuating the edges of your fabric masterpieces.
Let’s unravel the thread of creativity and craftsmanship, exploring what stitch is genuinely used for borders.
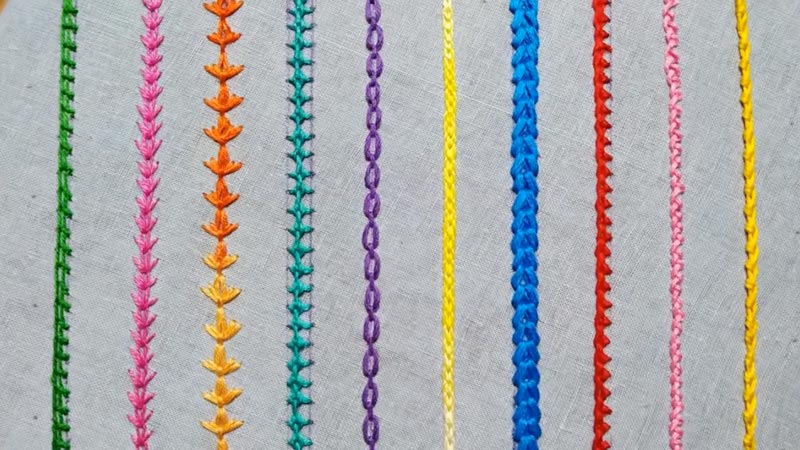
What Stitch Is Used For Borders? Kinds of Stitches
Each stitch in your sewing and embroidery projects, carefully chosen, contributes to a project’s overall aesthetic and durability.
Let’s delve into all the kinds of stitches commonly employed for borders, understanding their characteristics and when to use them.
Blanket Stitch
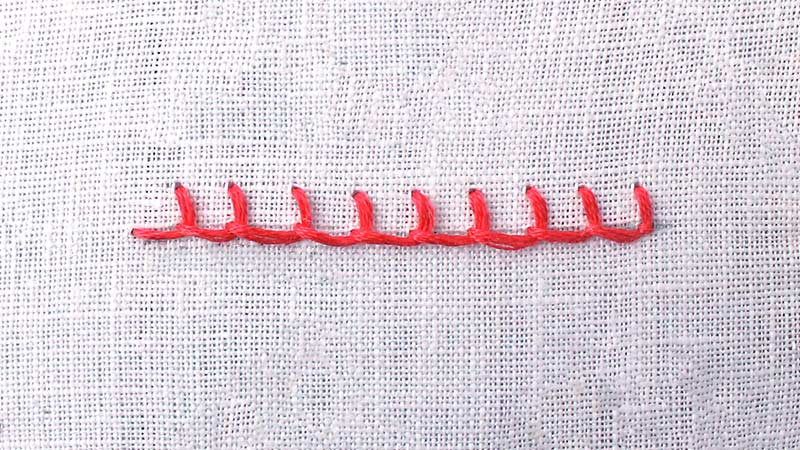
The timeless and versatile blanket stitch stands as a stalwart choice for borders. Its distinctive interlocking loops provide both decorative flair and functional edge reinforcement.
Ideal for finishing raw edges on fabrics like wool, felt, or fleece, the blanket stitch adds a touch of classic elegance to blankets, shawls, and garments.
Satin Stitch
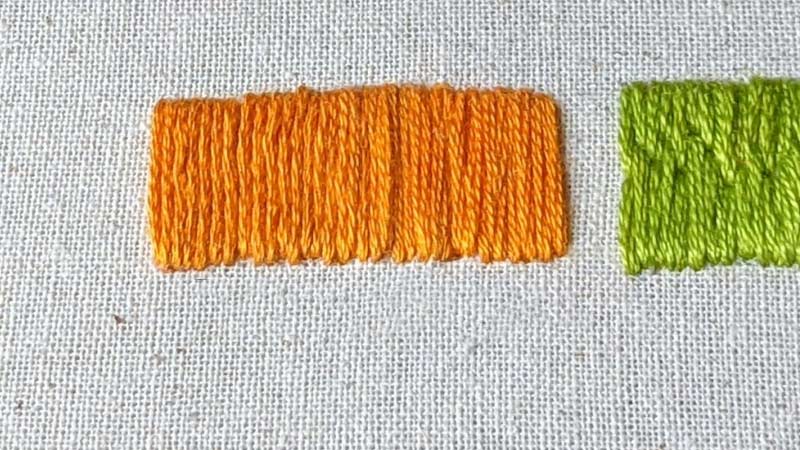
For a sleek and polished border, the satin stitch takes centre stage. This smooth and shiny stitch involves closely spaced, parallel threads covering the edge, creating a solid and smooth surface.
Satin stitching is perfect for embellishing borders on items like handkerchiefs, tablecloths, or any project requiring a refined finish.
Feather Stitch
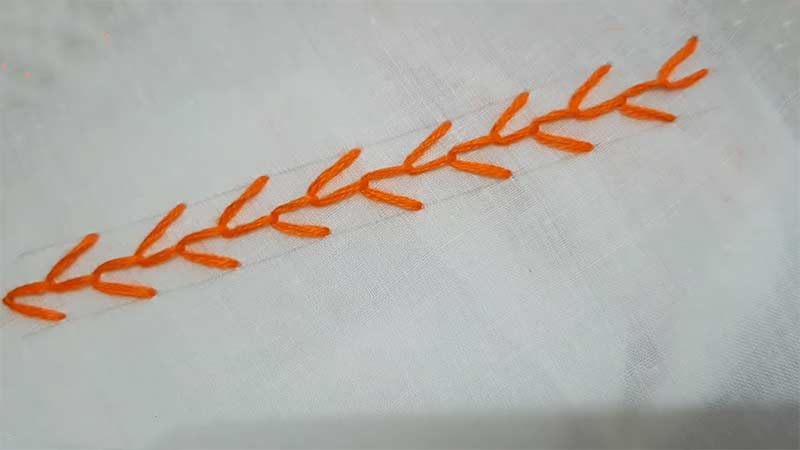
The feather stitch, characterized by its delicate, branching pattern, is a go-to for adding a touch of whimsy to borders. This stitch works well on lightweight fabrics, creating a feathery, vine-like effect.
It is ideal for projects like children’s clothing, pillowcases, or any design where a gentle, organic border is desired.
Herringbone Stitch
With its distinctive V-shaped pattern resembling the skeleton of a fish, the herringbone stitch is a classic choice for decorative borders.
This stitch not only adds visual interest but also provides structural support. Well-suited for borders on heavier fabrics or home decor items like curtains and upholstery.
Whip Stitch
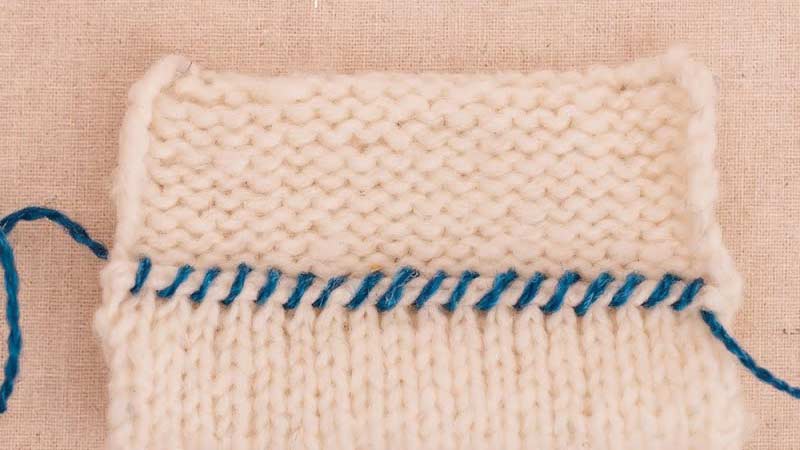
Simplicity meets functionality in the whip stitch, a quick and easy method for joining fabrics along the border.
Often used for appliqué or attaching trims, the whip stitch is a reliable choice when a neat, inconspicuous border is desired. It’s beneficial for joining fabrics with different textures or weights.
Cross Stitch
Cross stitching extends beyond its traditional use in embroidery to become an enchanting border option. By repeating the iconic X-shaped stitches along the edge, a cross-stitched border adds a touch of handmade charm.
The embroidery border stitches are well-suited for projects like hand towels, napkins, or any item fitting a quaint, rustic border.
Scallop Stitch
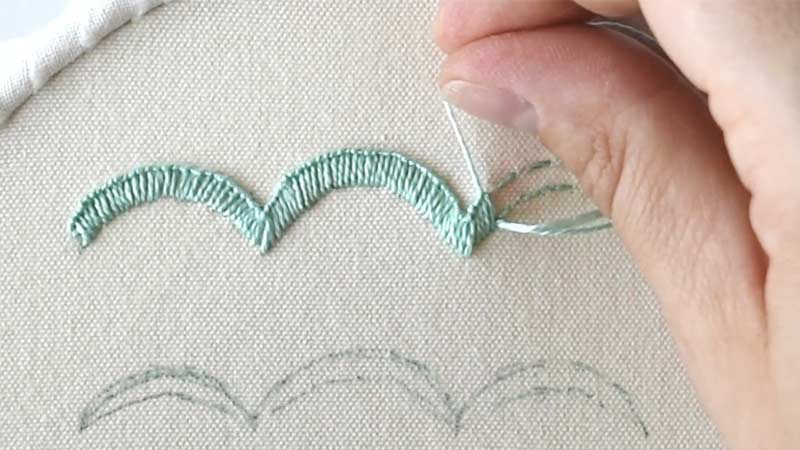
Soft and scalloped, this stitch creates a charming border reminiscent of ocean waves. Often chosen for baby clothing, linens, or feminine accessories, the scallop stitch adds a playful and decorative touch. It involves a repeated pattern of semi-circular stitches, creating a delightful edge.
Chain Stitch
As one of the oldest and most adaptable embroidery stitches, the chain border stitches find their place in creating decorative borders. With a looping, interconnected pattern, the chain stitch offers a timeless elegance.
It is ideal for borders on handbags, pillow covers, or any project with a desired graceful, textured finish.
Buttonhole Stitch
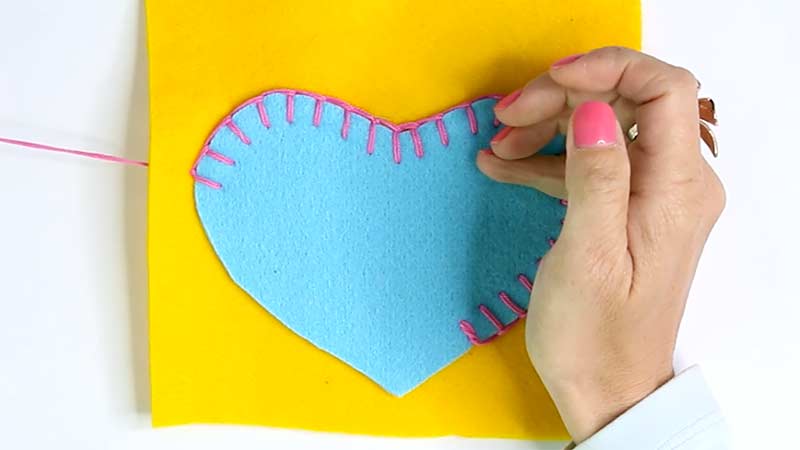
Renowned for its durability and versatility, the buttonhole border stitch is a go-to for securing and finishing edges.
Commonly used in garment-making for reinforcing buttonholes, this stitch also excels as a border on projects like jackets, coats, or any item requiring a secure and polished edge.
Running Stitch
Simple yet effective, the running stitch provides a basic but versatile border option. Characterized by evenly spaced, straight stitches, it is quick to execute and can be adapted for various styles.
The running stitch is suitable for lightweight fabrics and can be used for borders on casual clothing, quilts, or decorative household items.
Step-By-Step Guide On How to Create Stitched Borders on Garments?
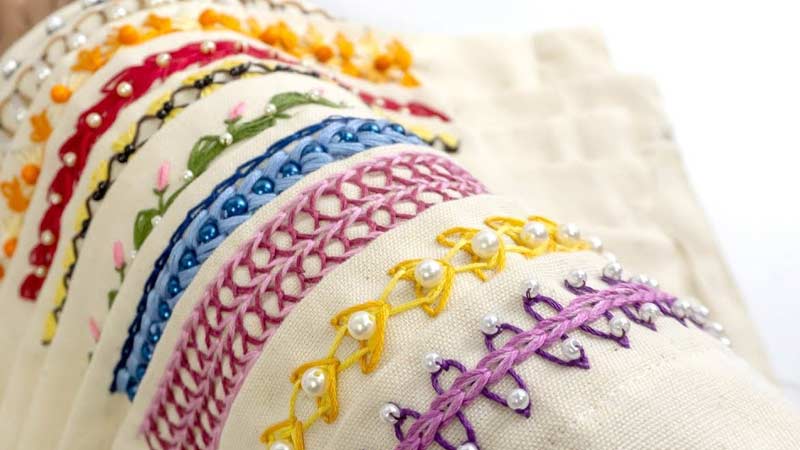
Adding stitched borders to garments is a beautiful way to infuse creativity and a personalized touch. Let’s explore a step-by-step guide on how to create stitched borders on garments.
Design Planning
When diving into design planning, envision the overall look of your garment and strategically decide where the stitched borders will make the most impact.
Analyze the garment’s structure, considering elements like cuffs, collars, hems, or decorative panels. This thoughtful approach ensures that the placement of your stitched borders enhances the visual appeal.
Marking
The marking phase is crucial in translating your design vision onto the fabric. Utilize precise marking tools such as chalk, water-soluble pens, or tailor’s chalk to draw clear border lines on the garment.
This serves as a visual guide for stitching and guarantees uniformity in your design.
Fabric Preparation
Before delving into the stitching process, ensure your garment is prepared for optimal results. If the garment is not assembled, stitch together the main pieces before adding borders.
This ensures that the borders seamlessly integrate into the garment’s structure. Additionally, take a moment to ensure the fabric is clean and pressed.
Hooping the Fabric
If you’ve chosen to use an embroidery hoop, carefully place the garment fabric inside, securing it tightly. The hoop aids in maintaining even tension across the fabric, a crucial factor for achieving precise and consistent stitching.
This step not only facilitates the stitching process but also contributes to the overall quality of the finished borders.
Thread the Needle
Thread selection plays a pivotal role in the success of your stitched borders. Choose a thread colour that complements or contrasts with the garment fabric, enhancing the overall design.
Thread your needle with an appropriate length, ensuring it’s not overly long to avoid tangling. Securely knot the end of the thread, providing stability to your stitches.
Choose the Stitch
The choice of stitch is akin to selecting the brushstroke for a painting. Consider your garment’s overall aesthetic and theme, then choose a stitch that resonates with your design vision.
Whether opting for the classic elegance of a blanket stitch, the sleek finish of a satin stitch, or the simplicity of a running stitch.
Start Stitching
With all preparations, embark on the stitching process along the marked border lines. Maintain a consistent stitch length for a professional finish, paying attention to detail at every step.
Adjust spacing and tension to achieve the desired visual effect if experimenting with decorative stitches. In this hands-on stage, your creativity comes to life, shaping the borders according to your envisioned design.
Corners and Curves
For sharp corners, pivot the needle at the corner, ensuring a seamless transition in your stitched borders.
When working with curves, adapt your stitching technique by making smaller stitches, allowing the border to follow the contour of the garment gracefully.
This attention to detail ensures that your stitched borders flow seamlessly with the garment’s shape.
Securing the Ends
As you approach the end of each border, take the necessary steps to secure the thread. Create a small knot or weave the thread back through existing stitches to prevent unravelling.
This ensures the longevity of your stitched borders, maintaining their integrity even with regular wear and laundering.
Trim Excess Threads
After completing the stitching, meticulously trim any excess threads. This step adds a final touch of refinement to your garment, presenting the stitched borders in full glory. If you’ve used an embroidery hoop, gently remove the garment, freeing it from the confines of the hoop.
Pressing
Elevate the overall appearance of your stitched borders by pressing them gently with a warm iron. This sets the stitches and smooths out any wrinkles or puckering that may have occurred during the stitching process.
FAQs
Can I add stitched borders to already assembled garments?
Yes, it’s possible. Carefully plan the placement, use marking tools, and secure the fabric in an embroidery hoop for even tension before stitching.
How do I prevent thread tangling while stitching borders?
Ensure your thread isn’t too long, as excessive length can lead to tangling. Use an appropriate needle size and maintain a smooth, controlled stitching pace.
Are there specific stitches suitable for delicate fabrics?
Yes, consider stitches like feather stitch or satin stitch for delicate fabrics. They provide a delicate touch without compromising the fabric’s integrity.
How can I add a personal touch to stitched borders on garments?
Experiment with thread colours, incorporate unique stitches or add embellishments like beads. Personalizing your stitched borders allows for creative expression and a distinct look.
Can I use machine stitching for garment borders instead of hand stitching?
Absolutely. Machine stitching can be a time-efficient alternative. Choose decorative machine stitches or a standard straight stitch for a sleek, polished border finish. Adjust stitch settings for optimal results on different fabrics.
Conclusion
The world of stitches for borders is a rich tapestry of creativity and functionality. As we’ve explored the intricacies of various stitching techniques, it becomes evident that borders are more than just boundaries – they are opportunities for artistic expression and detailing.
Whether you choose a classic blanket stitch for a cosy quilt or opt for the delicate charm of feather stitching on a garment, each stitch carries a story of craftsmanship.
These borders serve practical purposes, providing durability and structure and adding a touch of personal flair to your creations.
As you embark on your stitching endeavours, may you find joy in experimenting with different needlepoint border stitches and infusing your projects with a unique, handcrafted touch.
The borders you create become more than mere edges; they become a testament to your skill, passion, and the timeless artistry of the stitches that bind your creations.
Leave a Reply