Sewing machines are essential tools for countless artisans and hobbyists worldwide. While these machines are celebrated for their precision and durability, users occasionally encounter a puzzling issue: the detachment of sewing machine pedals.
This seemingly minor problem can disrupt sewing projects, leading to frustration and downtime. Understanding why sewing machine pedals detach is crucial for preventing and addressing this inconvenience.
Whether it’s due to wear and tear, loose connections, manufacturing defects, user error, damage, incompatibility, or the age of the machine, there are various factors that contribute to this issue.
In this exploration, we delve into these reasons and provide insights into how to avoid and rectify sewing machine pedal detachment, ensuring smoother sewing experiences.

Why Do Sewing Machine Pedals Detach?
Sewing machine pedals, also known as foot pedals or foot controllers, play a crucial role in the operation of a sewing machine.
They are responsible for controlling the speed and direction of the machine’s stitching mechanism.
However, in some situations, sewing machine pedals may detach or become separated from the machine.
There are several reasons why this can happen:
Wear and Tear
Over time, the connection between the sewing machine and its pedal can weaken due to regular use.
The constant pressure and movement on the pedal can cause the connecting mechanism to wear out or become damaged.
If the pedal is not properly maintained or replaced when necessary, it may eventually detach from the machine.
Loose Connections
The pedal is usually connected to the sewing machine with a cable that plugs into a specific port or socket.
If this connection becomes loose due to vibrations, movement, or accidental tugging on the cable, it can lead to the detaching machine during operation.
Manufacturing Defects
In some cases, sewing machine pedals may detach due to manufacturing defects. If the pedal was not properly assembled or if there was a quality control issue during production, it could result in the pedal becoming detached from the machine.
User Error
Sometimes, the user’s actions can inadvertently lead to the pedal detaching. For example, accidentally stepping on the cable, pulling it too forcefully, or mishandling the pedal while moving the sewing machine can cause the pedal to disconnect.
Damage
Physical damage to either the pedal or the sewing machine can also lead to detachment. If the pedal or the machine itself is dropped, bumped, or otherwise subjected to rough handling, it can damage the connecting components and result in the pedal detaching.
Incompatibility
Using a non-compatible pedal with the sewing machine can also lead to detachment. Different sewing machine models require specific types of pedals, and attempting to use an incompatible pedal may not provide a secure connection, causing it to detach.
Age of the Machine
Older sewing machines may be more prone to pedal detachment because the connecting mechanisms and cables may have degraded over time.
As machines age, it becomes increasingly important to inspect and maintain all of their components, including the pedal.
How to Repair Sewing Machine Pedal?
Sewing machine pedal repair is a valuable skill for any sewing enthusiast, as it can help you avoid costly replacements and keep your machine in working order.
Pedals, also known as foot controllers, are vital components that regulate the speed and direction of your sewing machine. When they malfunction or become damaged, it can disrupt your sewing projects.
Here’s a step-by-step guide on how to repair a sewing machine pedal:
Safety First
Ensure your sewing machine is completely disconnected from its power source. Unplug it from the electrical outlet or, if your machine has a separate power switch, turn it off.
Inspect the Damage
Carefully examine the pedal for visible signs of damage. This includes checking the cable, plug, and the pedal unit itself.
Look for frayed wires, loose connections, or any physical damage that may be affecting its functionality.
Replace Damaged Parts
- If the cable is frayed or damaged, it’s crucial to replace it. Measure the length of the existing cable and purchase a suitable replacement from a sewing machine supply store.
- When replacing the plug, ensure it matches the specifications of your sewing machine. You may need to solder the new plug onto the cable, so consider seeking help from someone experienced with soldering if you’re not confident in your soldering skills.
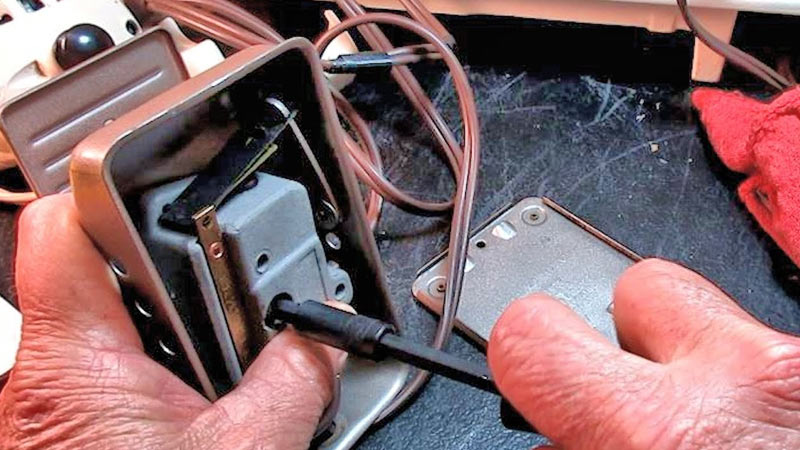
Check Internal Components
If the issue appears to be inside the pedal unit, you may need to open it up. Some pedals can be disassembled by removing screws or clips.
Look for loose wires, damaged switches, or any components that may need cleaning or replacement.
Clean and Lubricate
Use a can of compressed air to blow out dust and debris from the inside of the pedal. Be thorough in cleaning, as even a small amount of debris can affect performance.
Apply a small amount of sewing machine oil to any moving parts that may benefit from lubrication.
Reassemble
If you’ve taken the pedal apart, carefully reassemble it, making sure that all connections are secure. Take extra care not to pinch or damage any wires during reassembly.
Test the Pedal
Plug the pedal back into the sewing machine, reconnect it to the power source, and power on the machine.
Test the pedal’s functionality by gently pressing it to see if the sewing machine responds appropriately.
Ensure that the speed control and direction (forward/reverse) functions work correctly.
Fine-Tuning
Some pedals have tension screws or switches that allow you to adjust their responsiveness. Consult your sewing machine’s manual for guidance on how to make these adjustments if necessary.
Final Check
Give the pedal one last inspection to ensure all connections are secure, and there are no loose wires or components. Check for any signs of wear or damage that you might have missed earlier.
Safety Check
Always remember to disconnect the sewing machine from the power source before using it. Ensure that all connections are secure and that there are no exposed wires that could pose a safety hazard.
Sewing Machine Pedal Not Working
When your sewing machine pedal isn’t working, it can be frustrating and halt your sewing projects. There are several potential reasons for this issue, and troubleshooting can help you identify and address the problem.
Here’s a step-by-step guide to help you diagnose and resolve the “sewing machine pedal not working” problem:
Check the Power Source
Ensure that your sewing machine is properly plugged in or connected to its power source. Sometimes, a loose connection can give the appearance of a non-working pedal.
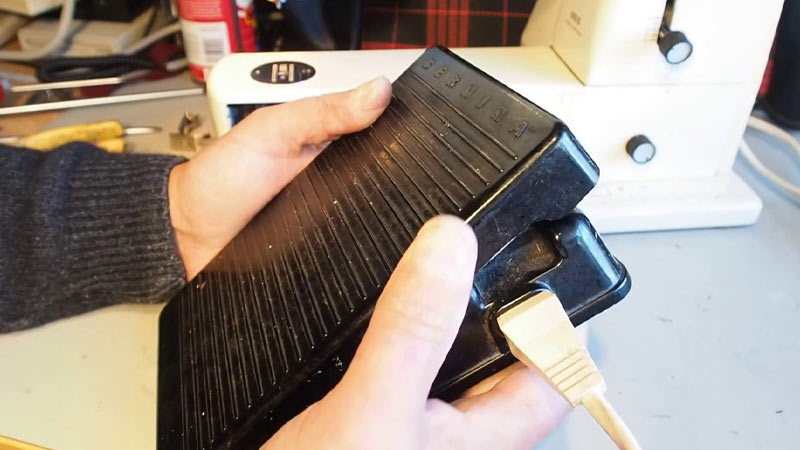
Pedal Connection
Examine the connection between the pedal and the sewing machine. Ensure that the plug is securely inserted into the machine’s port and that there are no loose wires.
Inspect the Pedal
Examine the pedal itself for visible damage. Look for frayed wires, loose connections, or any physical damage to the pedal unit.
Cable Check
Inspect the pedal’s cable for any signs of damage, such as fraying or cuts. A damaged cable can disrupt the flow of power and control signals.
Power Indicator Light
If your pedal has a power indicator light, check if it is lit when you press the pedal. If it doesn’t light up, it could indicate an issue with the pedal’s power supply.
Test with a Multimeter
If you have access to a multimeter, you can test the continuity of the pedal’s cable. Disconnect the pedal from the sewing machine and use the multimeter to check if there is continuity through the cable when you press the pedal. If there is no continuity, the cable may be faulty.
Clean the Pedal
Dust and debris can accumulate inside the pedal over time, affecting its performance. Use compressed air to blow out any dirt and apply a small amount of sewing machine oil to lubricate any moving parts within the pedal.
Test with Another Machine
If you have access to another compatible sewing machine, test the pedal with that machine to rule out whether the issue is with the pedal or the sewing machine itself. If the pedal works with the other machine, it suggests a problem with your sewing machine.
Consult the Manual
Refer to your sewing machine and pedal manuals for troubleshooting tips and diagrams specific to your model. They may offer insights into common issues and solutions.
Professional Help
If you’ve tried these troubleshooting steps and the pedal still isn’t working, or if you’re not comfortable with DIY repairs, it’s advisable to seek professional assistance from a sewing machine technician. They can diagnose and fix more complex issues.
Infinity Foot Pedal Not Working
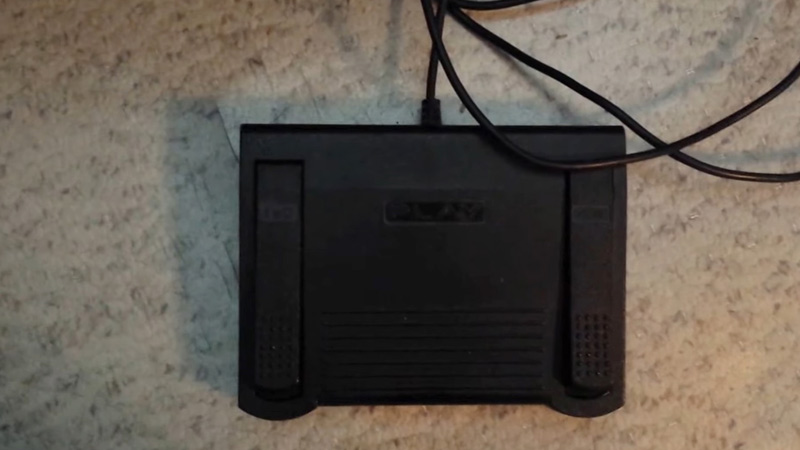
If your Infinity foot pedal is not working, it can be frustrating and interrupt your transcription or dictation workflow.
Here are some steps you can take to troubleshoot and potentially resolve the issue:
Check the Physical Connections
Ensure that the foot pedal is correctly connected to your computer or transcription software. Make sure the USB cable is securely plugged into a functional USB port.
Power and Indicator Lights
Check if the foot pedal has any indicator lights. These lights can provide information about the pedal’s status. If there are lights, check if they are illuminated when the pedal is connected and pressed.
Software Compatibility
Verify that the Infinity foot pedal is compatible with your transcription software or application. Some pedals may require specific drivers or software updates to function correctly.
Driver Installation
Ensure that you have installed any necessary drivers for the foot pedal. You can usually find these drivers on the manufacturer’s website or the product’s packaging.
Restart Software
Sometimes, transcription software may encounter issues that affect the foot pedal’s functionality. Try restarting your transcription software and see if the foot pedal begins working again.
Test on Another Computer
To rule out potential computer-related issues, try connecting the foot pedal to another computer or laptop. If it works on a different computer, the problem may be specific to your initial computer’s settings or software.
Check for Physical Damage
Inspect the foot pedal for any physical damage, loose connections, or broken parts. Ensure that the pedal’s buttons or switches are functioning correctly.
Adjust Pedal Settings
Some transcription software allows you to customize the behavior of foot pedals. Check the software settings to ensure the foot pedal is configured correctly.
Reinstall Software
If the foot pedal worked previously but stopped functioning after a software update or system change, consider reinstalling the transcription software or performing a system restore to a point when the pedal was working correctly.
Contact Manufacturer or Support
If you’ve tried all of the above steps and the foot pedal still isn’t working, it may be necessary to contact the manufacturer’s customer support or technical support for further assistance.
They can provide guidance specific to your foot pedal model and may offer solutions or recommend a replacement if the pedal is under warranty.
Sewing Machine Foot Pedal Alternatives
If your sewing machine foot pedal is not working, or damaged, or if you’re looking for alternatives to the traditional foot pedal control, there are several options available:
Replacement Foot Pedal
The most straightforward solution is to purchase a replacement foot pedal that is compatible with your sewing machine. This option is ideal if your current pedal is damaged or malfunctioning.
Knee Lift Lever
Some sewing machines, especially industrial models, come with a knee lift lever. This lever allows you to lift the presser foot using your knee, leaving your hands free to guide the fabric.
It’s a great alternative to a foot pedal for tasks that require frequent fabric adjustments.
Start/Stop Button
Many modern sewing machines, particularly computerized ones, have a start/stop button on the machine itself.
This button allows you to start and stop sewing without using a foot pedal. You control the speed using the machine’s speed adjustment settings.
Speed Control Slider/Buttons
Some sewing machines have speed control sliders or buttons that allow you to set and adjust the sewing speed directly on the machine’s control panel. This eliminates the need for a foot pedal to control speed.
Remote Foot Pedal
In some cases, you can use a remote foot pedal extension. This device connects to your sewing machine via a cable and allows you to place the foot pedal on a more convenient location, such as on a table or surface closer to your hands.
Electronic Speed Controller
If your sewing machine lacks built-in speed control options, you can purchase an external electronic speed controller.
These devices allow you to adjust and control the sewing speed without relying on the foot pedal.
Foot-Free Sewing Attachment
Some sewing machines offer attachments that allow you to sew without using your feet at all. These can include knee-activated devices or attachments for hands-free sewing.
Sewing Machine Software
For computerized sewing machines, there are software solutions available that allow you to control your sewing machine via a computer or tablet.
This can include designing and executing complex stitching patterns without the need for a foot pedal.
Voice Control or Remote Control
In some advanced sewing setups, you can use voice commands or a remote control device to start, stop, and control the speed of your sewing machine.
FAQS
Can environmental conditions affect pedal detachment?
Yes, extreme temperatures and humidity can impact the materials and connections in sewing machine pedals, potentially contributing to detachment over time.
Do sewing machine pedal attachments differ for industrial vs. domestic machines?
Yes, the design and attachment mechanisms of pedals can vary between industrial and domestic sewing machines, impacting their susceptibility to detachment.
Can improper storage cause pedal detachment?
Yes, storing your sewing machine in a manner that puts pressure on the pedal or exposes it to potential damage can lead to detachment issues.
Is it possible for repeated heavy-footed use to cause pedal detachment?
Yes, excessive force applied to the pedal over time can strain the connections and lead to detachment.
Can pedal detachment be a result of sewing machine vibrations?
Yes, vibrations during sewing can gradually loosen pedal connections, potentially leading to detachment if not addressed.
To Recap
Understanding why sewing machine pedals detach is essential for maintaining seamless sewing experiences.
Whether due to wear and tear, loose connections, manufacturing defects, user error, or machine age, the causes can be multifaceted.
Addressing these issues promptly through regular inspection, maintenance, and proper handling can prolong the life of sewing machine pedals and prevent unexpected disruptions.
Moreover, choosing compatible components and adhering to recommended usage practices can significantly mitigate detachment risks.
Ultimately, by staying proactive and knowledgeable about the factors contributing to pedal detachment, sewing enthusiasts can ensure that their machines remain reliable and dependable tools for their creative endeavors.
Leave a Reply