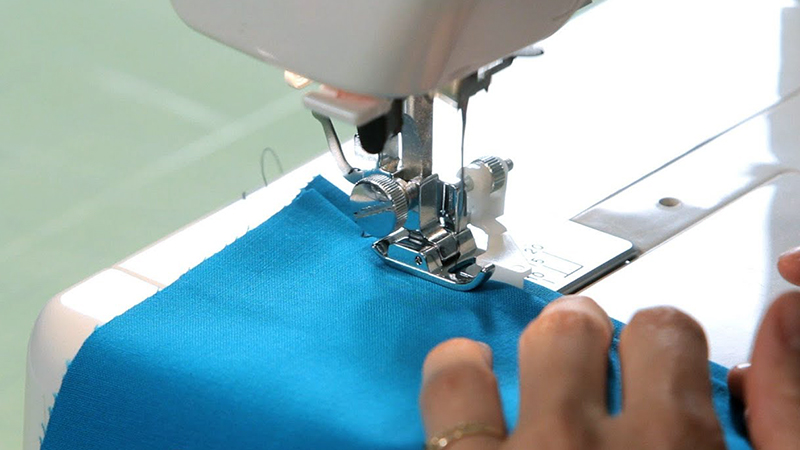
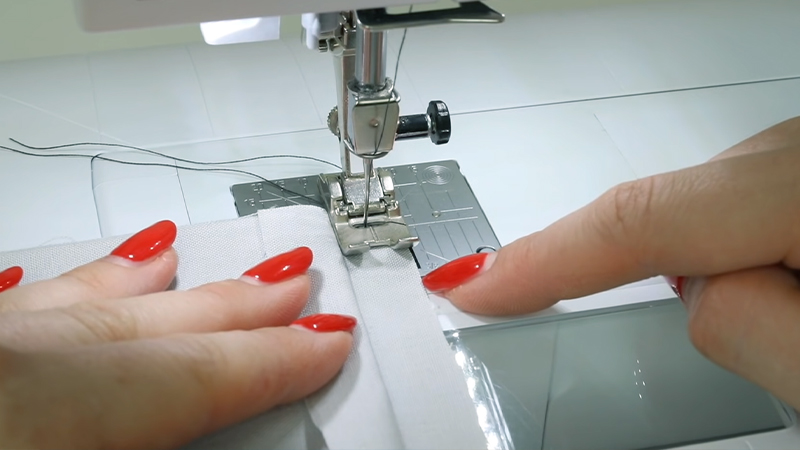
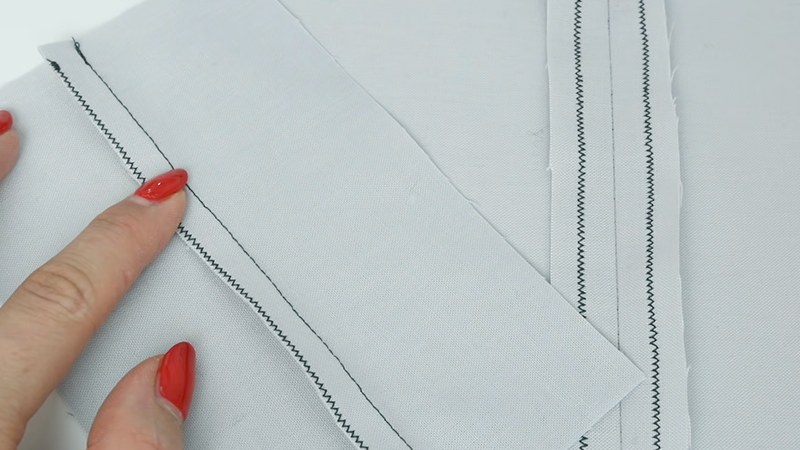
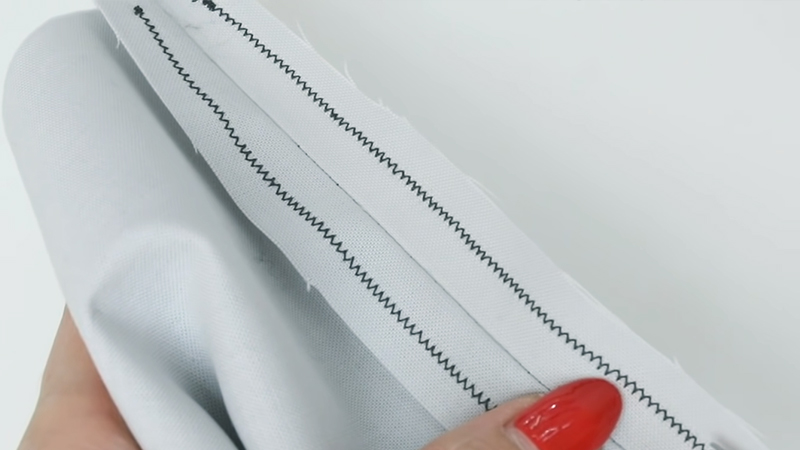
Fabric puckering in a zigzag stitch can be a frustrating setback for any sewing enthusiast. This issue, characterized by the undesirable gathering or wrinkling of fabric during stitching, arises from a combination of factors.
Understanding why it occurs is essential for achieving smooth and professional-looking results in sewing projects. From tension settings to needle selection, various elements play a crucial role in preventing puckering.
Delicate fabrics, in particular, are susceptible to this problem. In this guide, we’ll delve into the reasons behind fabric puckering in zigzag stitching and provide practical tips to help you troubleshoot and enhance your sewing experience.

What Is Fabric Puckering?
Fabric puckering refers to the undesirable gathering, wrinkling, or folding of material during the sewing process. It occurs when the fabric doesn’t feed smoothly through the sewing machine, resulting in uneven or distorted stitches.
Puckering can give a finished garment or project an unprofessional and untidy appearance.
This issue commonly arises due to factors like incorrect tension settings, improper needle selection, or using the wrong sewing technique for a particular fabric. It’s particularly noticeable on delicate or lightweight materials.
Addressing the causes of fabric puckering is crucial to achieving clean, smooth stitches and ensuring the overall quality and durability of a sewing project.
Why Is Fabric Puckering in Zigzag Stitch?
Fabric puckering in a zigzag stitch can be caused by several factors, and understanding these reasons can help you troubleshoot and improve your sewing projects.
Here are some common causes:
Incorrect Tension Settings
Incorrect tension settings are a common culprit behind fabric puckering. If the upper tension is set too high, the thread pulls tightly, causing the fabric to gather.
Conversely, if the lower tension is too tight, it can create excess tension in the bobbin thread, leading to puckering. Finding the right balance between upper and lower tension is crucial for smooth, even stitching.
Inappropriate Needle Size or Type
Using the wrong needle for the fabric type can lead to puckering. For instance, a ballpoint needle is ideal for knits, as it slides between the fibers without causing damage.
On the other hand, a sharp needle is better suited for woven fabrics. Using the correct needle ensures that the fabric is pierced cleanly, reducing the likelihood of puckering.
Uneven Feed Dogs
The feed dogs are responsible for moving the fabric through the machine. If they’re not working evenly, it can cause uneven feeding, resulting in puckering.
Regular maintenance and cleaning of the feed dogs, as well as ensuring they’re properly aligned, can help prevent this issue.
Improper Stitch Length and Width
Both stitch length and width play a crucial role in preventing puckering. A very short stitch length can create excessive tension on the fabric, leading to bunching.
Similarly, an overly wide stitch may not adequately secure the fabric, causing it to pucker. Adjusting these settings according to the fabric type helps maintain a smooth stitch.
Faulty Thread or Thread Quality
Using poor-quality or old thread can lead to puckering. Irregularities in thickness or texture can disrupt the stitching process.
Investing in high-quality thread appropriate for the fabric can significantly improve stitch quality and reduce the likelihood of puckering.
Uneven Pressure on the Presser Foot
Uneven pressure on the presser foot can lead to uneven feeding, causing the fabric to pucker. This can be caused by an uneven surface or incorrect presser foot attachment. Ensuring that the presser foot exerts uniform pressure across the fabric helps maintain even stitching.
Fabric Type
Certain fabrics are more prone to puckering due to their delicate nature. Lightweight materials like silk or chiffon are particularly susceptible.
When working with such fabrics, extra care is needed in adjusting tension settings, choosing the right needle, and handling techniques to minimize puckering.
Dull Needle
A dull needle can snag the fabric rather than smoothly piercing it, potentially leading to puckering. Regularly replacing or sharpening needles ensures clean penetration, reducing the likelihood of puckering and fabric damage.
Improper Handling of Stretchy Fabrics
Stretchy fabrics, such as knits, require special handling. Using a walking foot or a stabilizer can prevent uneven stretching and distortion, resulting in smoother, puckering-free stitches.
Lack of Fabric Stabilizer
When working with fabrics prone to puckering, using a stabilizer like tear-away or wash-away interfacing provides additional support during stitching. This helps maintain the fabric’s integrity and reduces the likelihood of distortion.
Sewing Speed
Sewing too quickly can lead to fabric bunching up, especially on lighter materials.
Maintaining a steady, controlled pace allows the feed dogs to move the fabric smoothly, resulting in even stitching without puckering.
Improper Thread Tension for Decorative Stitches
When using decorative zigzag stitches, it’s crucial to adjust both upper and lower tensions appropriately.
Experimenting with different tension settings helps find the right balance for achieving decorative stitches without causing puckering in the fabric.
How to Fix Fabric Puckering in Zigzag Stitch?

When you’ve encountered fabric puckering in your zigzag stitching, don’t fret—there are several measures you can take to rectify this issue.
Puckering often arises due to a combination of factors, and addressing them systematically can lead to smoother, more professional results.
Here’s a step-by-step guide on how to fix fabric puckering in a zigzag stitch:
Check Tension Settings
Start by examining the tension settings on your sewing machine. Adjust the upper and lower tensions gradually, testing on a scrap piece of fabric until you achieve a balanced stitch. Lowering the upper tension slightly can often alleviate puckering.
Select the Right Needle
Ensure you’re using the appropriate needle for the fabric you’re working with. A ballpoint needle for knits or a sharp needle for woven fabrics can make a significant difference in preventing puckering.
Inspect Feed Dogs
Take a moment to inspect the feed dogs. Clean any accumulated lint or debris, and ensure they’re moving smoothly. Misaligned or worn feed dogs can lead to uneven fabric movement and subsequently, puckering.
Adjust Stitch Length and Width
Experiment with different stitch lengths and widths. Lengthening the stitch slightly and adjusting the width can often help in achieving a smoother, less puckered result.
Use High-Quality Thread
Opt for high-quality thread suitable for the fabric. Poor-quality or old thread can have irregularities that contribute to puckering. Investing in good thread can significantly improve stitch quality.
Verify Presser Foot Pressure
Double-check that the presser foot is applying even pressure across the fabric. Inconsistent pressure can lead to uneven feeding and subsequent puckering.
Consider the Fabric Type
Keep in mind that delicate or lightweight fabrics, like silk or chiffon, are more susceptible to puckering. Adjust your sewing techniques and settings accordingly to minimize this effect.
Ensure a Sharp Needle
A dull needle can snag the fabric, causing puckering. Replace or sharpen the needle regularly to ensure it pierces cleanly.
Handle Stretchy Fabrics with Care
When working with stretchy fabrics, like knits, use a walking foot or stabilizer to prevent distortion and ensure even stitching.
Apply a Fabric Stabilizer
When you’re working with a fabric prone to puckering, consider using a stabilizer like tear-away or wash-away interfacing. This provides extra support during stitching, reducing the likelihood of distortion.
Control Sewing Speed
Maintain a steady, controlled sewing speed. Avoid sewing too quickly, especially on lightweight fabrics, as this can lead to bunching and puckering.
Adjust Tension for Decorative Stitches
When you’re using decorative zigzag stitches, make sure to adjust both upper and lower tensions appropriately.
Experiment with different tension settings to find the right balance for achieving decorative stitches without causing puckering.
Advantages of Using Zigzag Stitch

Zigzag stitching is a versatile sewing technique that offers several advantages, making it a valuable tool for a wide range of sewing projects.
Here are some of the key advantages of using a zigzag stitch:
Secures Raw Edges
Zigzag stitching is excellent for finishing raw edges, preventing fraying and ensuring a clean, professional-looking seam.
This is particularly important for fabrics that tend to fray easily, like silk or lightweight cotton.
Stretch and Flexibility
Unlike straight stitches, zigzag stitches have some built-in stretch. This makes them ideal for sewing on stretchy fabrics like knits or materials used in activewear, ensuring that the seam can move with the fabric.
Reinforces Seams
Zigzag stitching adds extra strength to seams, making them more durable and less likely to come apart, especially in high-stress areas like waistbands, armholes, or crotches.
Mends Fabric Tears
Zigzag stitches can be used to repair small tears or holes in fabric. By stitching back and forth over the damaged area, you can secure the edges and prevent further tearing.
Allows for Decorative Stitching
Zigzag stitches can be adjusted in terms of width and length, allowing for a wide variety of decorative patterns.
This versatility makes zigzag stitching a popular choice for embellishing garments or creating unique design elements.
Sews Over Thick or Bulky Seams
Zigzag stitches are more adept at handling thicker or layered fabrics, making them a suitable choice for projects that involve quilting, upholstery, or sewing through multiple layers.
Applies Elastic
Zigzag stitching is commonly used to attach elastic to garments, ensuring a secure and flexible fit. The stretch of the zigzag stitch complements the elasticity of the material.
Mends Elastic or Stretchy Fabrics
When elastic or stretchy fabrics have lost their elasticity, a zigzag stitch can be used to mend or reinforce the area. The added stretch of the stitch helps to accommodate movement.
Creates Buttonholes
Many modern sewing machines have a zigzag stitch setting specifically for creating buttonholes. This ensures a clean, secure finish around the buttonhole edges.
Sews Appliqué
Zigzag stitching is often employed in appliqué work. It allows for precision in attaching fabric shapes onto a base fabric, ensuring they’re securely fastened while providing a clean edge finish.
Sews on Trims and Ribbons
Zigzag stitching is an effective way to attach trims, ribbons, and other embellishments to a garment. It securely holds the trim in place while allowing for a decorative edge.
Repairs Elastic Waistbands
When elastic in waistbands loses its stretch, a zigzag stitch can be used to create new casings or repair the existing one, providing renewed elasticity and longevity.
Tips and Tricks for Preventing Fabric Puckering in Zigzag Stitch

Preventing fabric puckering in a zigzag stitch involves a combination of techniques and attention to detail.
Here are some valuable tips and tricks to help you achieve smooth and professional-looking stitches:
Use the Right Needle
The choice of needle is crucial in preventing fabric puckering. For knits, a ballpoint needle is recommended, as it slips between the fibers without causing damage.
On the other hand, woven fabrics benefit from a sharp needle which ensures clean and precise penetration.
Check Tension Settings
Proper tension adjustment is key. Testing on a scrap piece of fabric allows you to find the ideal tension settings for your specific fabric.
This involves adjusting both the upper and lower thread tensions as needed. Balancing these tensions ensures that the thread feeds smoothly, reducing the likelihood of puckering.
Stabilize the Fabric
Especially when working with delicate or lightweight fabrics, using stabilizers can provide much-needed support.
Tear-away or wash-away interfacing can be employed to reinforce the fabric, preventing puckering during stitching.
Clean and Maintain Feed Dogs
Regular maintenance of the feed dogs is essential. Ensuring they are free from lint and debris allows for smooth fabric movement.
Additionally, making certain they are in good condition and properly aligned facilitates even feeding.
Adjust Stitch Length and Width
Experimenting with different stitch lengths and widths can make a significant difference.
Slightly lengthening the stitch and adjusting the width to suit the fabric type often results in smoother stitches with less puckering.
Select Quality Thread
The quality of the thread you use is crucial. High-quality thread appropriate for your fabric type ensures a more even and secure stitch. Older or low-quality threads can have irregularities, leading to tension issues and potential puckering.
Control Sewing Speed
Avoiding excessive speed, particularly on lightweight fabrics, is important. Maintaining a steady, controlled pace allows the feed dogs to move the fabric smoothly, resulting in even stitching without puckering.
Use a Walking Foot
A walking foot is especially useful when working with stretchy fabrics like knits. It aids in evenly feeding both the top and bottom layers of the fabric, reducing the likelihood of puckering.
Employ a Slightly Looser Upper Tension
When puckering is still occurring, consider reducing the upper thread tension slightly. This adjustment can help alleviate any excessive pulling on the fabric.
Experiment with Differential Feed
When you’re using a serger machine, adjusting the differential feed can be particularly effective in preventing puckering on stretchy fabrics. Experiment with different settings to find the most suitable one.
Use Proper Presser Foot Pressure
Ensuring that the presser foot exerts even pressure across the fabric is crucial. Inconsistent pressure can lead to uneven feeding and subsequent puckering.
Test on Scrap Fabric
Before starting your actual project, it’s always advisable to test your settings on a scrap piece of fabric.
This allows you to fine-tune the settings without risking any mistakes on your main project.
FAQs
What causes fabric puckering in zigzag stitching?
Fabric puckering can be caused by factors like incorrect tension settings, improper needle choice, and sewing on delicate fabrics.
How to prevent fabric puckering in zigzag stitching?
Proper tension settings, selecting the right needle, using stabilizers, and adjusting stitch length and width can help prevent puckering.
Does fabric type affect puckering?
Yes, delicate or lightweight fabrics are more prone to puckering due to their fragility.
Can adjusting stitch settings help?
Yes, slightly lengthening the stitch and adjusting the width can reduce puckering.
Is puckering common for beginners?
Yes, it’s a common challenge, but with practice and understanding, beginners can overcome it.
Wrap Up
Fabric puckering in a zigzag stitch is a common challenge in sewing, but it’s not insurmountable. By addressing the root causes and implementing the right techniques, you can achieve clean and professional results in your projects.
Understanding the significance of factors like tension settings, needle choice, and fabric type is key to preventing puckering. It’s also essential to remember that practice and patience play crucial roles in improving your sewing skills.
With diligence and the knowledge gained from this guide, you can confidently tackle fabric puckering issues, ensuring your sewing creations are smooth, polished, and free from unwanted wrinkles or gathers.
Leave a Reply