Steaming a seam in sewing is a fundamental technique that adds finesse to the craft. Beyond the simple act of joining fabric, sewing is an art that demands attention to detail and a commitment to achieving a polished finish.
Steaming a seam serves as an essential tool in this pursuit, offering numerous benefits. It smooths out wrinkles, sets stitches, and enhances the drape of the fabric, creating a more professional and refined look.
Whether working with delicate silk or robust denim, steaming ensures that the final result is not just functional but also aesthetically pleasing.
In this article, we explore the reasons behind why you would steam a seam in sewing and its impact on the quality and appearance of your creations.
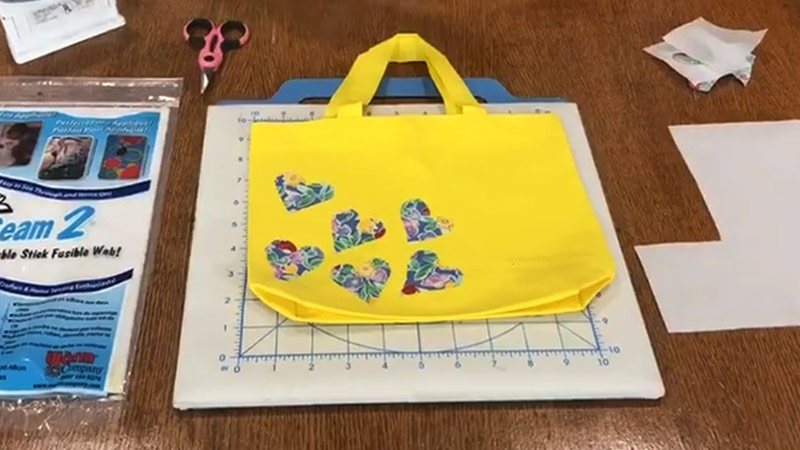
Why Would You Steam a Seam in Sewing?
Steaming a seam in sewing is a common technique used to achieve a polished and professional finish for your garments.
While it may seem like a small step in the sewing process, steaming a seam can make a significant difference in the final look and feel of your project.
Here are several reasons why you might want to steam a seam in sewing:
Flattening and Setting the Seam
When you sew two pieces of fabric together, a seam is created. This seam often has bulk due to the layers of fabric and stitching.
By steaming the seam, you can flatten it, making it look neater and more streamlined. The heat and moisture from the steam can help the fibers relax and settle into place, setting the seam in its desired position.
Removing Wrinkles and Creases
Fabric often comes with wrinkles and creases, especially if it has been stored for some time. These wrinkles can make sewing more challenging and can affect the final appearance of your project.
Steaming the fabric before you sew can help remove these wrinkles, making it easier to work with and ensuring a smoother finish.
Enhancing the Drape of the Fabric
Different fabrics have various levels of stiffness and can behave differently when sewn. Steaming can soften the fabric and improve its drape, making it flow more gracefully and look more elegant.
This is particularly important for projects that involve lightweight and flowy fabrics like chiffon, silk, or satin.
Setting the Stitches
When you’ve sewn a seam, the heat from the steam can also help set the stitches. This means that the stitches will better hold their place and be less likely to come undone with wear and washing. It’s an extra layer of security to ensure your seams are durable.
Pressing Open Seams
For certain sewing techniques, like making a flat-fell seam or French seam, steaming can be crucial.
It helps press open and flatten the seam allowances neatly, creating a clean and professional finish on both sides of the fabric.
Improving the Appearance of Details
In sewing, it’s often the little details that make a big difference in the final appearance of a garment. Steaming can help shape details like pleats, darts, and tucks to make them stand out and look sharp.
It can also help mold fabric around curves and contours, enhancing the fit and appearance of your project.
Preventing Shrinkage
Some fabrics may shrink when exposed to heat and moisture. By steaming your fabric before sewing, you can pre-shrink it, reducing the risk of the garment shrinking after it’s completed and washed.
Can You Use a Steamer for Hemming Tape?
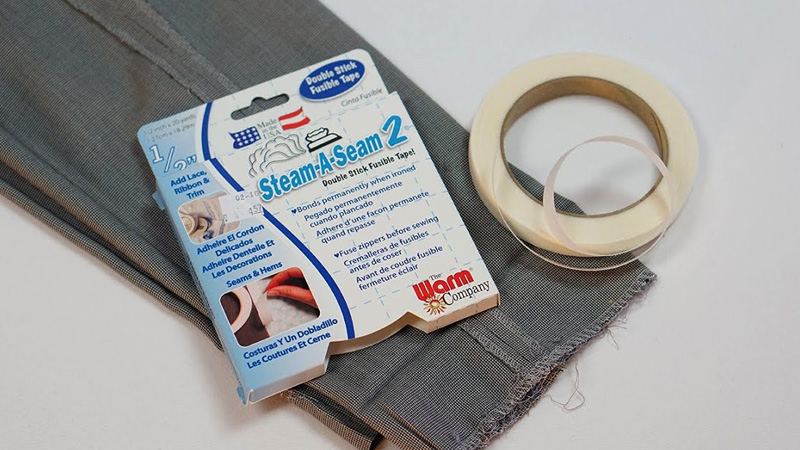
A steamer can be used in conjunction with hemming tape, but it serves a different purpose in the hemming process.
Hemming tape is typically used to create a secure and neat hem without sewing, while a steamer is primarily used for removing wrinkles and setting seams.
Here’s how you can use a steamer with hemming tape:
Prepare the Fabric
Begin by ensuring that your fabric is clean and wrinkle-free. Washing and ironing the fabric beforehand is essential.
Properly pressed fabric provides a smooth surface for the hemming tape to adhere to, resulting in a neater finish.
Apply the Hemming Tape
Hemming tape, often known as fusible web or double-sided tape, is designed to create a secure hem without sewing.
To use it, fold the fabric to the desired hem length and insert the hemming tape between the two layers of fabric within the hem allowance.
Be sure to follow the manufacturer’s instructions for the specific hemming tape you’re using. Generally, this involves positioning the tape with the adhesive side against the wrong side of the fabric.
Heat to Activate the Tape
Hemming tape typically relies on heat to activate the adhesive and bond the fabric layers together. Set your iron to the recommended temperature indicated on the hemming tape’s packaging.
Gently press the iron over the hemmed area for the specified duration. This step essentially “seals” the hem without the need for sewing. Be careful not to use too much heat, as it can damage delicate fabrics.
Use a Steamer
Once you’ve applied the hemming tape and allowed the fabric to cool slightly, you can utilize a steamer. The steamer can serve two purposes at this stage.
First, it can help remove any remaining wrinkles or creases in the fabric, especially those caused during the application of the hemming tape.
Second, it aids in setting the seam created by the tape. Pass the steamer over the hemmed area, holding it a short distance from the fabric, to release steam.
This steam can relax the fabric fibers and make the hem appear neat and professional.
Cool and Set the Hem
After steaming, let the fabric cool and set for a few moments. This step is crucial to ensure the bond created by the hemming tape is strong and durable.
Avoid disturbing the hem until it has completely cooled and set. Once set, the hem should stay securely in place, creating a tidy, no-sew finish for your project.
How to Make a Seam Pressing Stick?
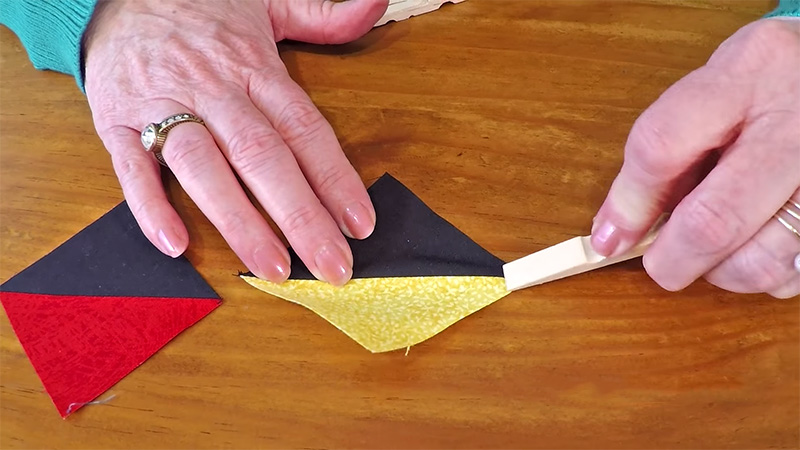
A seam pressing stick, also known as a clapper or point presser, is a handy tool for achieving crisp and professional-looking seams in sewing.
It’s typically made from hardwood, such as oak or pine, and has a flat surface for pressing seams and a pointed end for pressing tight corners.
Here’s how to make a seam-pressing stick:
Materials and Tools:
- Hardwood Board
- Saw
- Sandpaper
- Ruler or measuring tape
- Pencil
- Clamps
- Wood Finish
Steps:
Select and Cut the Wood
Start by selecting a suitable hardwood board. You can often find such boards at a local hardware store or a woodworking supply shop.
Measure and mark the dimensions outlined above on the wood using a ruler and pencil. Then, carefully cut the wood using a saw to create the flat and pointed sections of the seam-pressing stick.
Shape the Pointed End
The pointed end should gradually taper to a fine point. You can achieve this by making angled cuts or by using sandpaper. Carefully shape and smooth the pointed end until it forms a fine, flat point.
Sand and Smooth
Use coarse sandpaper to remove any rough edges, and then switch to fine-grit sandpaper to make the surface of the stick smooth. Pay special attention to the edges and corners to prevent snagging fabric.
Finish
If you wish to protect the wood and give it a more polished appearance, you can apply a wood finish, such as varnish or polyurethane. Follow the manufacturer’s instructions for the finish you choose and allow it to dry completely.
Use and Enjoy
Your seam pressing stick is now ready for use. When pressing seams, place the flat surface over the seam, and use the pointed end to press open seams, corners, and tight areas. The flat surface helps to set the seam, while the pointed end allows for precision pressing.
How to Use Steam a Seam
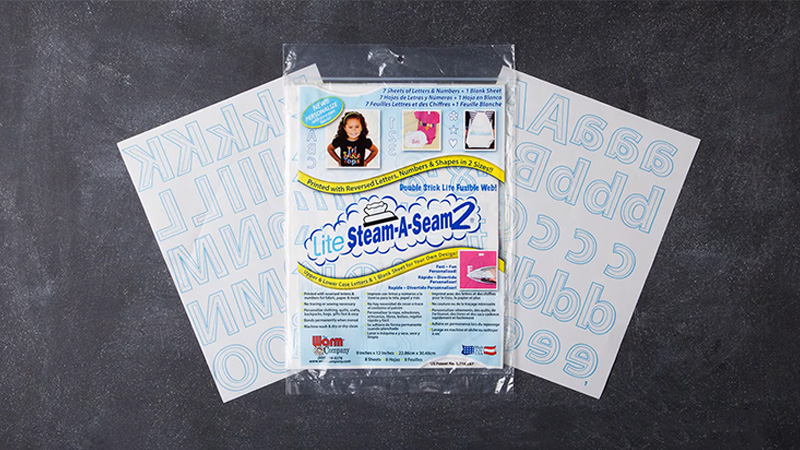
Steam-A-Seam is a popular fusible web product used in sewing and crafting to bond fabrics together without stitching.
It’s often used for appliqué work, bonding fabrics temporarily before sewing, or securing hems.
Here’s how to use Steam-A-Seam:
Materials You’ll Need:
- Steam-A-Seam
- Fabric
- Iron and Ironing Board
Steps:
Prepare Your Work Area
Start by setting up your iron and ironing board in a well-ventilated and spacious area. Make sure the iron is at the appropriate temperature setting for the fabric you’re working with, and ensure the ironing board cover is clean.
Cut the Steam-A-Seam
Measure and cut the Steam-A-Seam to the desired size and shape for your project. It’s best to use a pair of sharp scissors to ensure clean edges.
Peel Off the Backing Paper
Steam-A-Seam typically comes with a backing paper on one side to protect the adhesive. Carefully peel off this paper to reveal the adhesive side of the product.
Position the Steam-A-Seam
Place the adhesive side of the Steam-A-Seam onto the wrong side of the fabric in the desired location. Make sure to align it properly to achieve the desired outcome. The adhesive side should be in contact with the fabric.
Press with an Iron
With the adhesive side of the Steam-A-Seam in contact with the fabric, cover it with a press cloth or parchment paper to protect your iron from any adhesive residue.
Then, press down with a hot iron for the recommended time specified on the Steam-A-Seam’s packaging.
This time can vary depending on the type of Steam-A-Seam you are using, so be sure to follow the instructions.
Allow it to Cool
After pressing, allow the fabric and Steam-A-Seam to cool and set for a moment. This cooling period helps to ensure a strong bond.
Trim Excess and Finalize Your Project
Once the Steam-A-Seam has cooled, trim any excess fabric around the bonded area if necessary. Then, you can proceed with the rest of your project, whether it’s appliqué work, securing hems, or any other sewing or crafting application.
What Is Steam a Seam Used For?
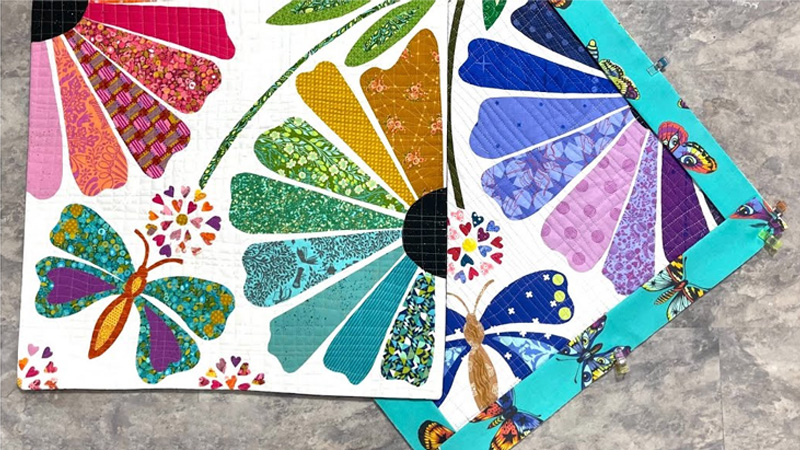
Steam-A-Seam is a versatile product used in sewing, quilting, and various crafting applications.
It serves as a double-sided, heat-activated adhesive that provides a wide range of uses and benefits:
Appliqué
One of the most common uses of Steam-A-Seam is in appliqué work. It allows you to bond fabric shapes or motifs onto a base fabric without sewing, resulting in neat and secure attachments. This is particularly useful for intricate or small appliqué pieces.
Hemming
Steam-A-Seam is a handy tool for creating quick and easy hems. It’s especially useful for temporary or no-sew hems, allowing you to adjust the length of a garment or curtain without stitching.
Quilting
Quilters use Steam-A-Seam for appliquéing fabric shapes onto their quilt tops. It simplifies the process by eliminating the need for pinning and sewing down each piece.
Crafting
Beyond sewing, Steam-A-Seam is valuable in a wide array of crafts. It adheres fabric to paper, cardboard, and other surfaces, making it suitable for projects like scrapbooking, card making, and fabric-based crafts.
Securing Fabrics Temporarily
It’s an excellent choice for temporarily securing fabric layers together, making it easier to work with and sew. The temporary bond can be released with heat when the final placement is confirmed.
Setting Seams
Steam-A-Seam is ideal for setting seams in sewing. When you press it over a seam, it helps flatten and stabilize the seam allowance, creating a crisp and polished look.
Fabric Layering
It’s useful for layering fabric pieces in sewing or crafting projects. It holds layers together without pins or adhesive spray until you’re ready to permanently set them.
Embellishing Clothing and Accessories
Steam-A-Seam allows you to add fabric embellishments or patches to clothing or accessories. It provides a secure bond without the need for sewing.
Pattern Layout
In pattern-making and fabric layout, Steam-A-Seam can help secure pattern pieces to fabric, making it easier to cut out your project.
Temporary Bonding for Testing
It’s often used for testing fabric placement and design elements. If you’re uncertain about the final arrangement, Steam-A-Seam provides a temporary bond that can be adjusted before permanent bonding.
Problems With Steam a Seam 2 And Solutions
While Steam-A-Seam 2 is a popular and widely used fusible web product in sewing and crafting, like any product, it can have its share of problems or issues.
Here are some common problems you might encounter when using Steam-A-Seam 2:
Difficulty Peeling the Backing Paper
Some users find it challenging to peel off the backing paper from Steam-A-Seam 2. This can be frustrating and time-consuming, as the adhesive may stick to the paper.
Solution: Use a sharp pin or the edge of scissors to gently lift a corner of the backing paper. Take care not to damage the adhesive. Alternatively, you can try storing the Steam-A-Seam in the refrigerator for a short time before using it. The cold can make the adhesive less sticky and easier to work with.
Adhesive Residue on the Iron
If the adhesive side of the Steam-A-Seam comes into contact with the iron, it can leave a sticky residue on the iron’s soleplate.
Solution: Always use a protective barrier like a press cloth or parchment paper between the Steam-A-Seam and the iron. If any residue does accumulate on the iron, clean it off promptly with a cloth or sponge while the iron is still warm.
Adhesive Seeping Through Fabric
Sometimes, the adhesive in Steam-A-Seam 2 can seep through lightweight or porous fabrics, leaving visible marks on the fabric’s right side.
Solution: Use a press cloth or parchment paper to prevent direct contact between the adhesive and the iron. Additionally, be cautious with the amount of heat and pressure you apply during the bonding process.
Difficulty in Repositioning
Steam-A-Seam 2 is designed to be repositionable until permanently pressed. However, some users may find it difficult to reposition their fabric as desired.
Solution: Work with a light touch when initially pressing the fabric with the Steam-A-Seam, so you can adjust the positioning if needed. You can also gently lift and reposition the fabric while it’s still warm but not completely set.
Loss of Stickiness Over Time
Over time, fusible adhesives, including Steam-A-Seam 2, can lose their stickiness if not stored properly or if they become contaminated.
Solution: Store your Steam-A-Seam in a cool, dry place away from direct sunlight. Keep it in its original packaging or in an airtight container to prevent contamination. If the adhesive has lost its effectiveness, you may need to replace it with a fresh product.
Limited Use on Heat-Sensitive Fabrics
Steam-A-Seam 2 requires heat to activate and bond, so it may not be suitable for fabrics that are heat-sensitive or prone to melting.
Solution: Be cautious when using Steam-A-Seam 2 with delicate or heat-sensitive fabrics. Always test a small, inconspicuous area before applying it to the entire project.
FAQS
Can steaming a seam help with pattern matching?
Yes, steaming a seam can be beneficial for pattern matching in sewing.
How does steaming affect fabrics with a nap, like velvet or corduroy?
Steaming can significantly impact fabrics with a nap, such as velvet or corduroy. It can help lift and restore the nap, making it appear more uniform and plush after sewing.
Is steaming recommended before or after sewing a zipper?
It’s generally advisable to steam before sewing a zipper. This can help flatten the fabric and create a smoother surface for attaching the zipper, making it easier to sew in place.
Can steaming be used to correct fabric distortion caused by pinning or basting?
Yes, steaming can be used to correct fabric distortion caused by pinning or basting. The steam can help fabrics return to their original shape and drape, minimizing the impact of pin marks or temporary stitches.
Does steaming help prevent seam puckering when working with lightweight or slippery fabrics?
Yes, steaming can be a helpful preventive measure to reduce seam puckering, especially when sewing lightweight or slippery fabrics.
Wrap Up
Steaming a seam in sewing is a transformative step that transcends the boundaries of mere practicality.
It’s an artful process that takes an ordinary fabric seam and elevates it to a level of sophistication and finesse.
The reasons for steaming a seam are multifaceted, ranging from flattening and setting the seam to enhancing the drape and the fabric’s overall appearance.
This technique ensures that delicate details and complex contours are accentuated and the fabric’s best qualities shine through.
Moreover, it offers a preventive measure against puckering and distortion, especially in the case of lightweight or slippery fabrics.
In essence, steaming is the key to achieving professional, polished, and visually appealing results in the world of sewing.
Leave a Reply